Chats
Chats Calendar
 Meetings
 Contacts
 Mail
Mail Docs
Docs Drive
Drive AI Table
 AI Minutes
 Attendance
 Approval
 YiDA
YiDA Admin Console
Result
Creating a group chat produces the following result: Updating a group chat produces the following result:Step 1: Build and Configure the “Create Group Chat” Form
Create a form to capture the group name, group owner, and group members needed to create a group chat. Procedure:- Create a regular form and name it “Create group chat”.
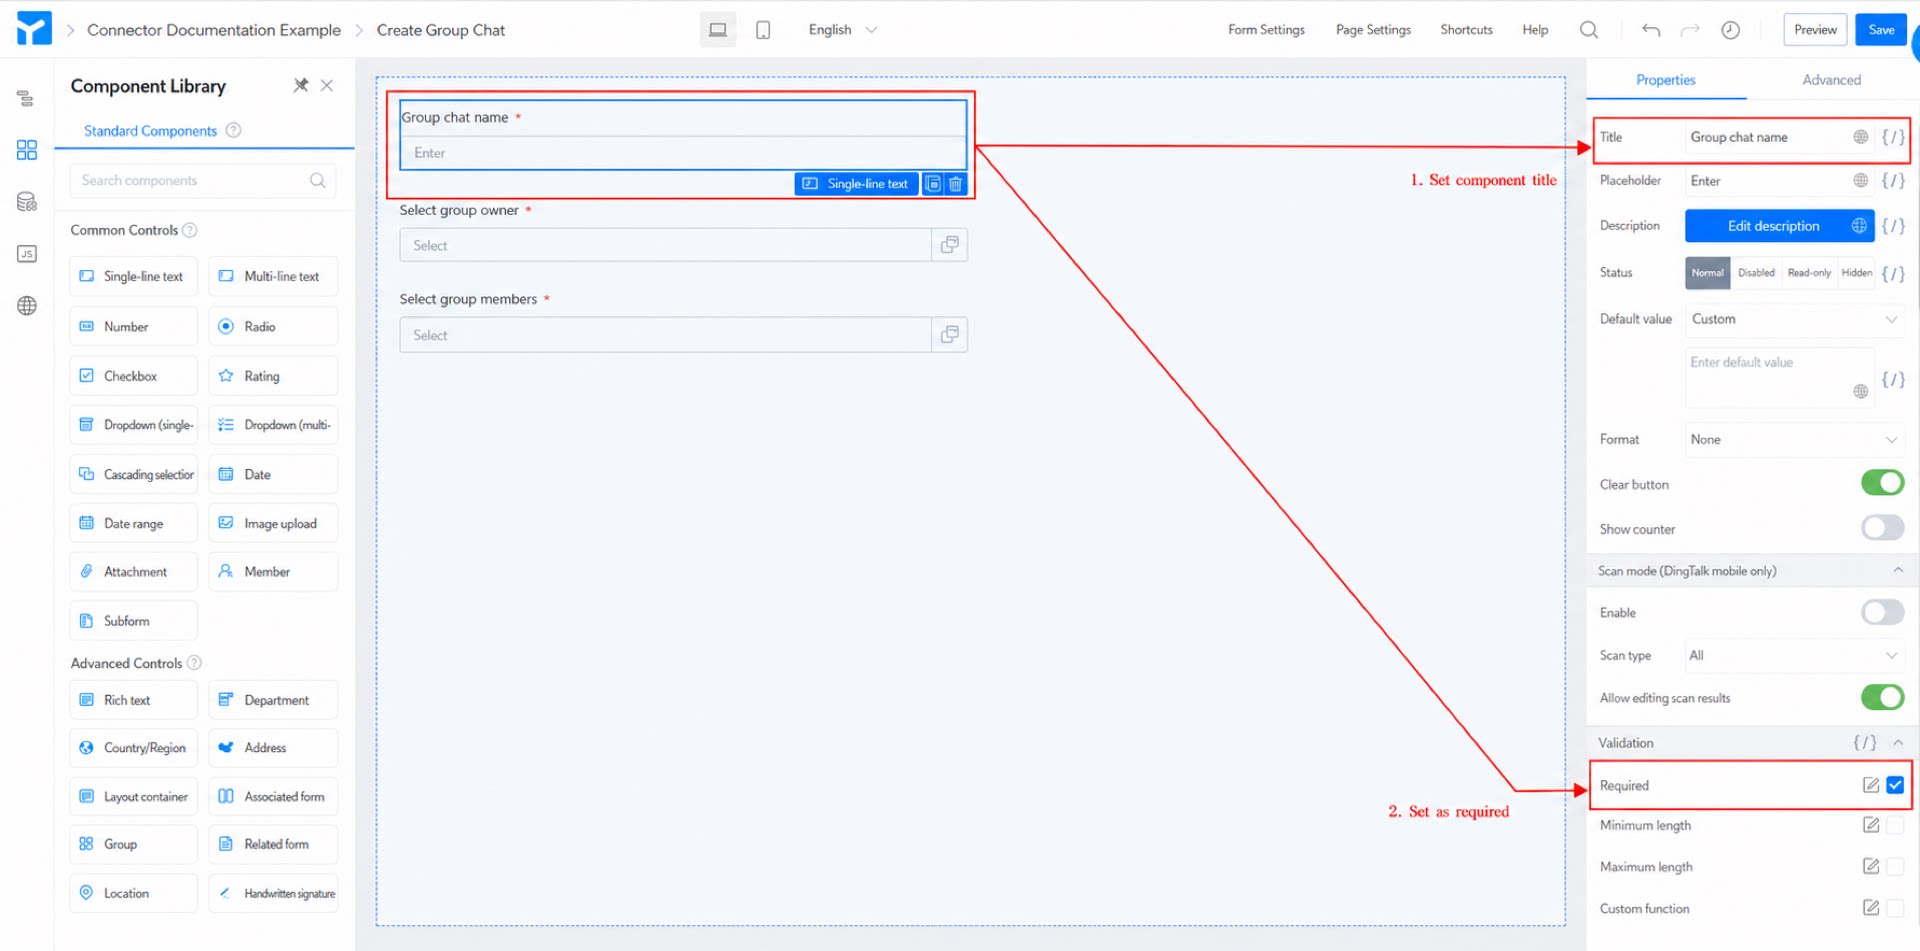
- Add a Single-line text component, name it “Group chat name”, and mark it as required. (See Figure 2.1-1.)
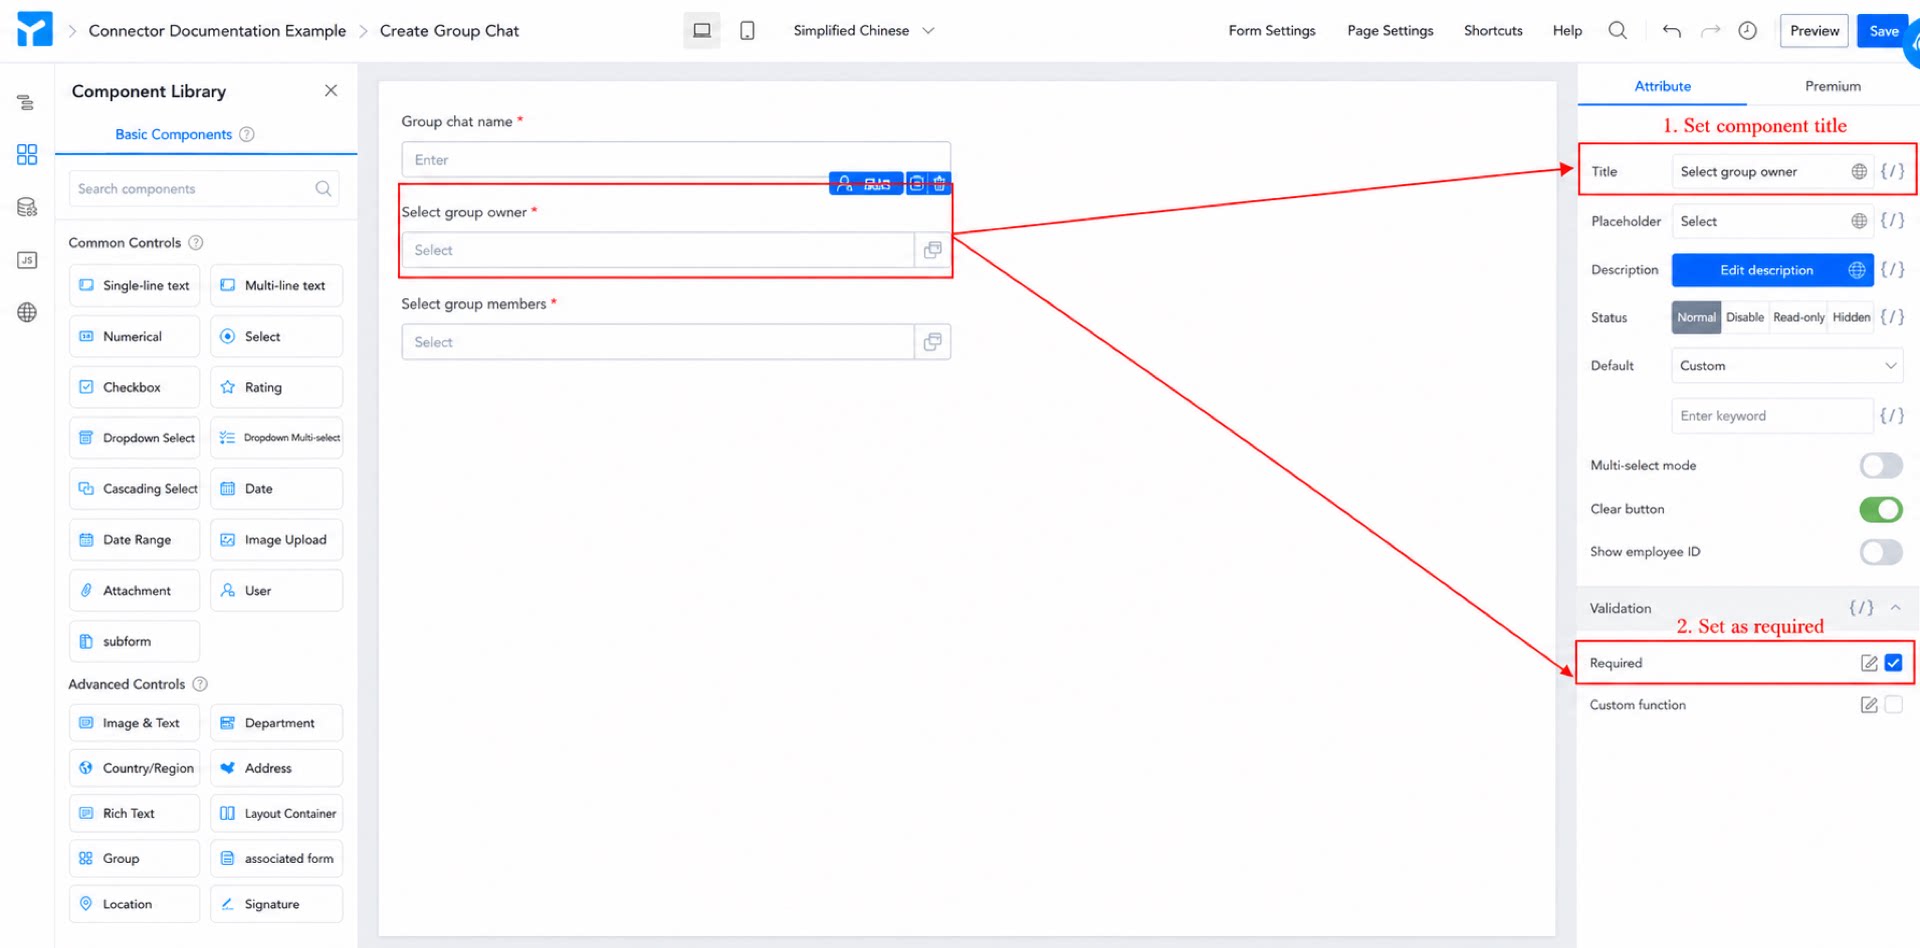
- Add a member component, name it “Select group owner”, and mark it as required. (See Figure 2.1-2.)
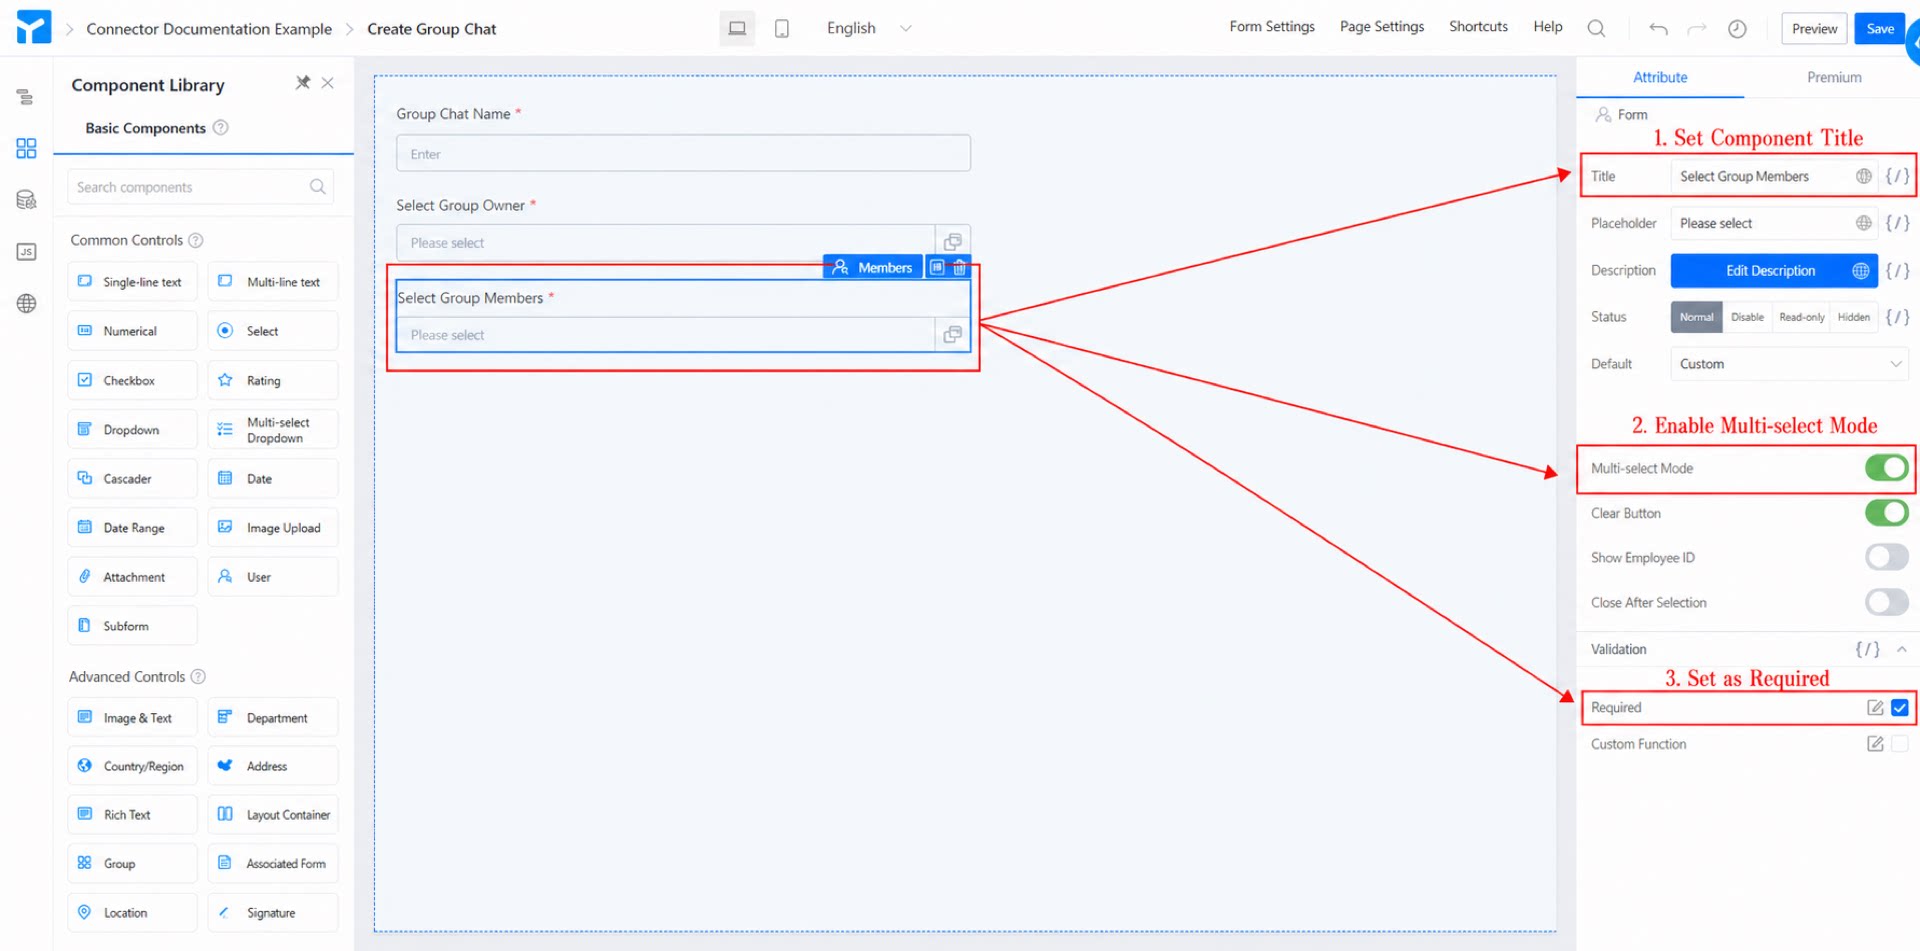
- Add another member component, name it “Select group members”, mark it as required, and enable Multiselect mode. (See Figure 2.1-3.)
- Click Save in the top right corner of the page.
Step 2: Build and Configure the “Group Chat Data Summary” Form
Create a form to record information about the group chats created through the “Create group chat” form, including the group name and group chat ID. The group chat ID comes from the data returned by the create-group-chat connector. Procedure:- Create a regular form and name it “Group chat data summary”.
- Add two Single-line text components, and name them “Group chat name” and “Group chat ID”. (See Figure 2.1-4.)
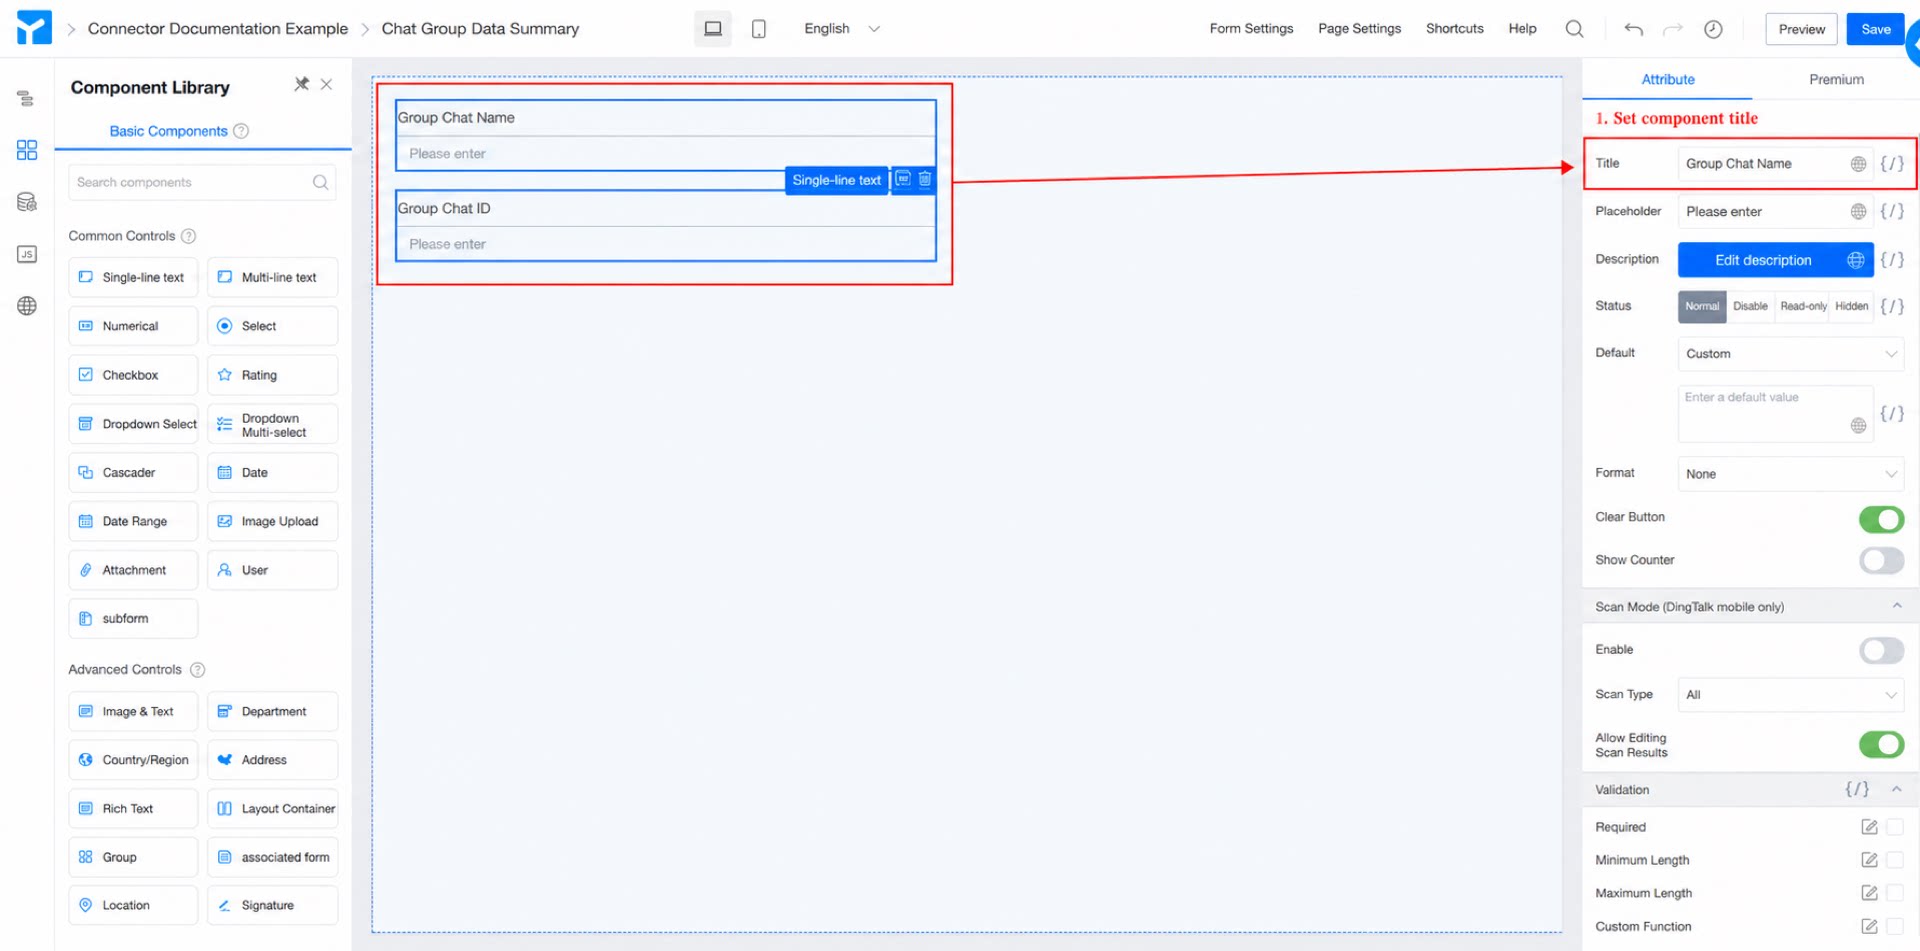
- Click Save in the top right corner.
Step 3: Build and Configure the “Update Group Chat” Form
Create a form to capture the data needed to update a group chat that was created through the connector. Procedure:- Create a regular form and name it “Update group chat”.
- Add a Select dropdown component, name it “Select group chat”, mark it as required, and link its options to the “Group chat name” component in the “Group chat data summary” form. (See Figure 2.1-5.)
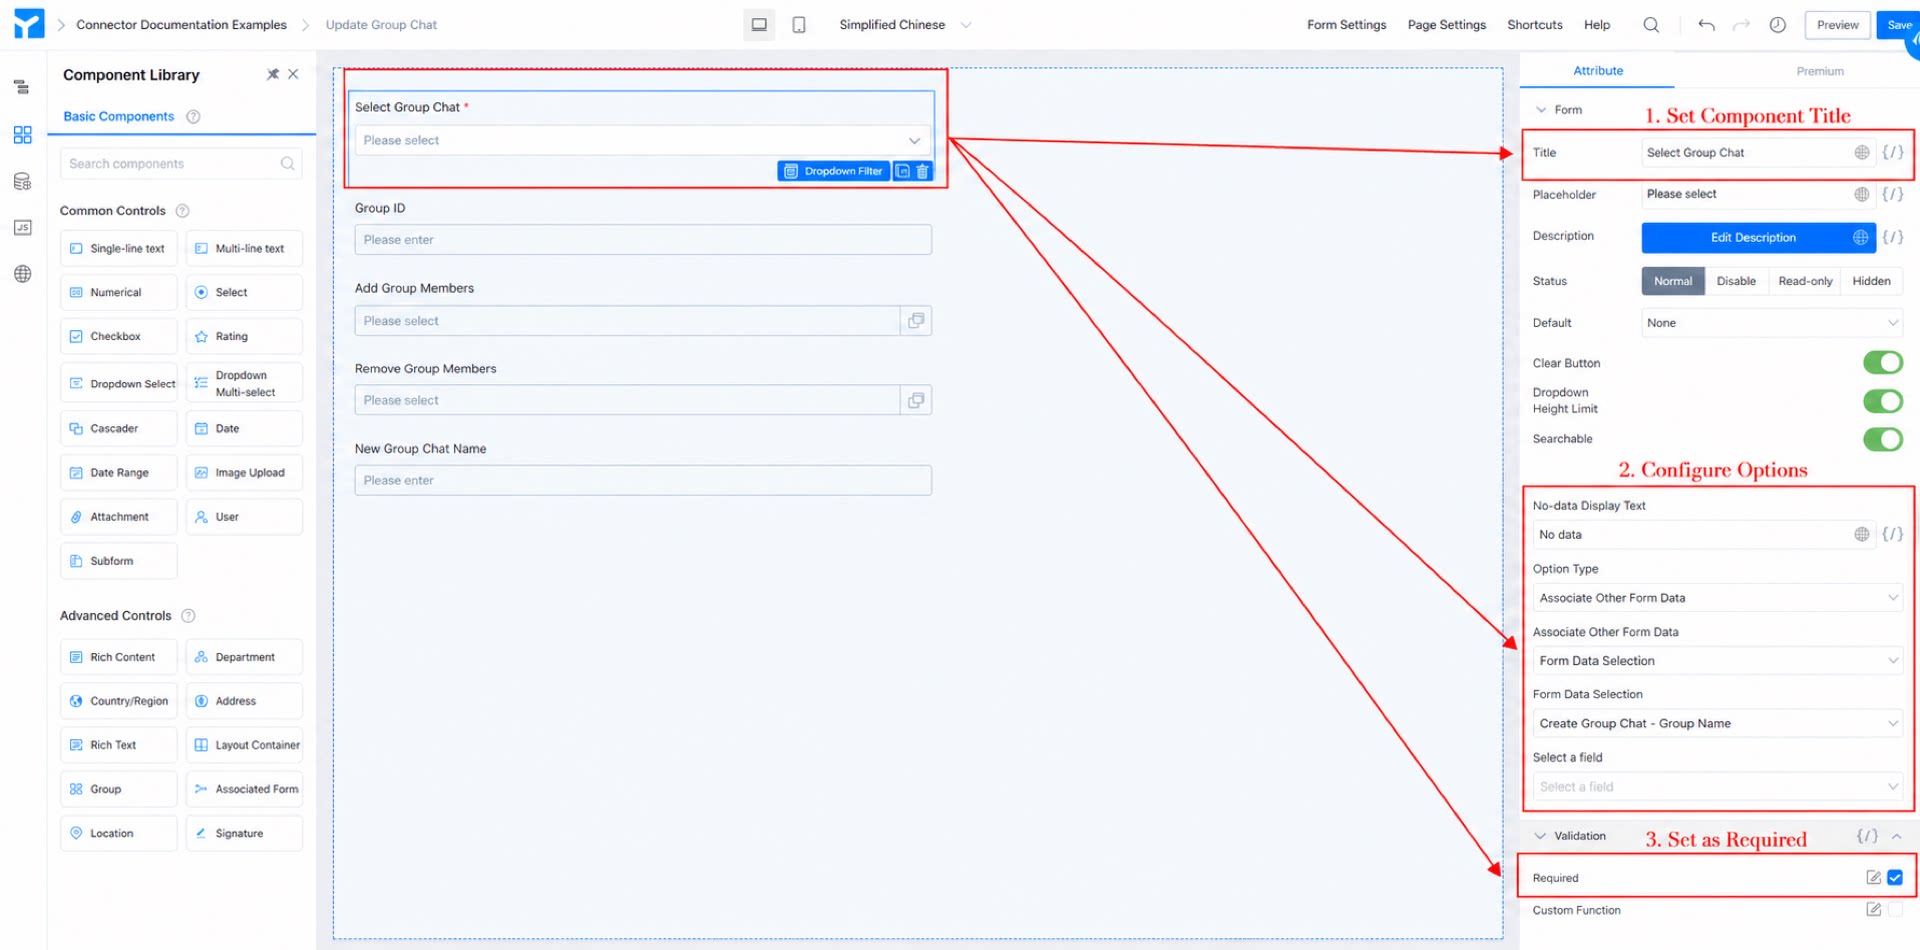
- Add a Single-line text component and name it “Group chat ID”. Configure data linkage with the “Group chat data summary” form so that when the value of “Select group chat” matches the value of “Group chat name”, the value of “Group chat ID” equals the value of the “Group chat ID” component. (See Figure 2.1-6.)
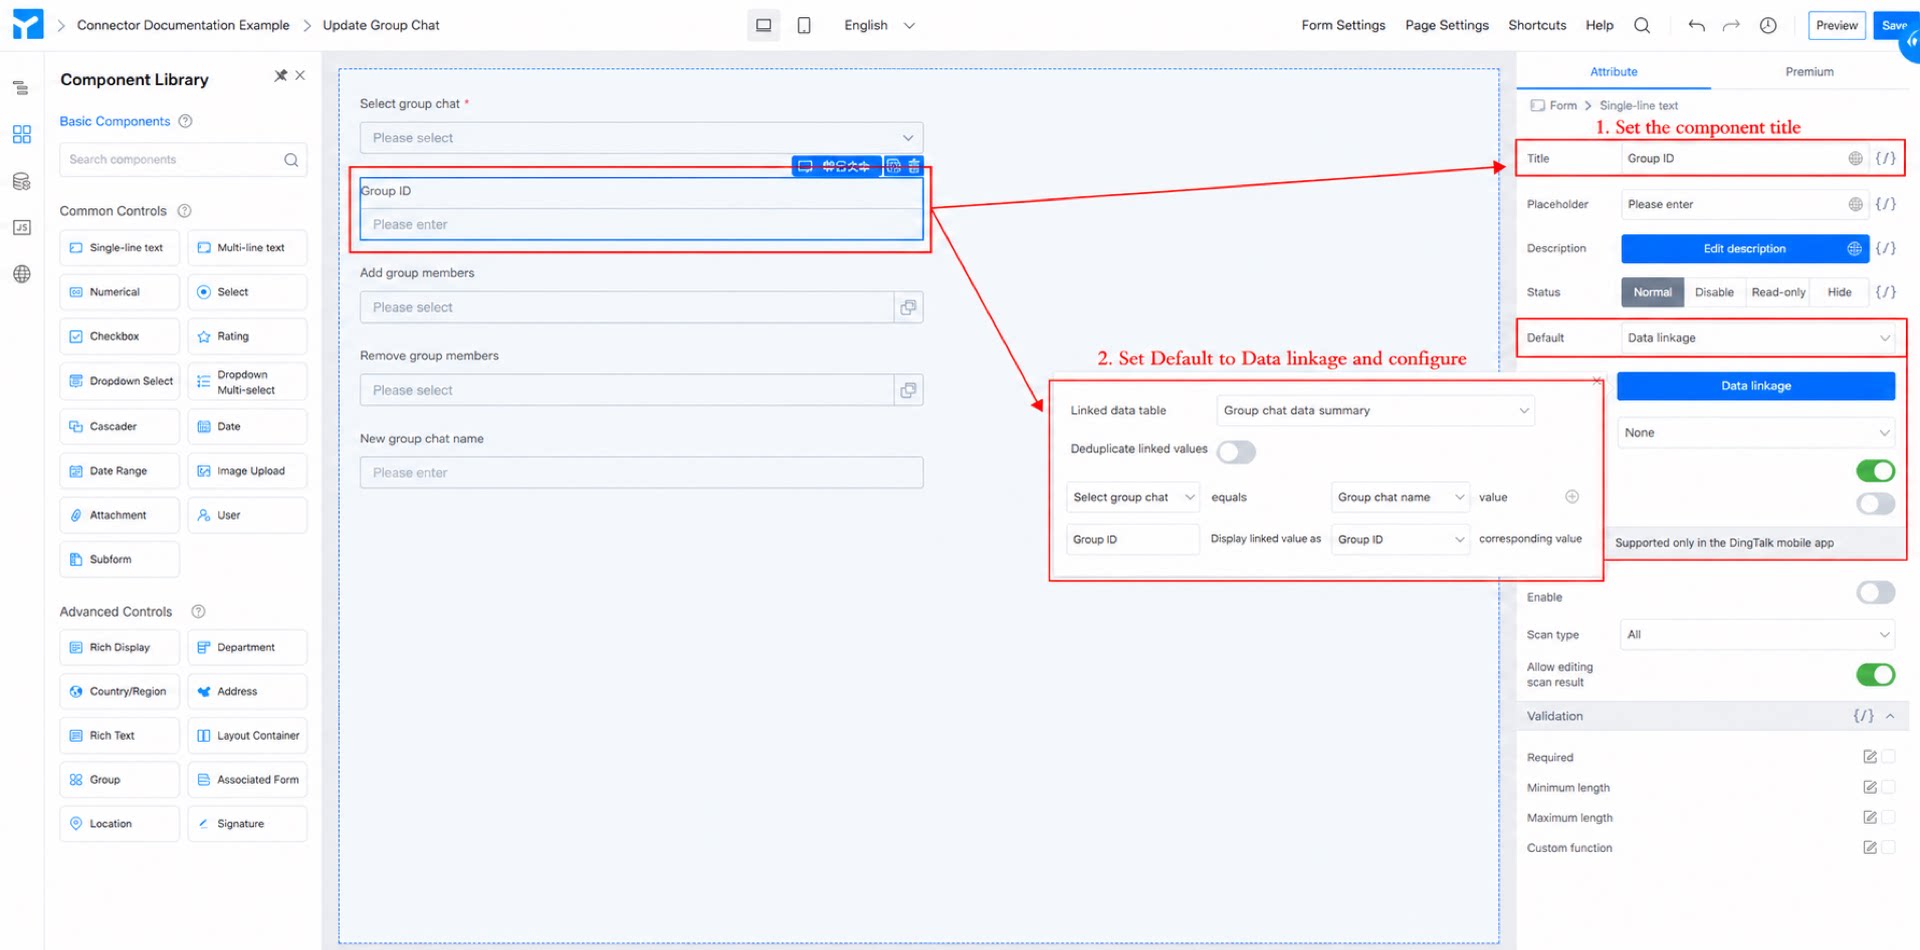
- Add two member components, name them “Add group members” and “Remove group members”, and enable Multiselect mode. (See Figure 2.1-7.)
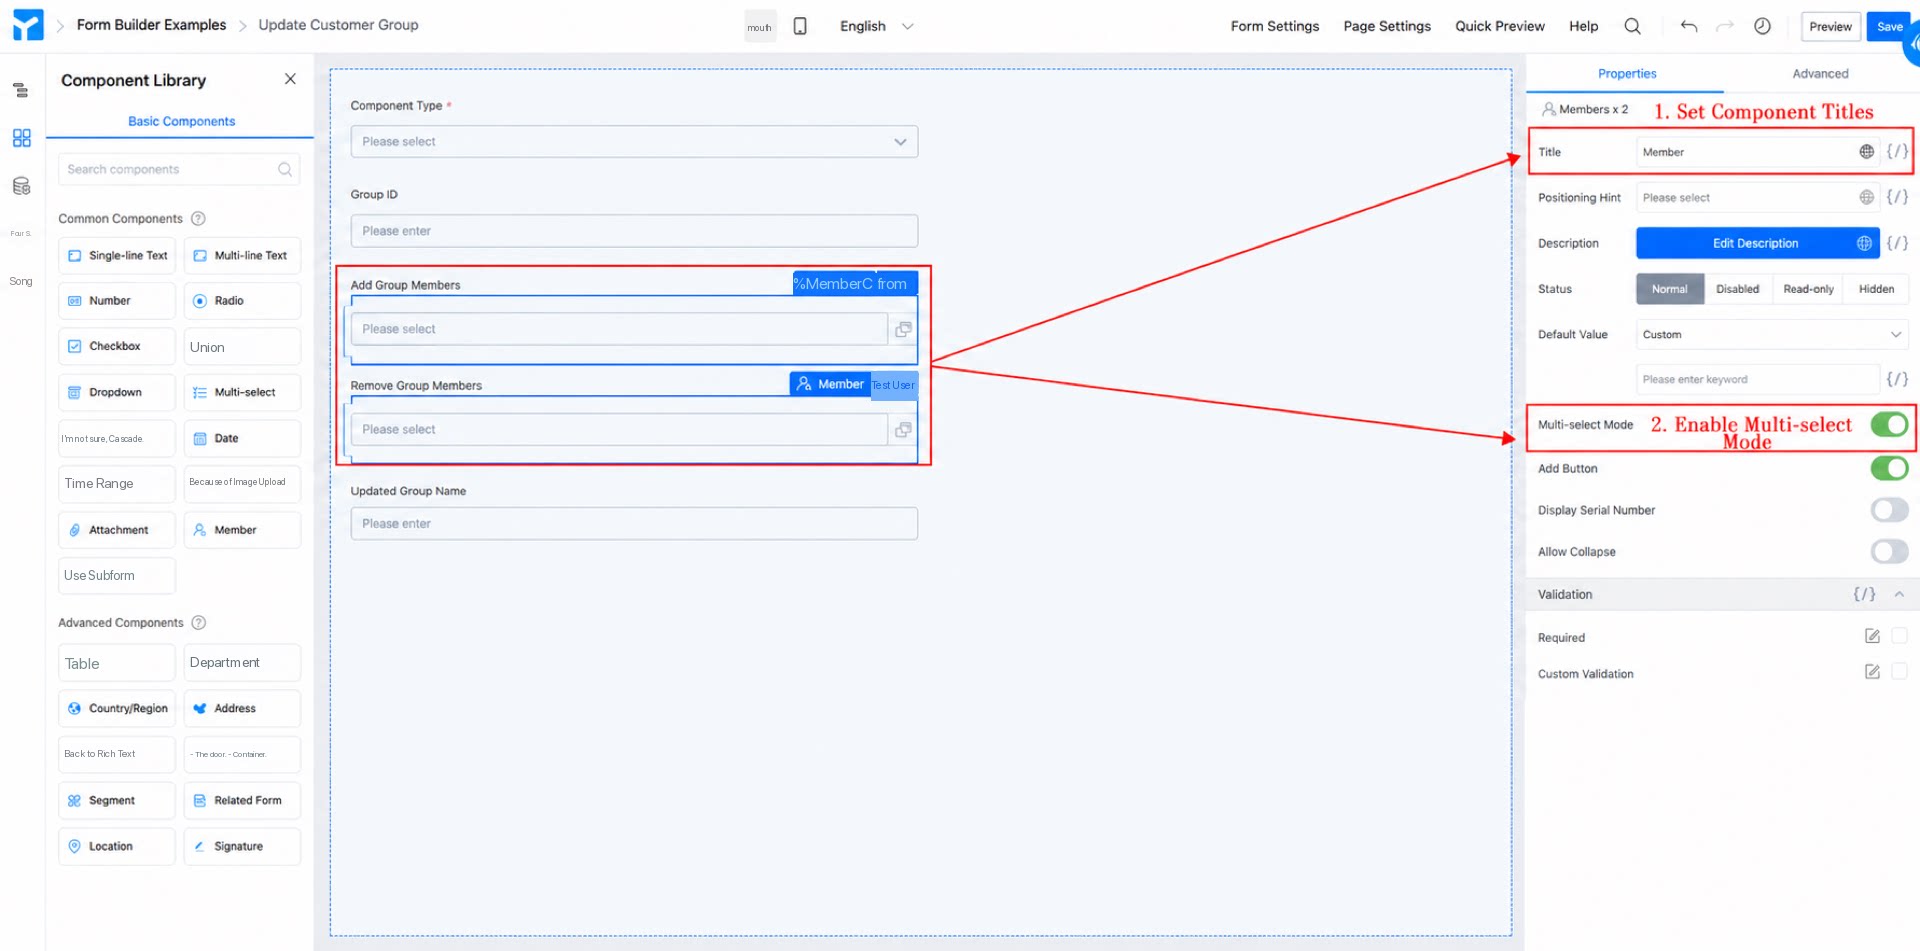
- Add a Single-line text component and name it “Updated group chat name”. (See Figure 2.1-8.)
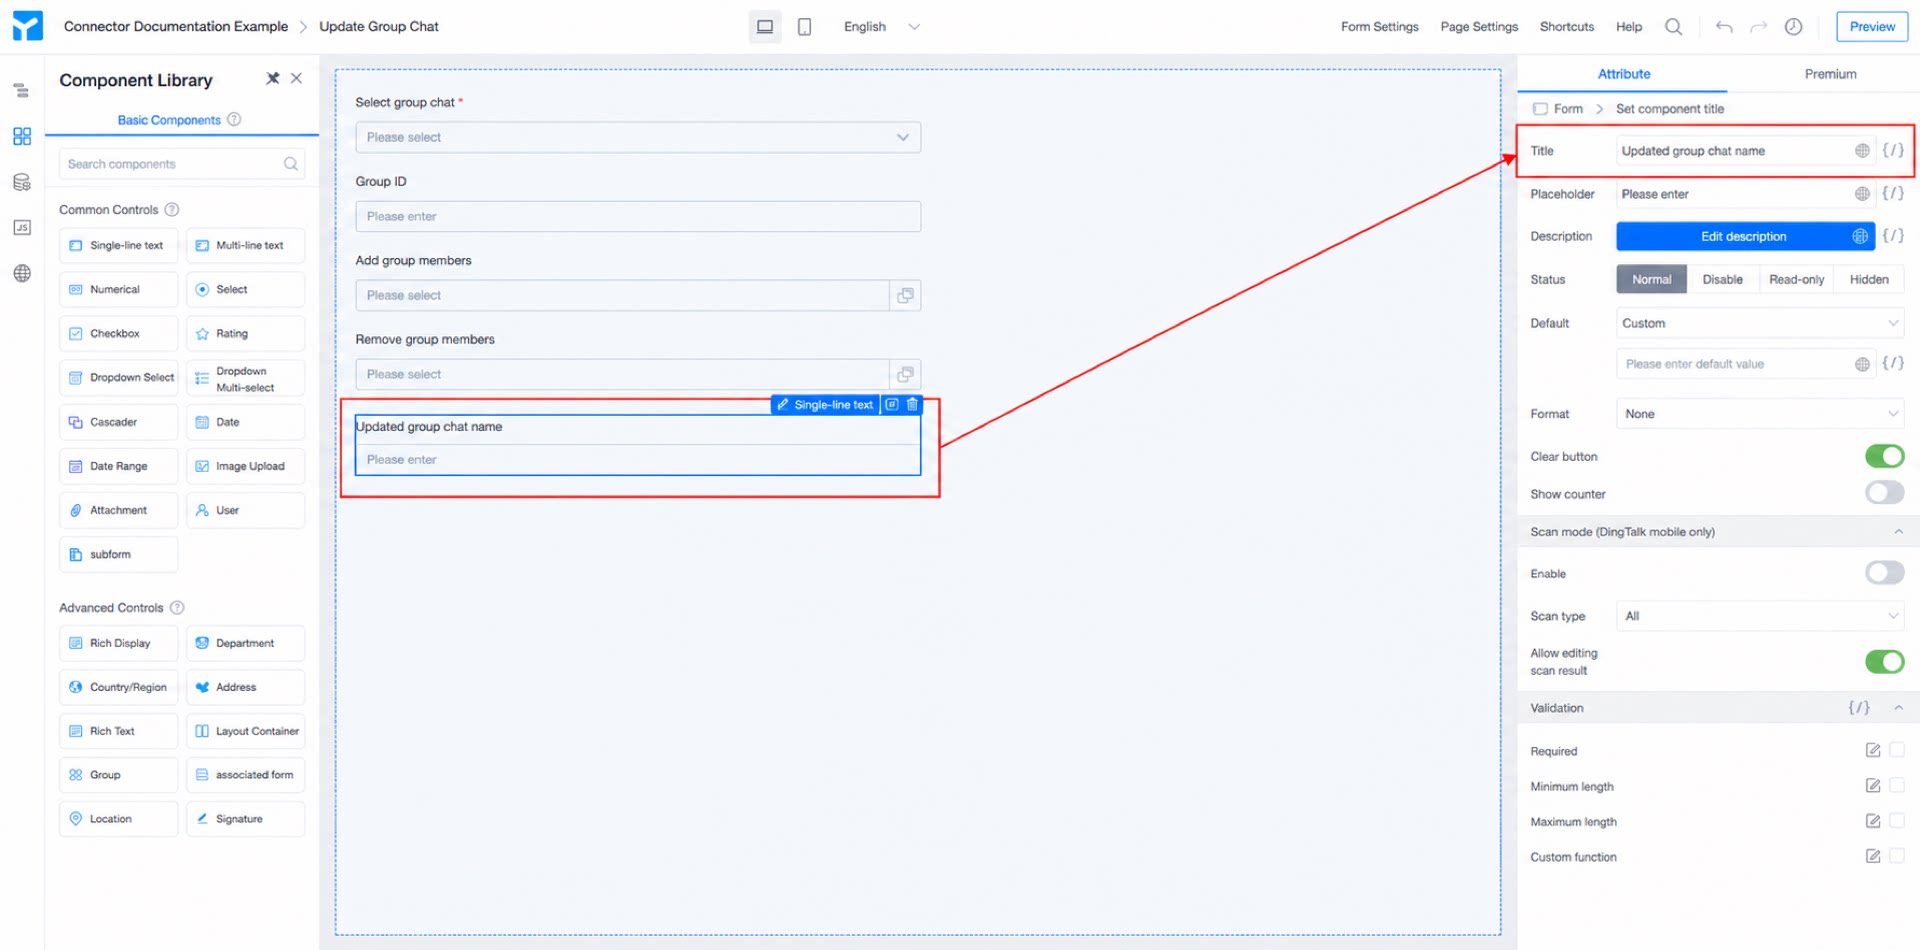
- Click Save in the top right corner of the page.
Step 4: Add and Configure a Connector for the “Create Group Chat” Form
For an introduction to YiDA connectors, see Integration & Automation - Connector.
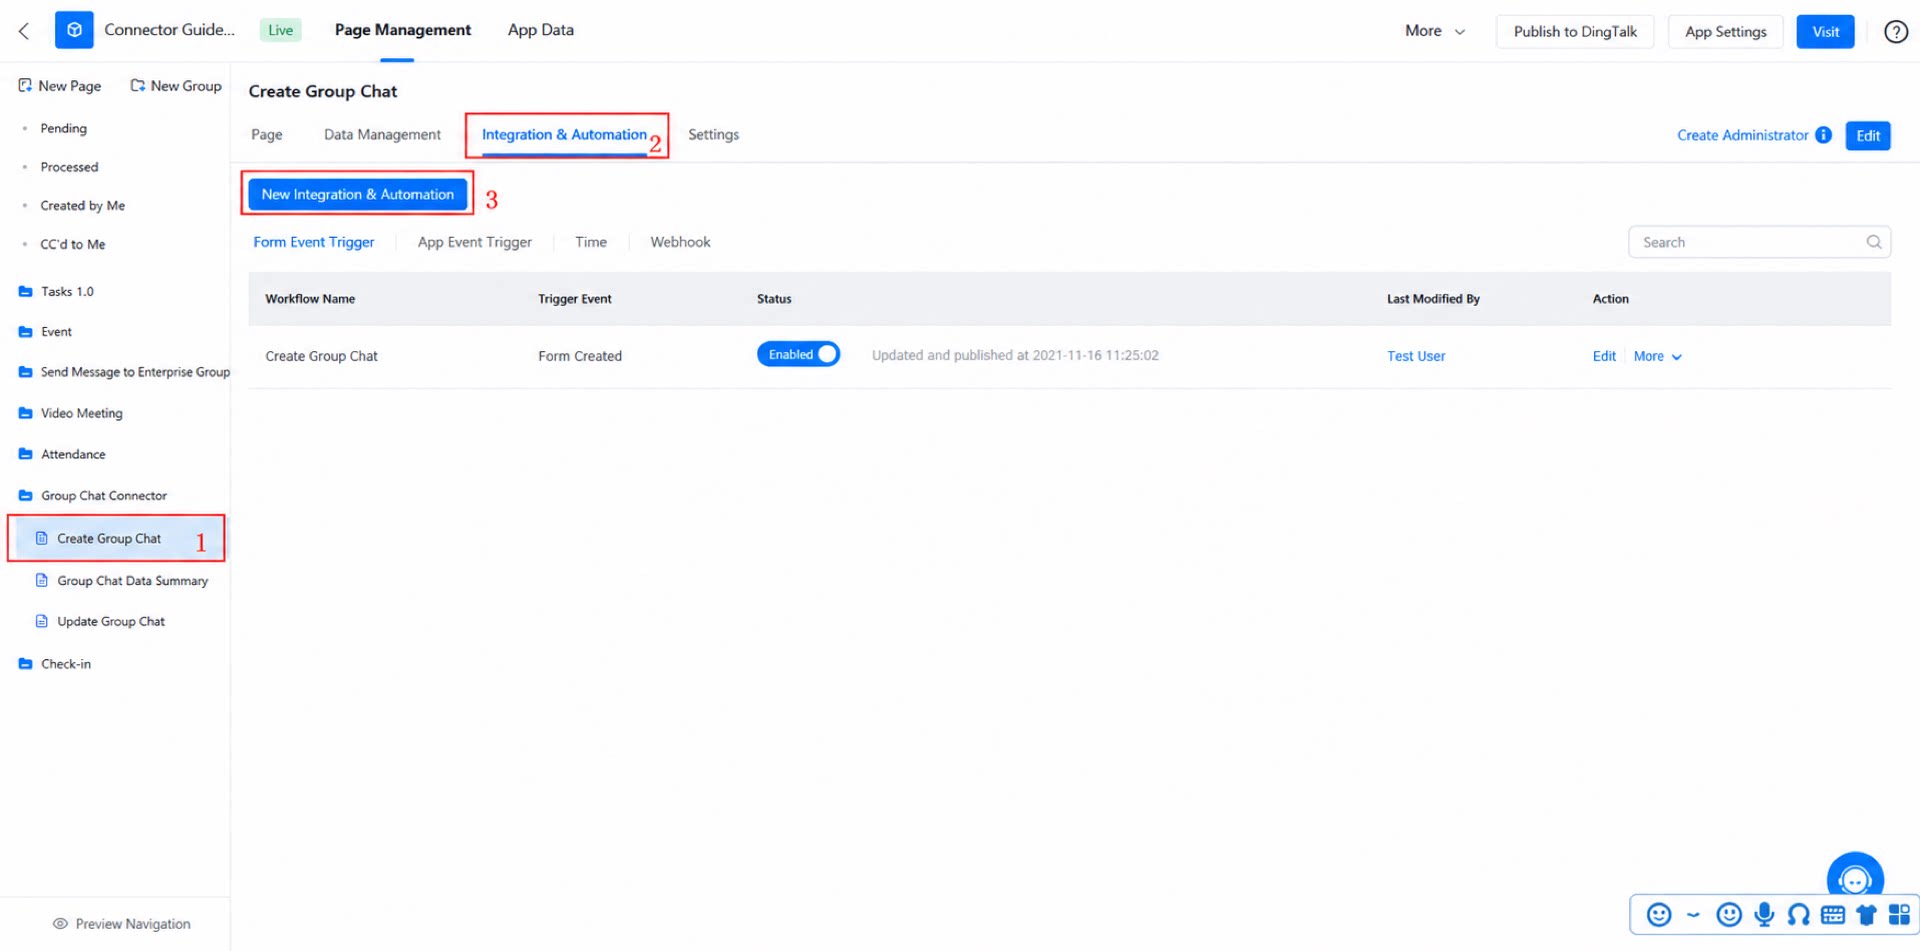
- Go to the admin page > “Create group chat” > “Integration & Automation” > “Create Integration & Automation”. (See Figure 2.2-1.)
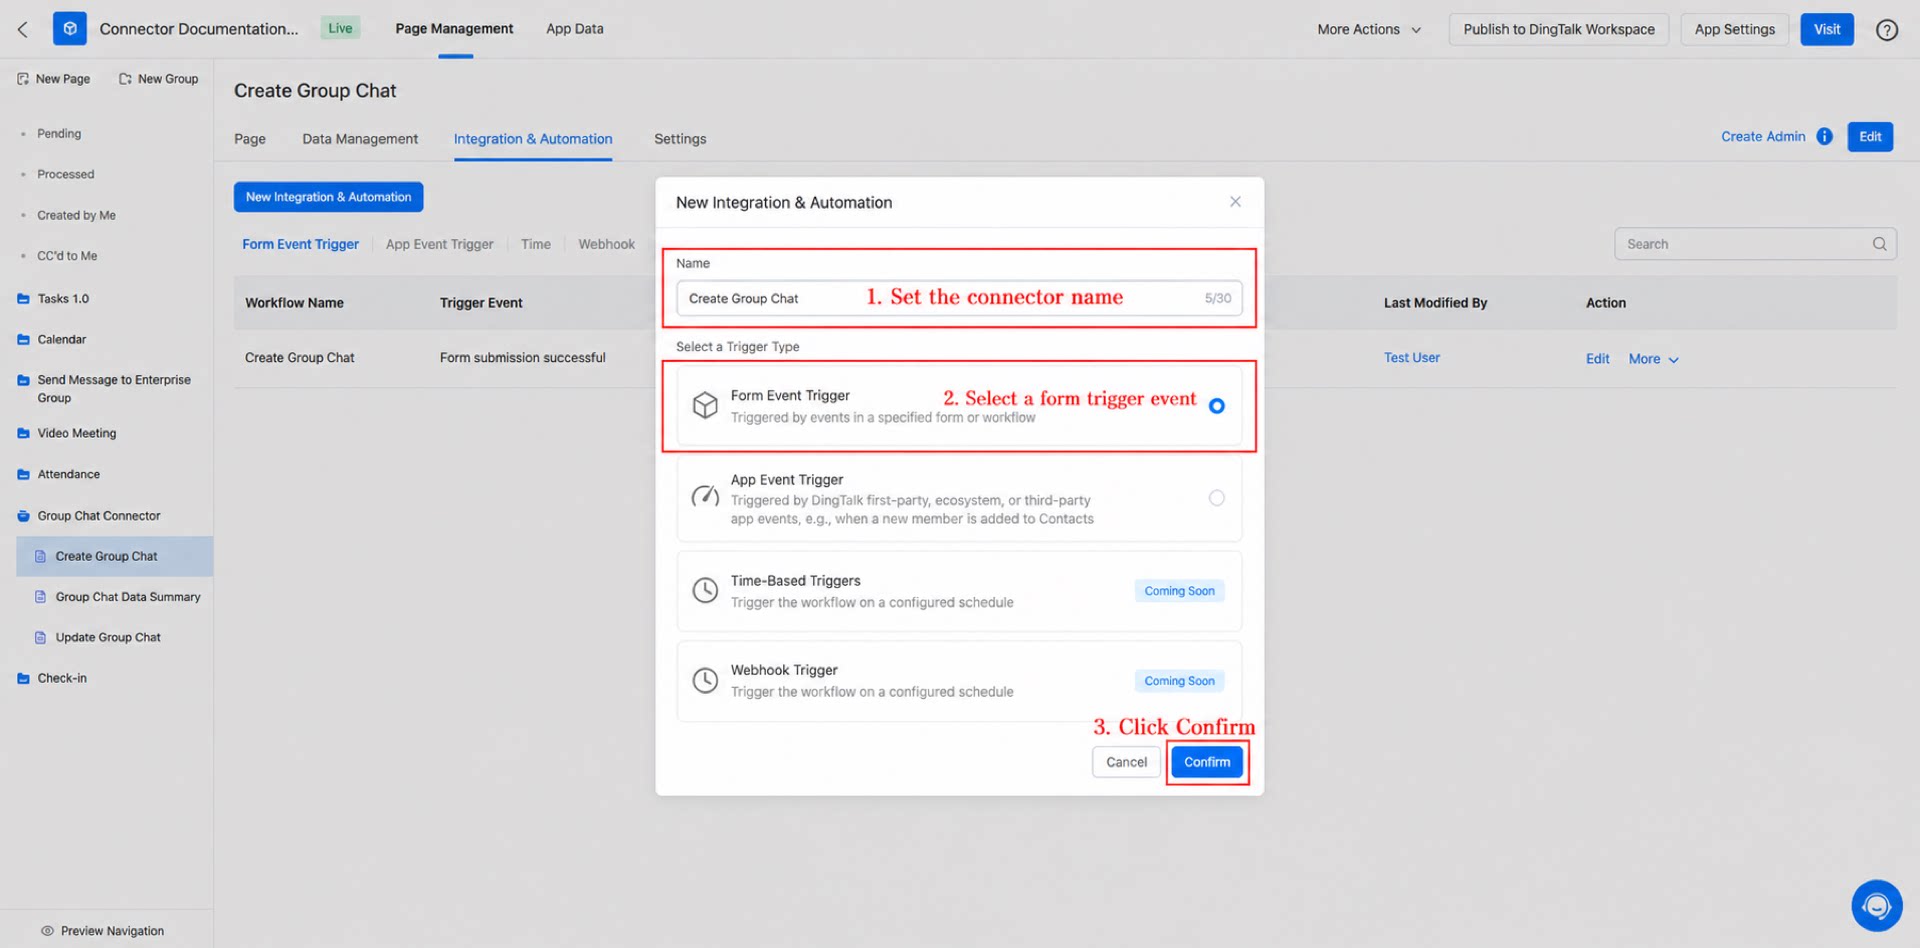
- Enter “Create group chat” as the connector name, set Trigger type to “Form event trigger”, and click Confirm.
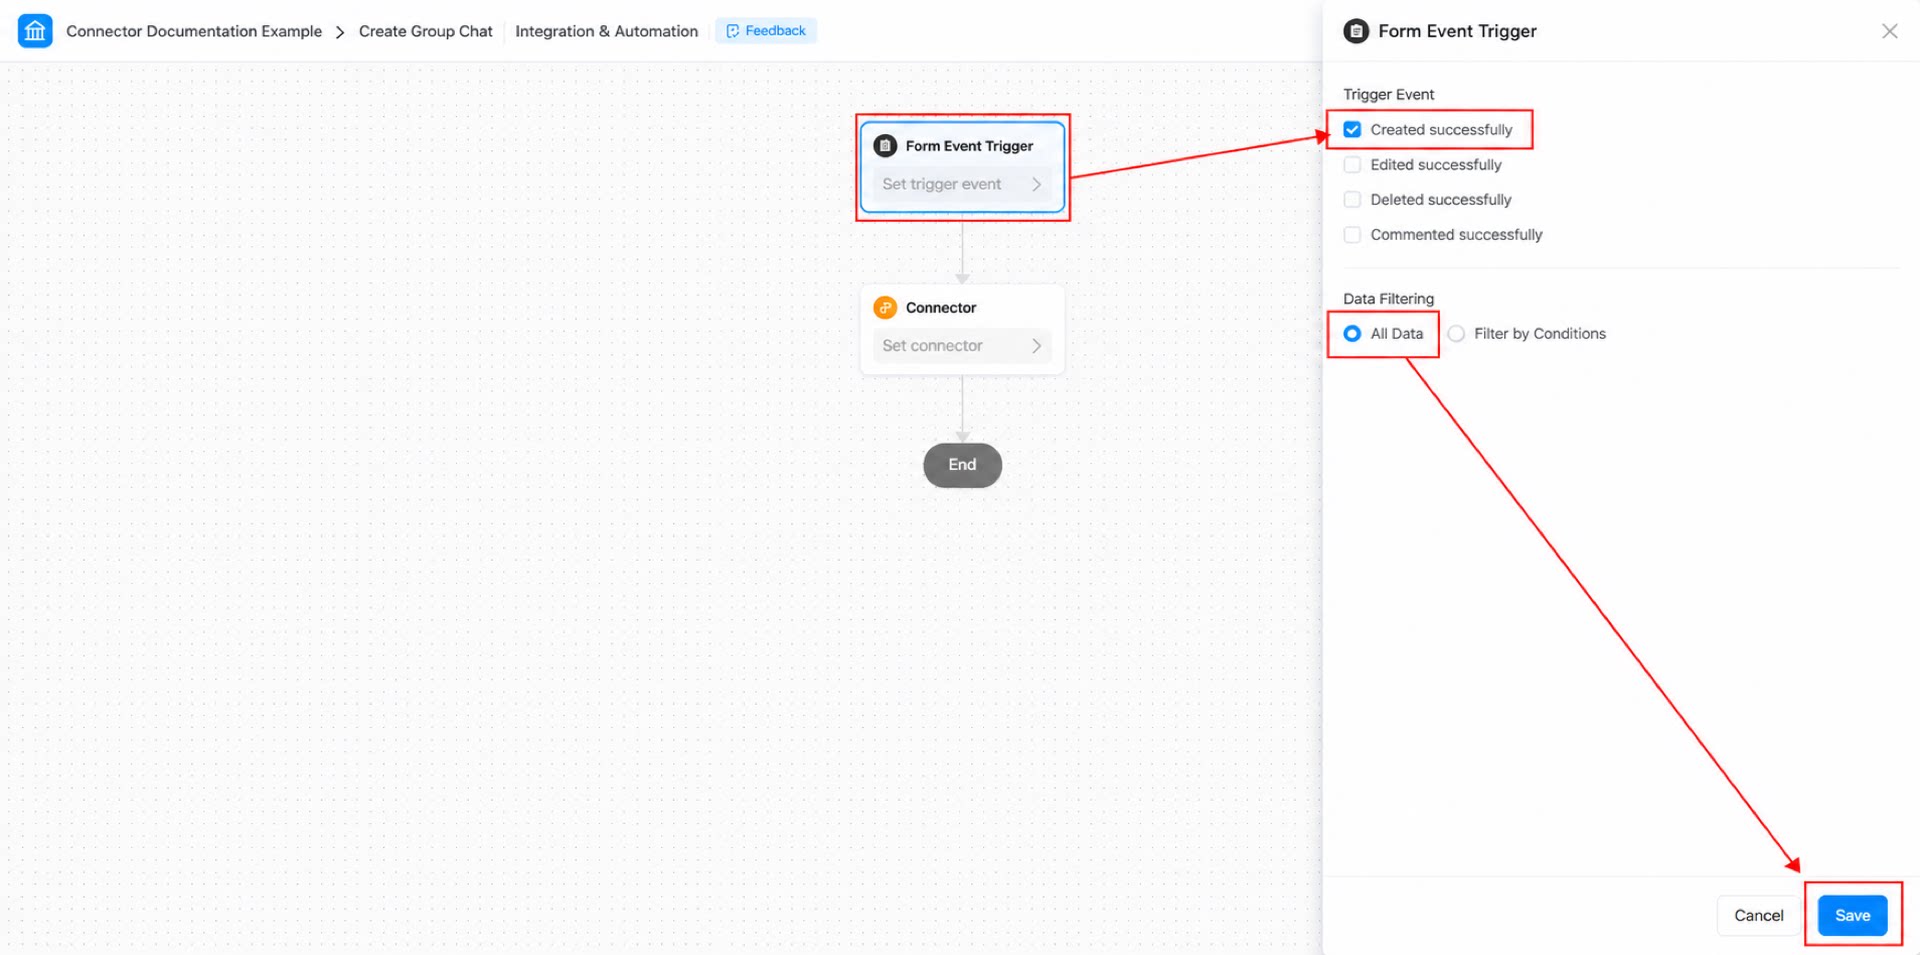
- Configure the form trigger event: set the trigger event to “Create success”, set the data filter to “All data”, and click Save.
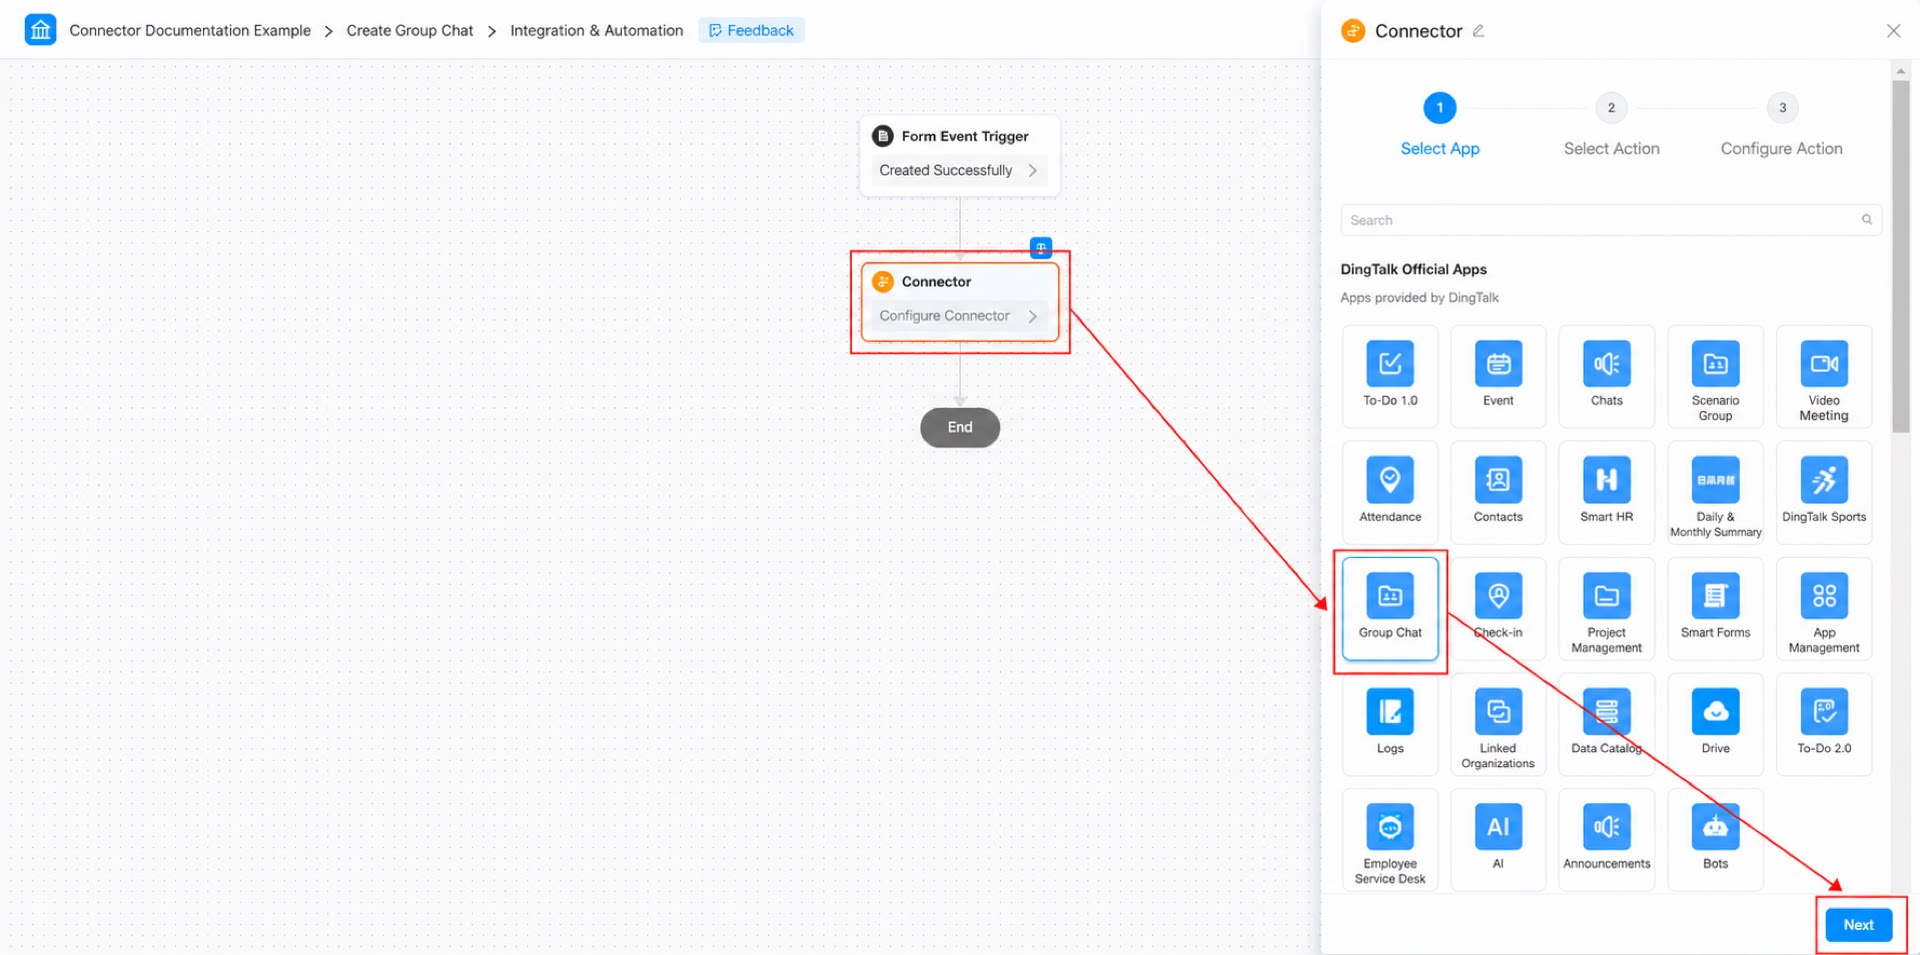
- Select the connector app: set App to “Group Chat”, and click Next. (See Figure 2.2-4.)
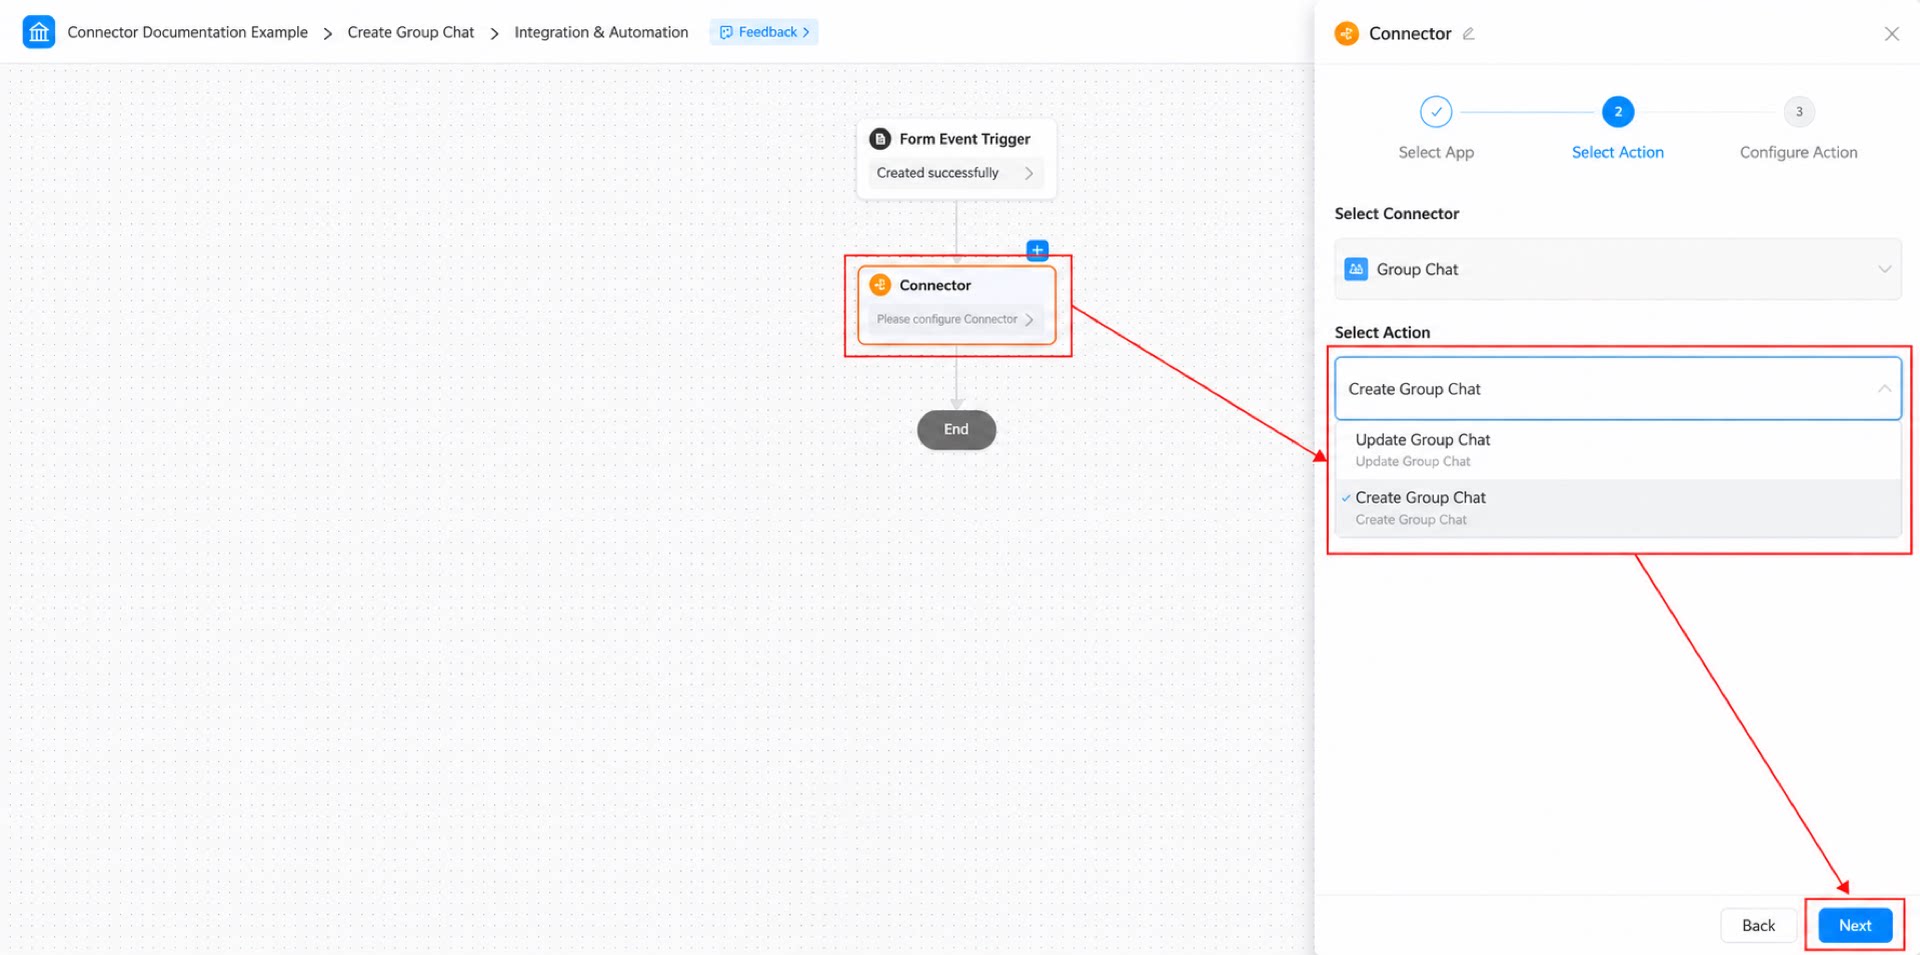
- Select the action: set the action to “Create group chat”, and click Next. (See Figure 2.2-5.)
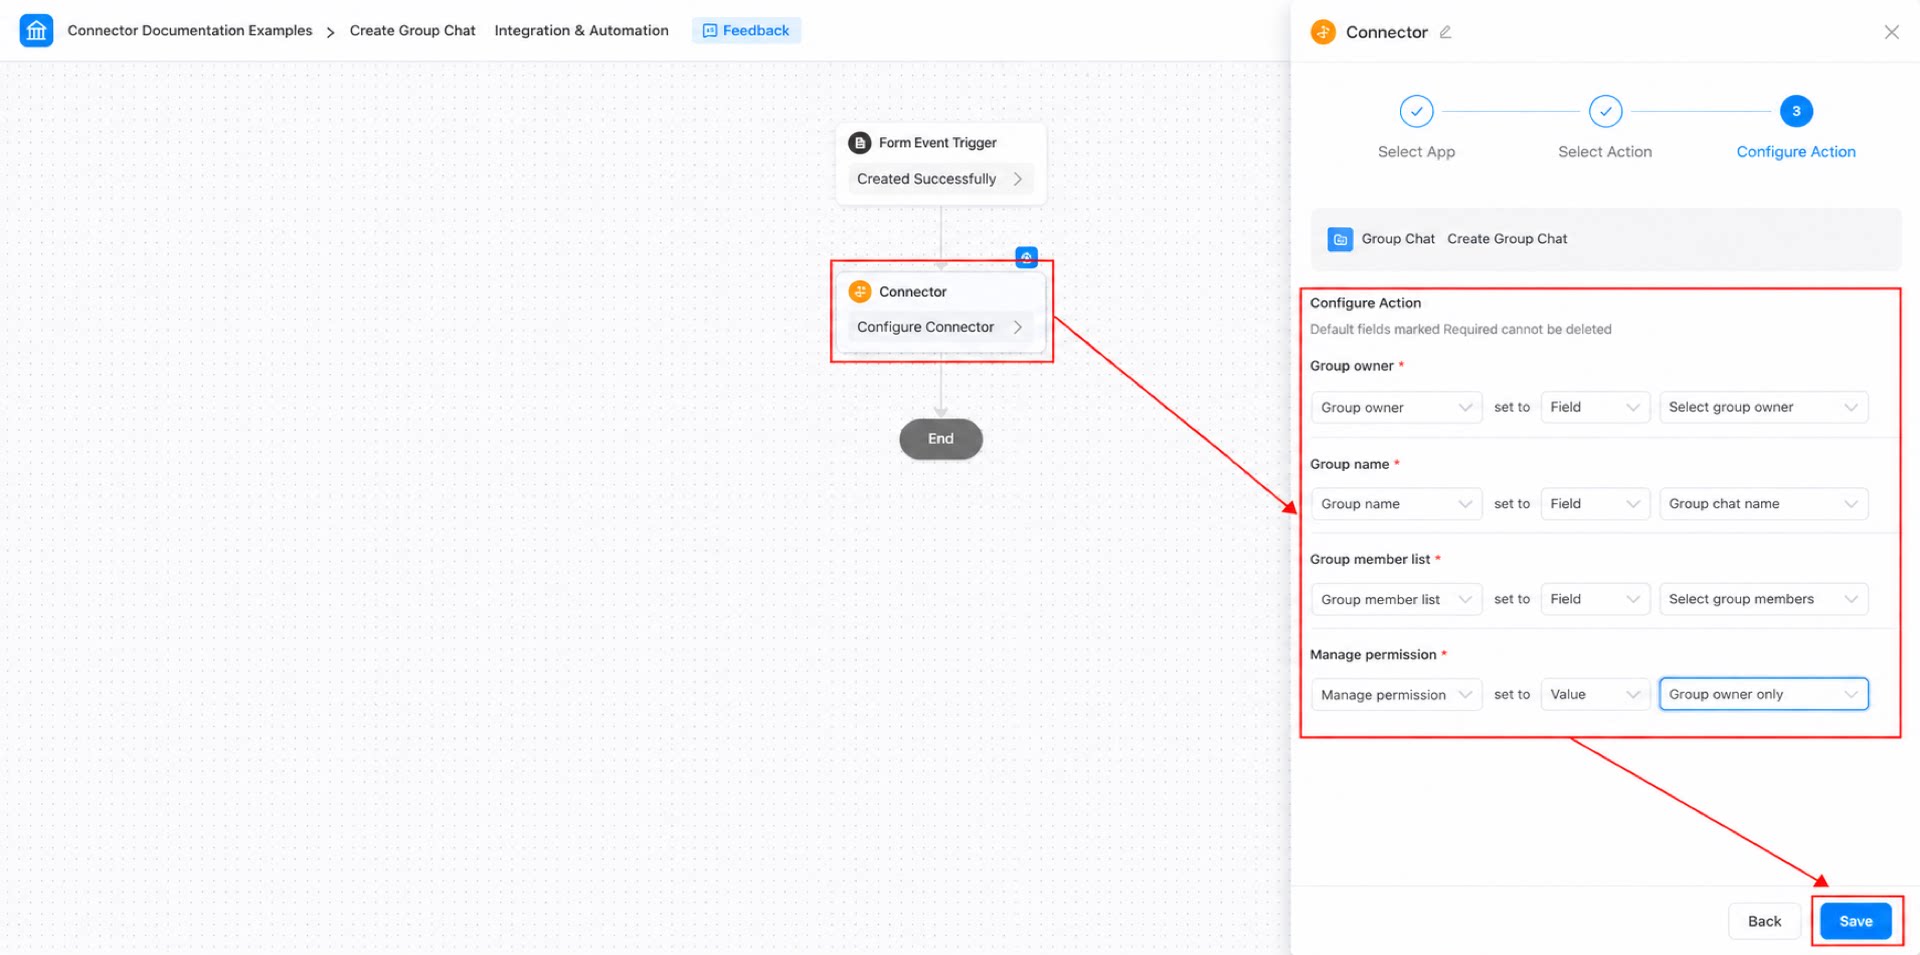
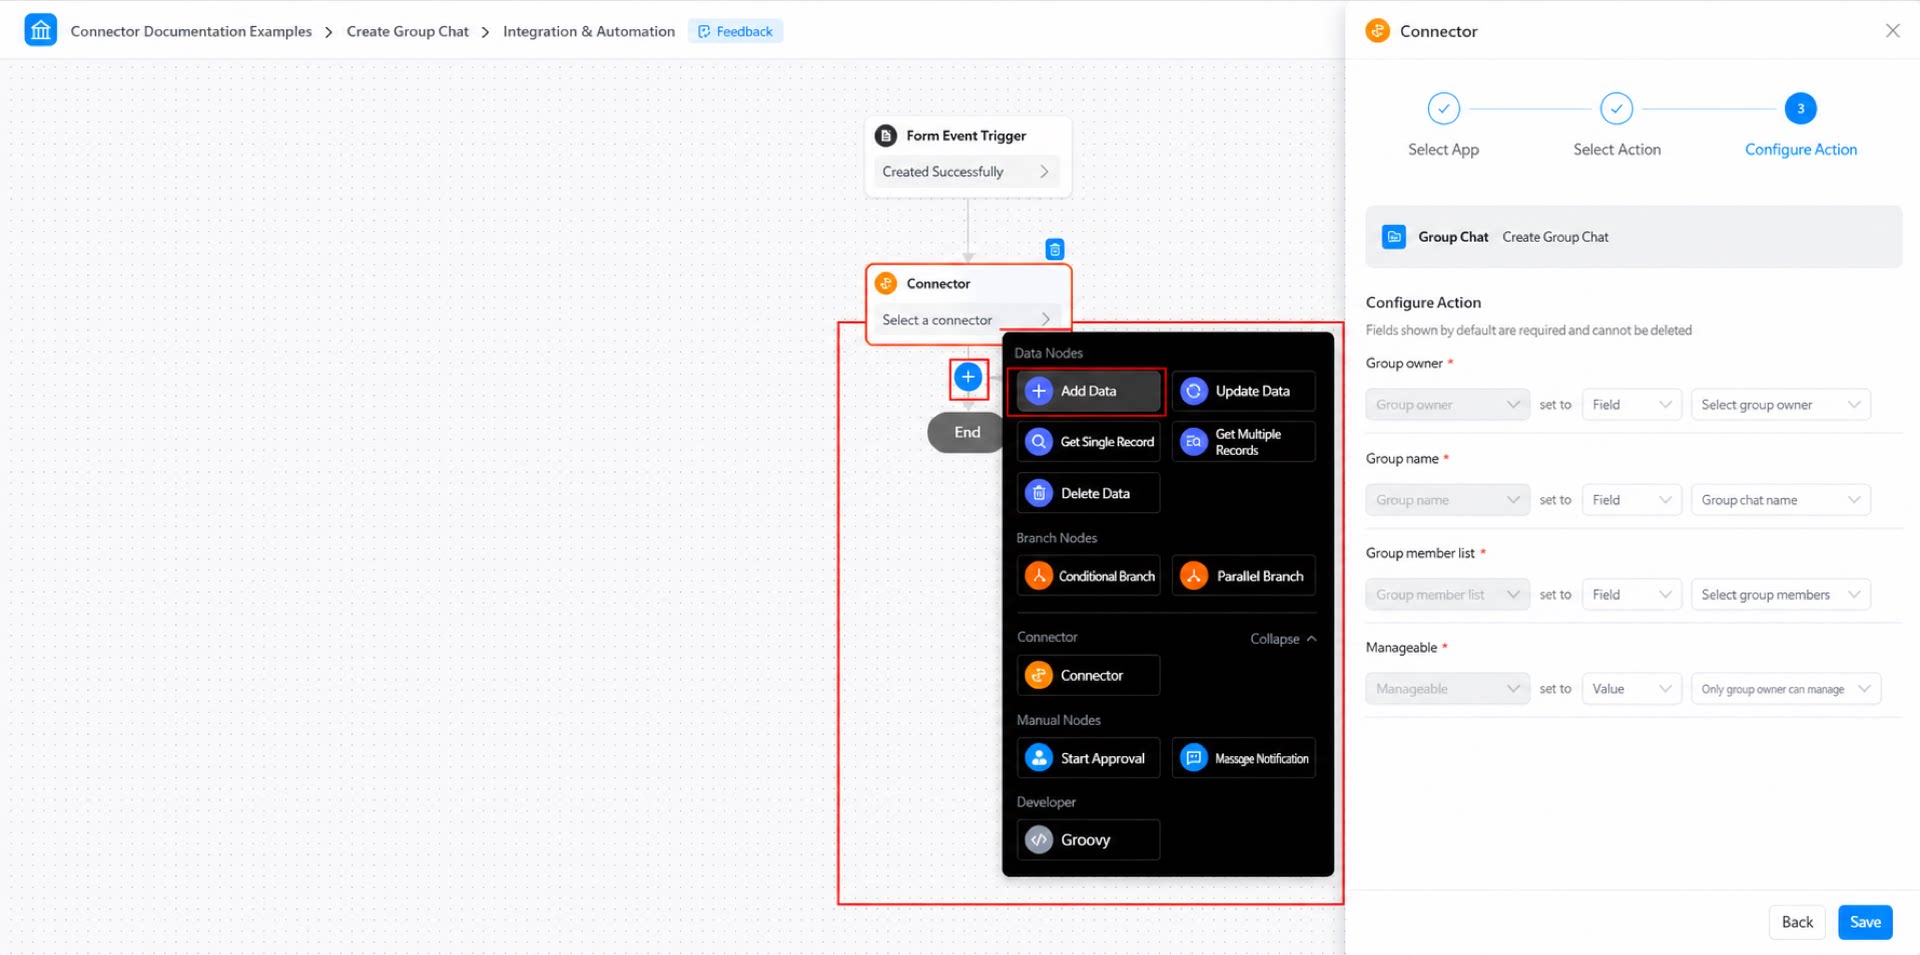
- Configure the action, and click Save. (See Figure 2.2-6.)
- Click Save in the top right corner of the page, and then click Publish.
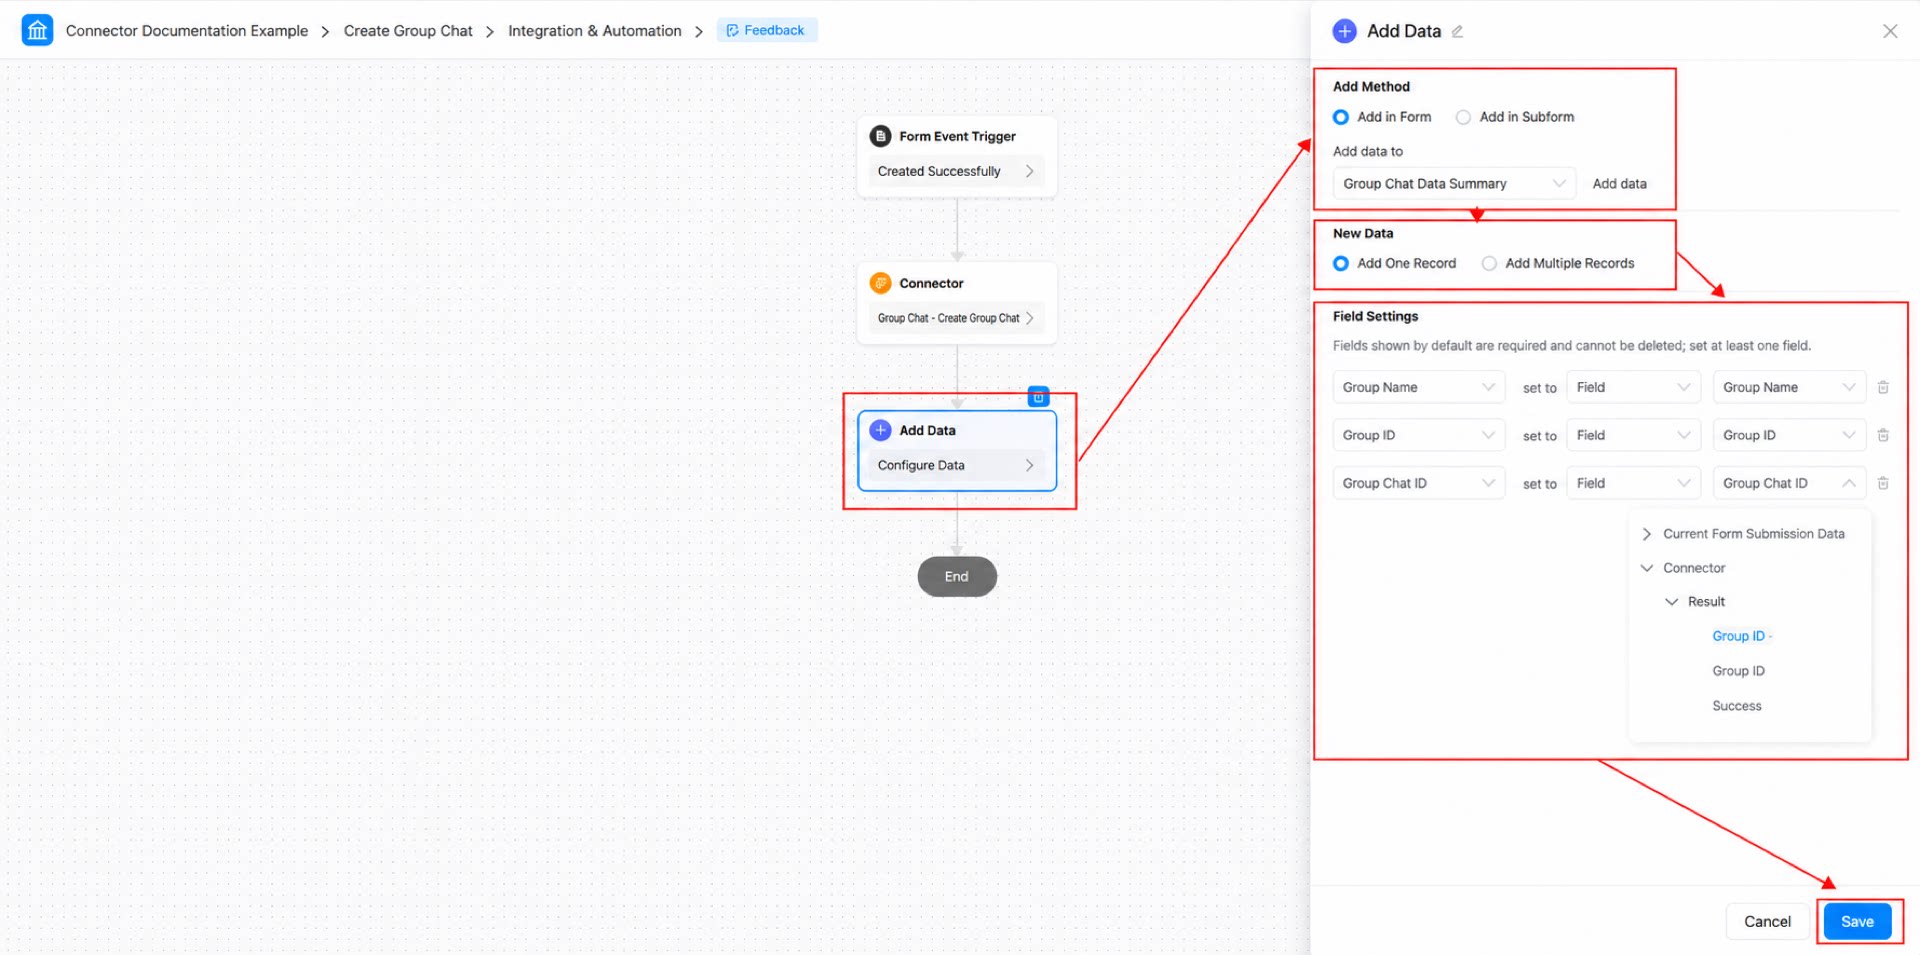
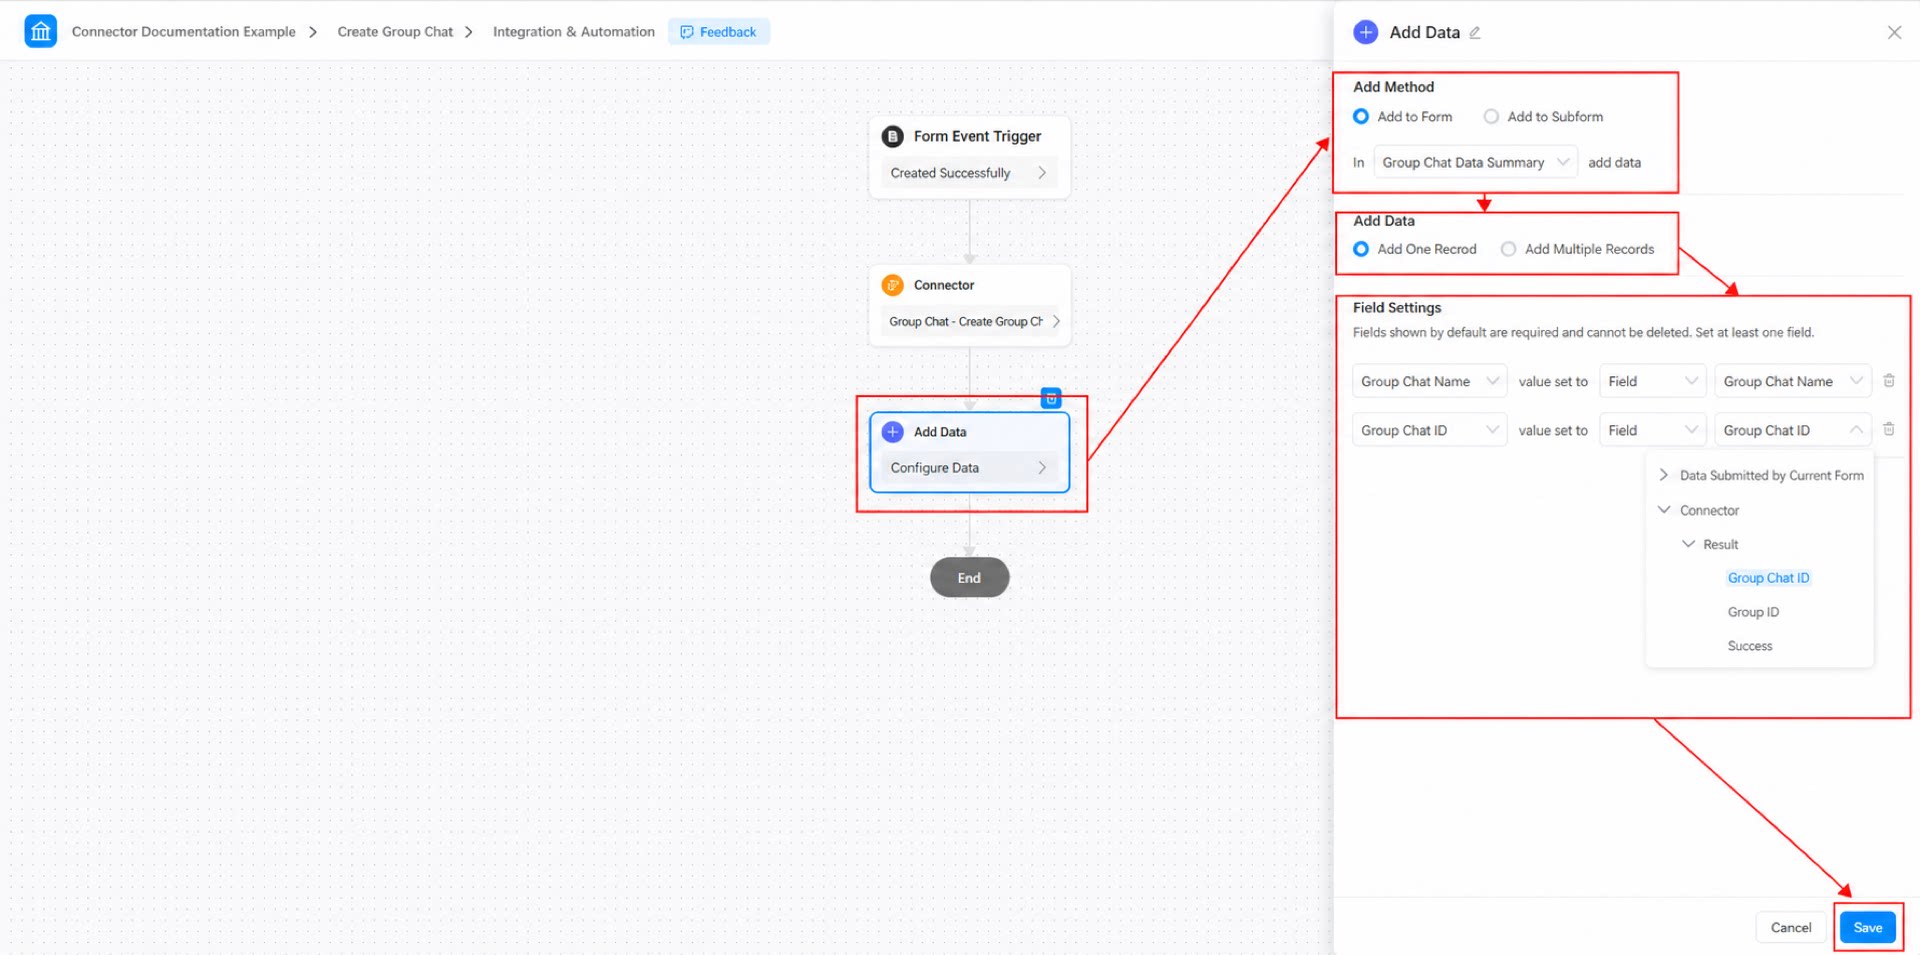
- Add a “Create data” node below the “Connector” node and configure it. This node returns the group chat ID to the “Group chat data summary” form. (See Figure 2.2-7.)
Step 5: Add and Configure a Connector for the “Update Group Chat” Form
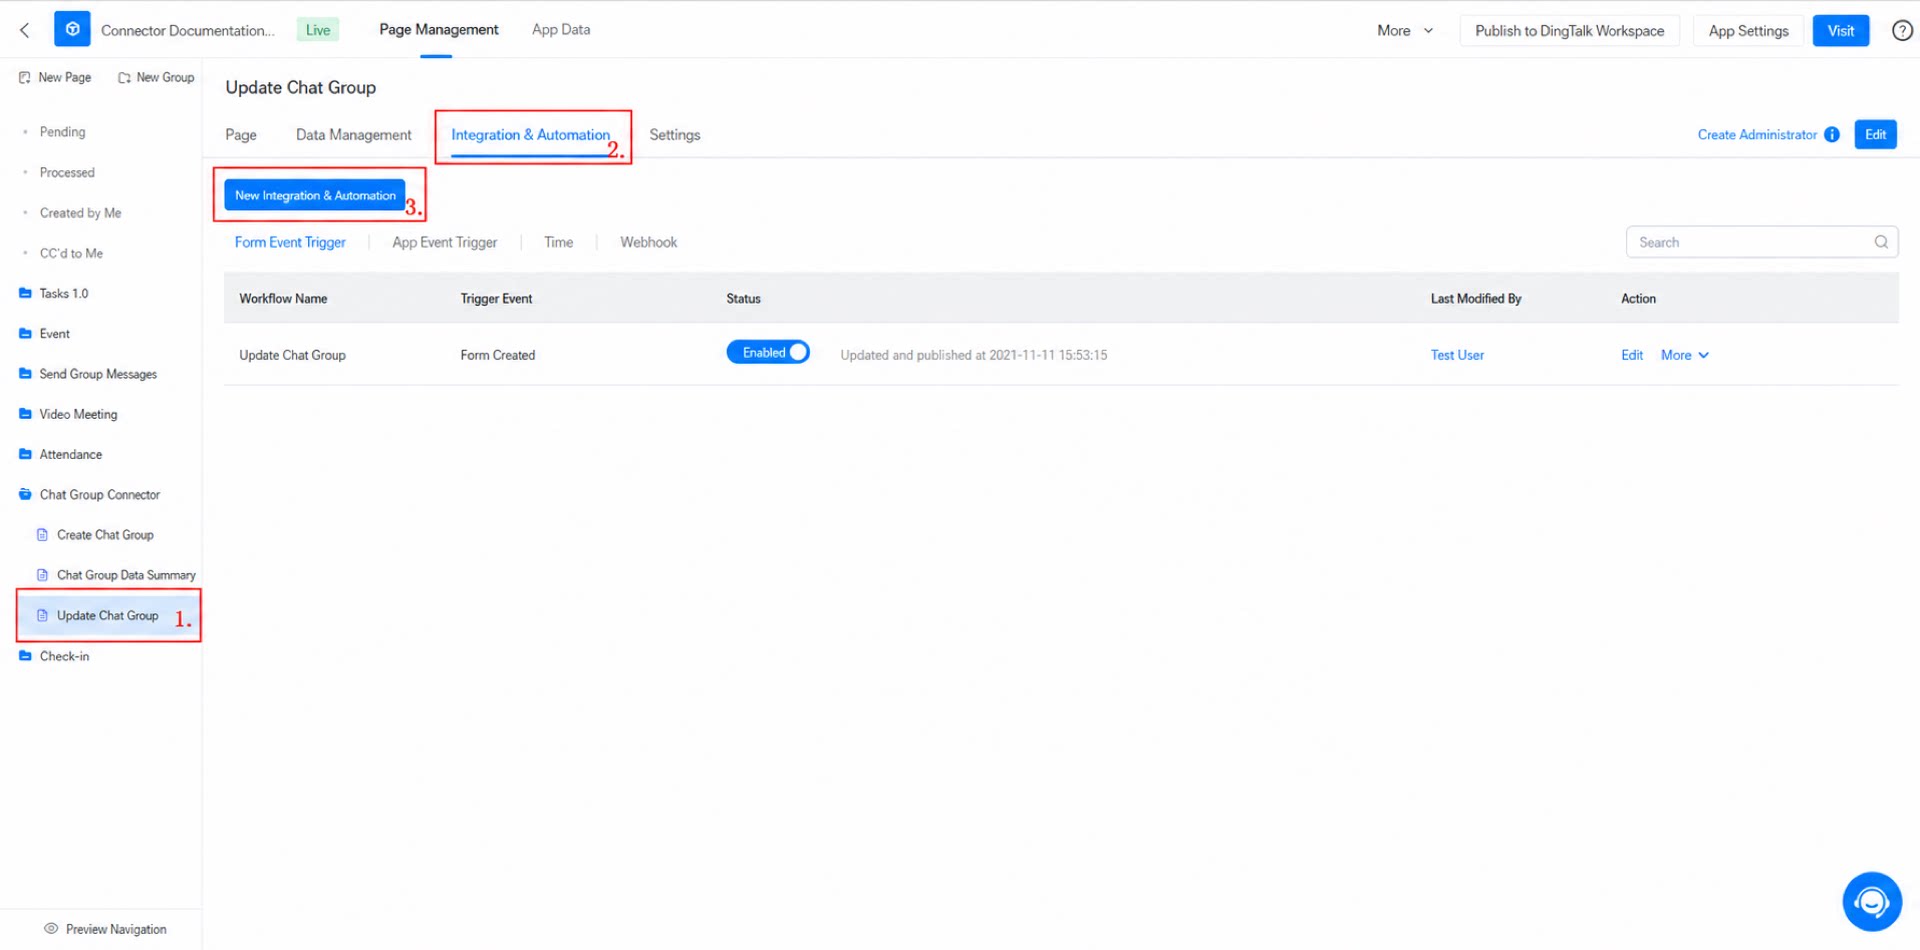
This connector automatically updates the DingTalk group chat created through the connector whenever the “Update group chat” form is submitted. Procedure:- Go to the admin page > “Create group chat” > “Settings” > “Page settings” > “Integration & Automation” > “Create Integration & Automation”. (See Figure 2.2-8.)
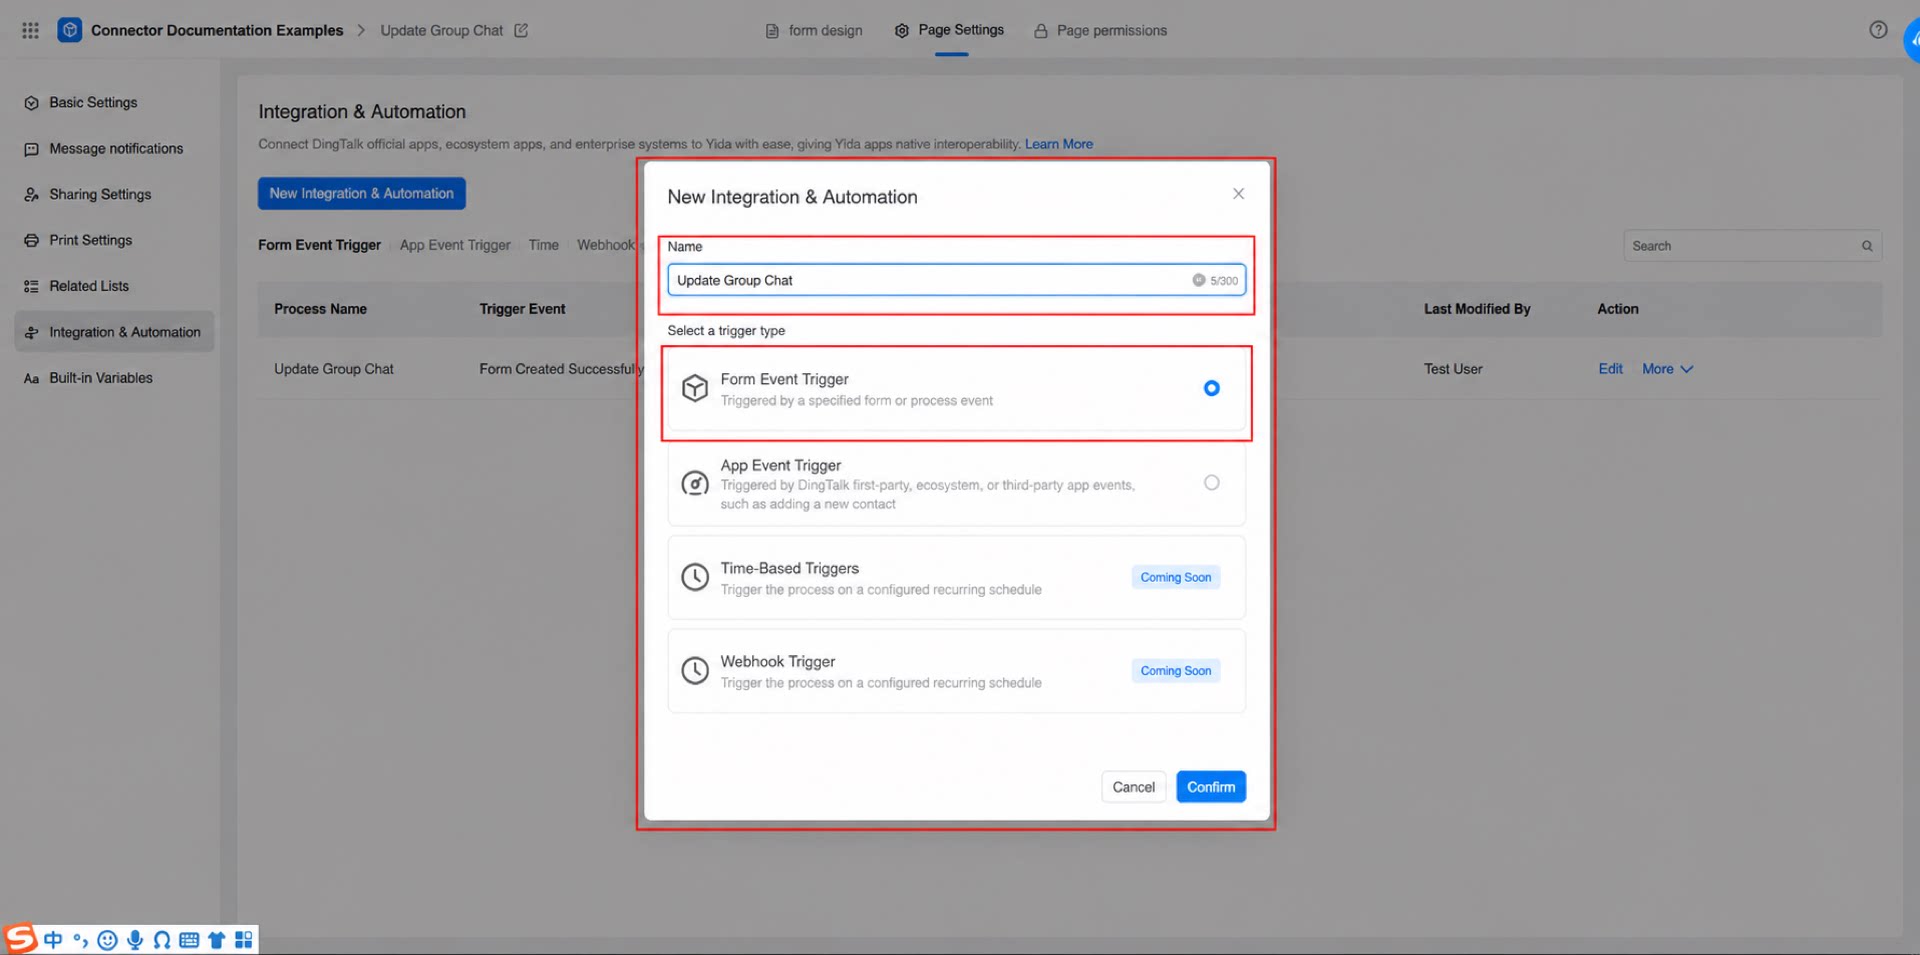
- Enter “Create group chat” as the connector name, set Trigger type to “Form event trigger”, and click Confirm.
- Configure the form trigger event: set the trigger event to “Create success”, set the data filter to “All data”, and click Save.
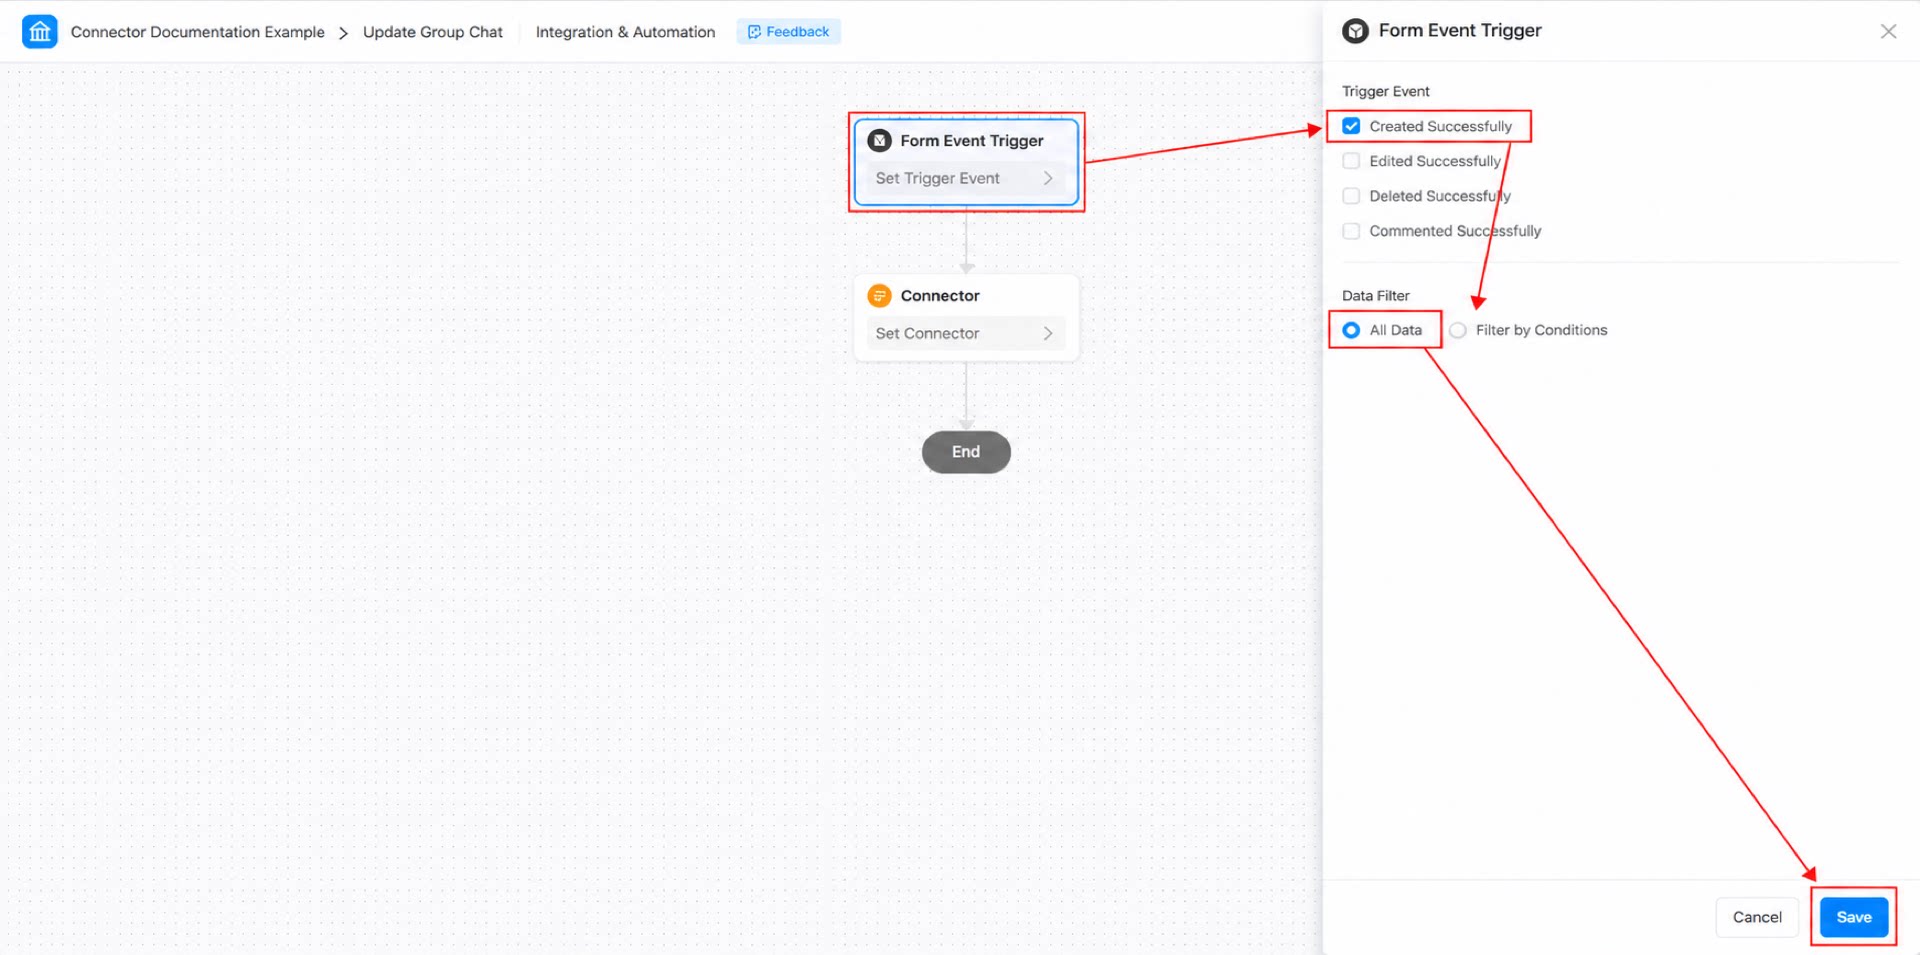
- Select the connector app: set App to “Group Chat”, and click Next.
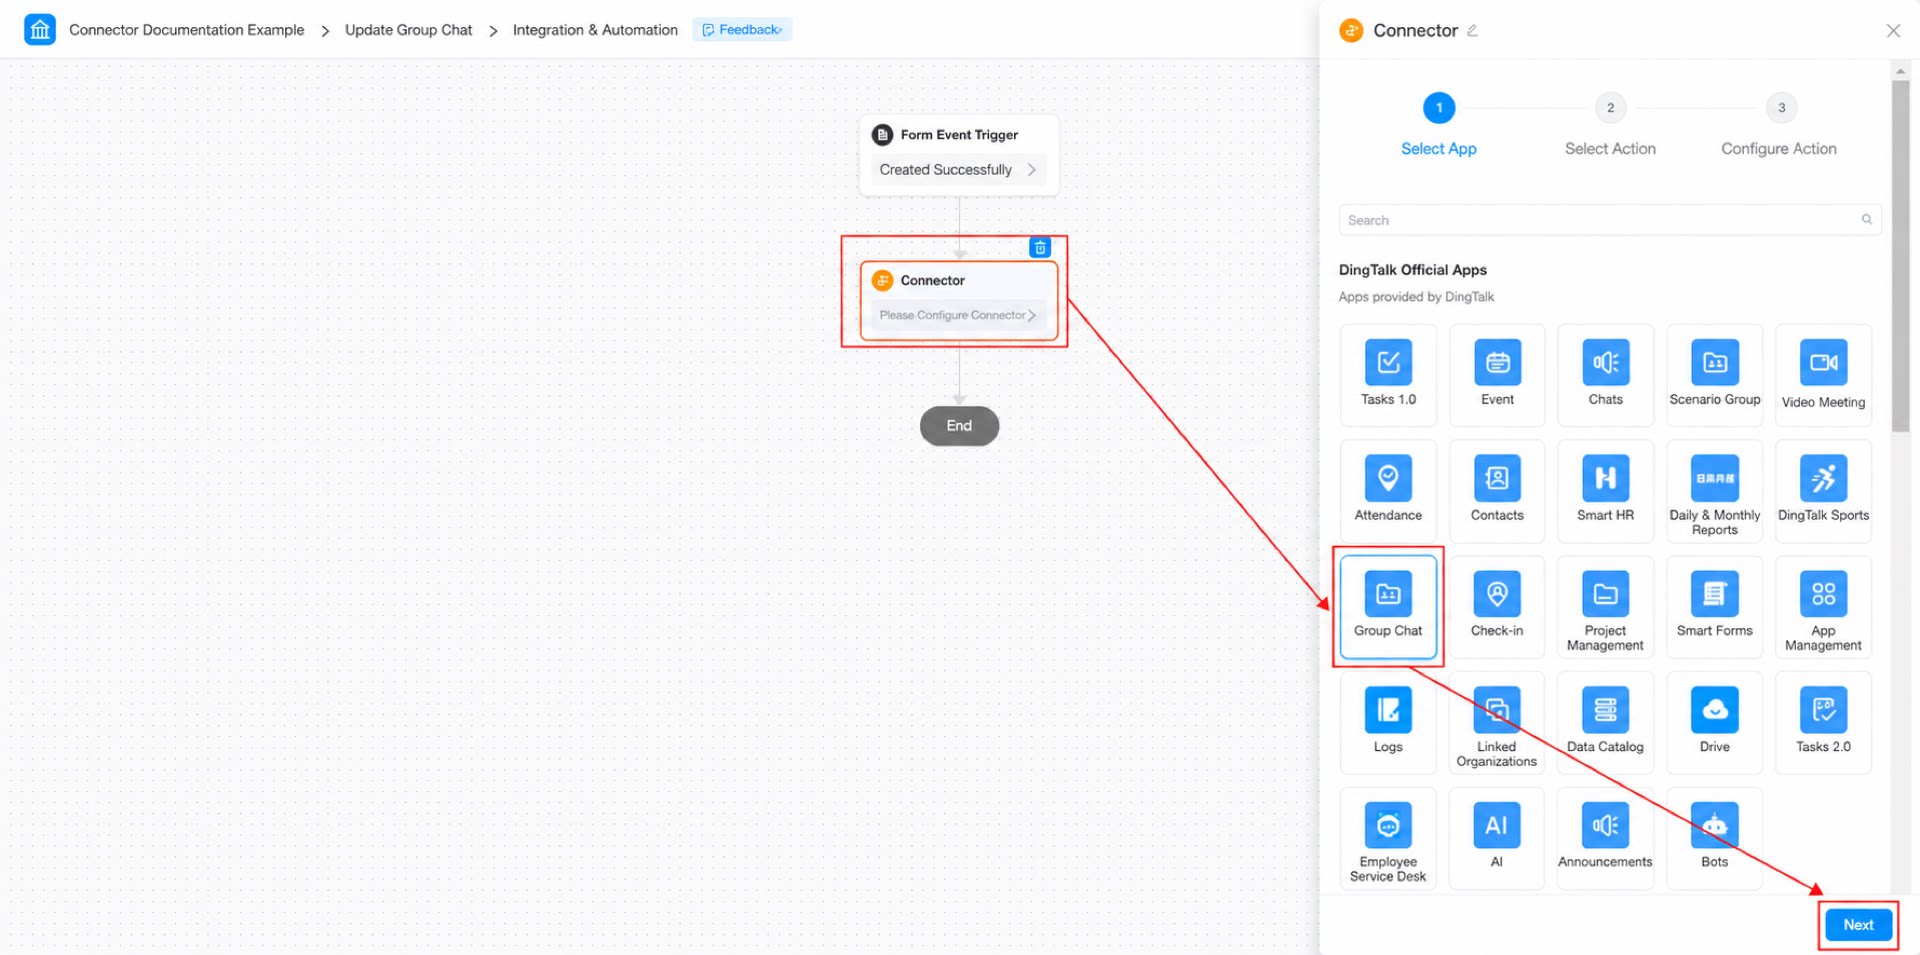
- Select the action: set the action to “Create group chat”, and click Next.
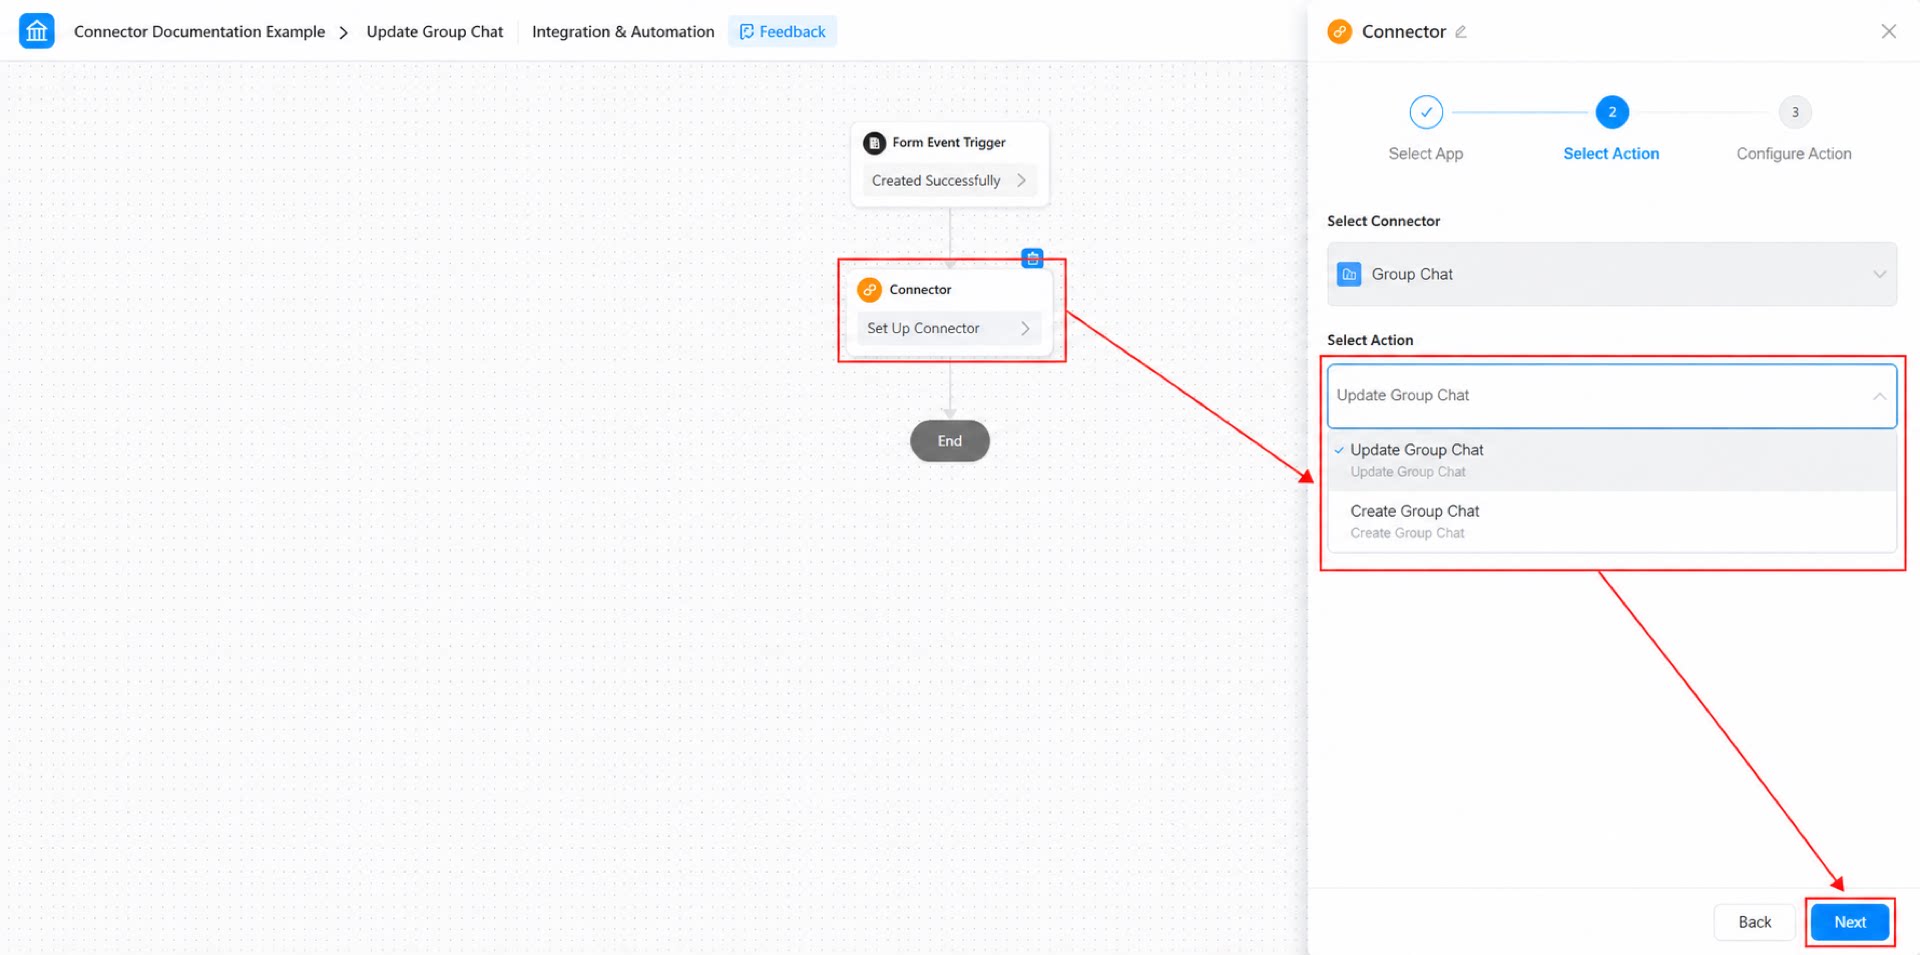
- Configure the action, and click Save. (See Figure 2.2-13.)
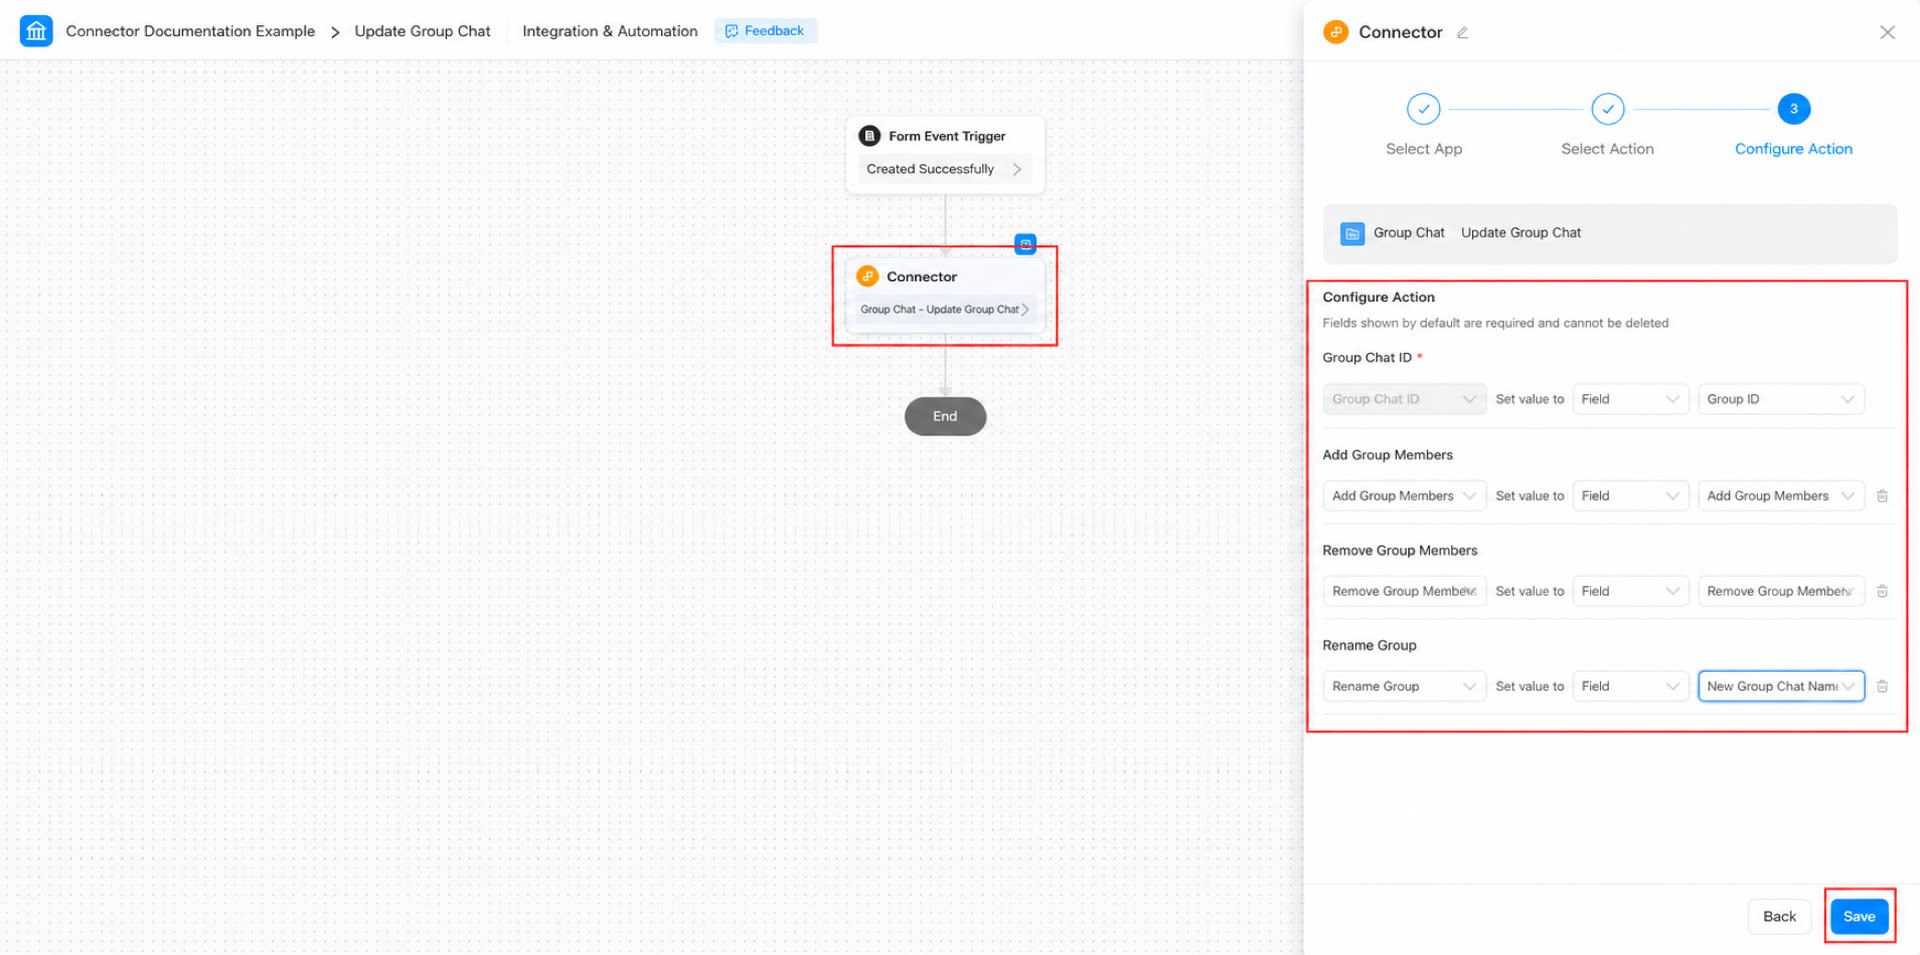
- Click Save in the top right corner of the page, and then click Publish.
Step 6: Submit the “Create Group Chat” Form to Trigger the Create-Group-Chat Connector
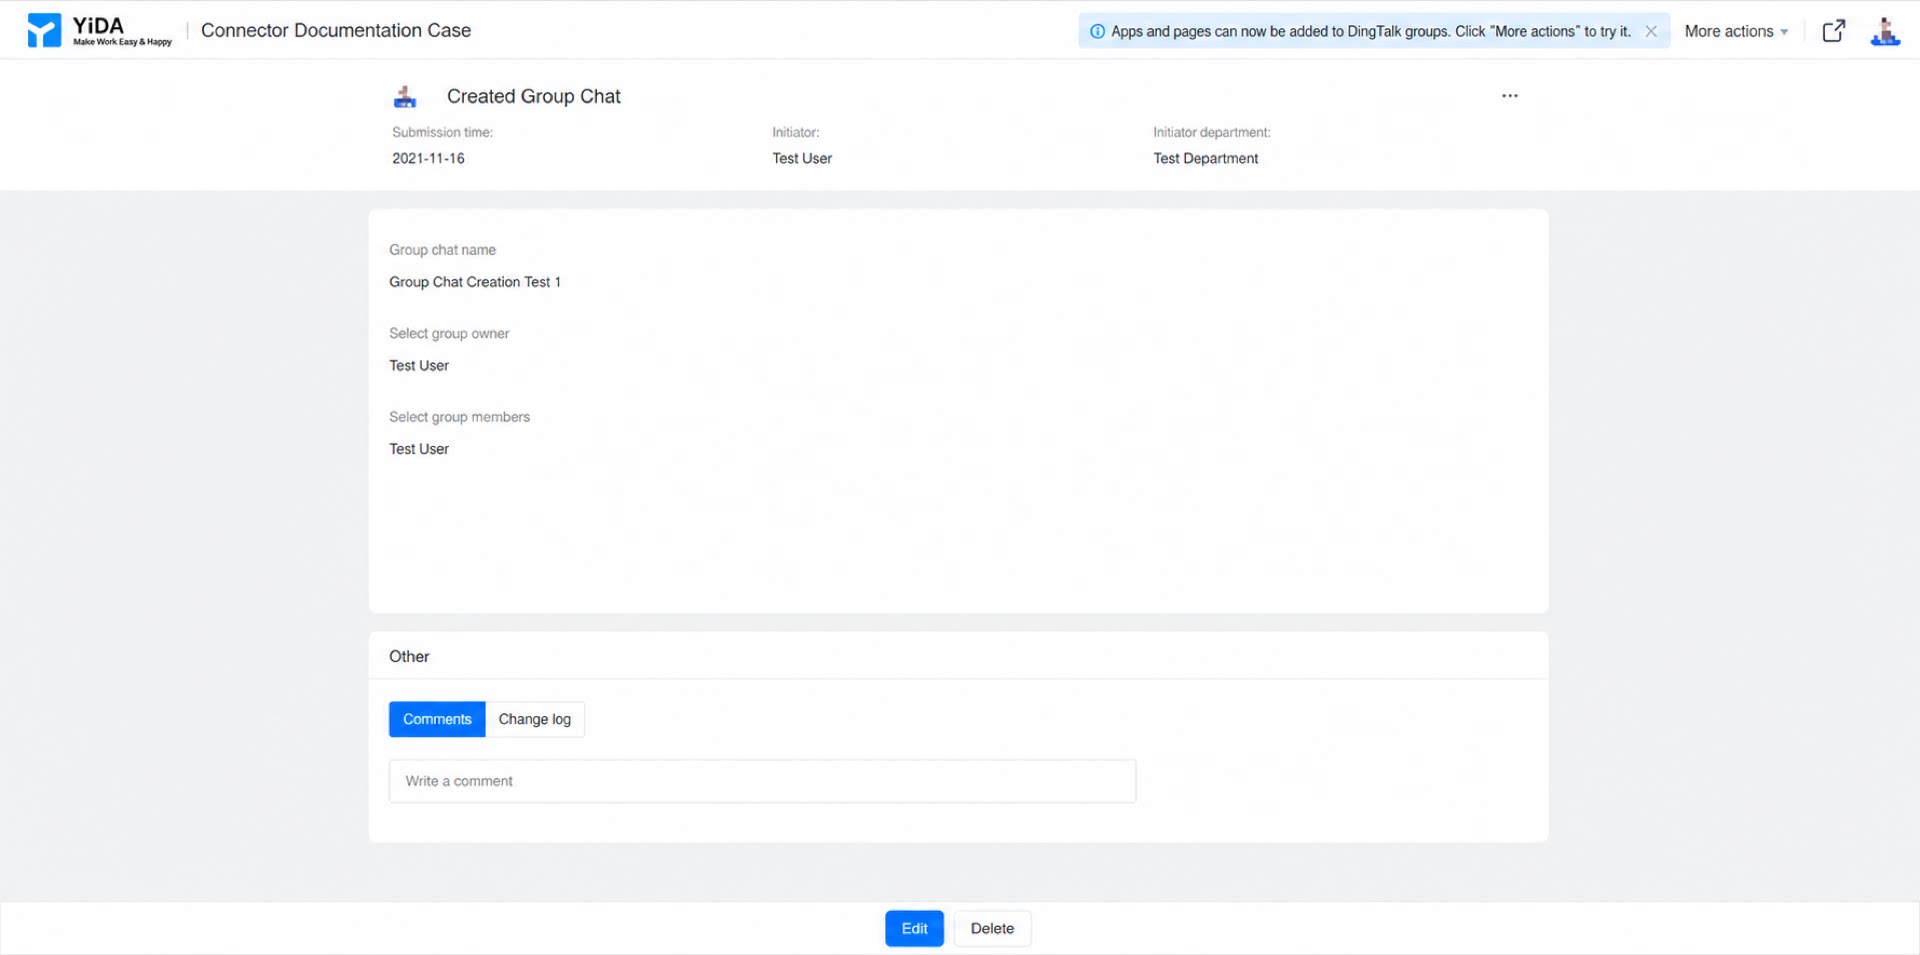
Step 7: Submit the “Update Group Chat” Form to Trigger the Update-Group-Chat Connector
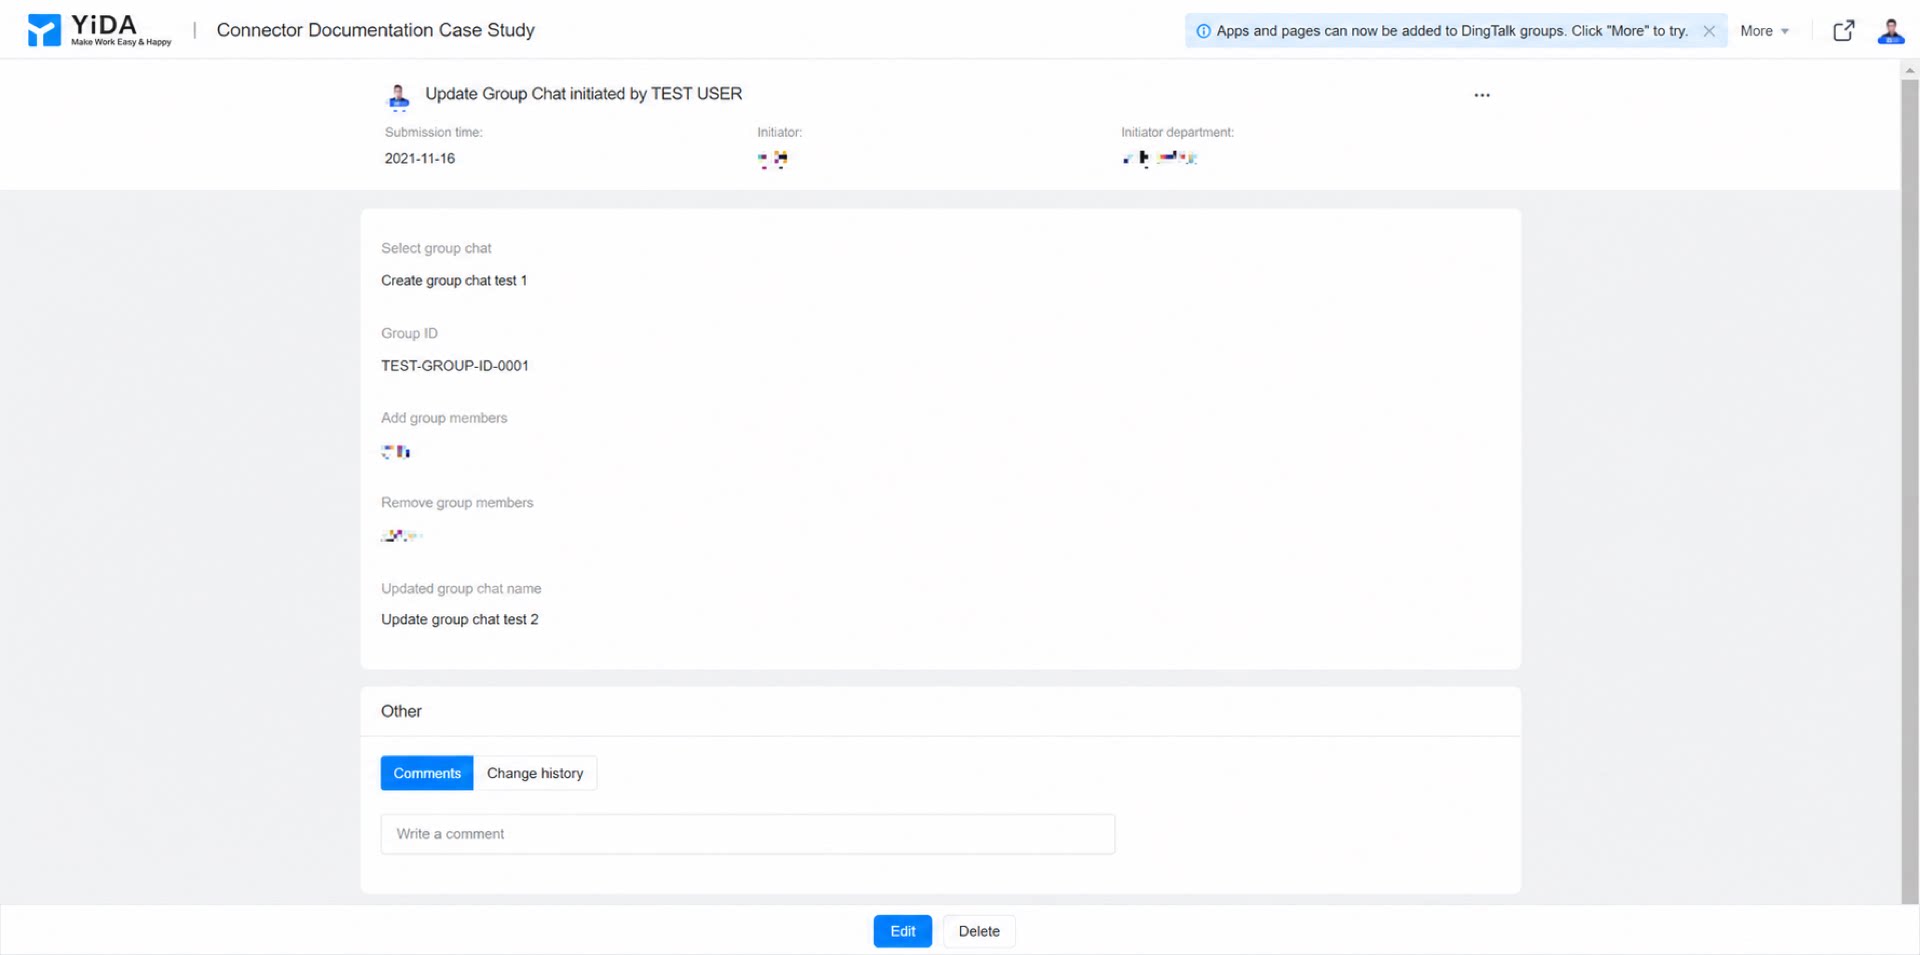
FAQ
Q: How do I obtain the group ID of a group chat created through a connector? A: Add a Create data node after the create-group-chat connector to persist the group chat ID returned by the connector to another form. (See the figure below.)