Chats
Chats Calendar
 Meetings
 Contacts
 Mail
Mail Docs
Docs Drive
Drive AI Table
 AI Minutes
 Attendance
 Approval
 YiDA
YiDA Admin Console
1. Use Case
Smart Form is a basic app provided by DingTalk. It fits scenarios such as surveys and registration tracking, and supports data statistics and download. This example shows how submitting a form in YiDA triggers a connector that queries the Smart Form templates created by a specific employee.2. Steps
2.1 Step 1: Create the “Smart Form Template Query” Form
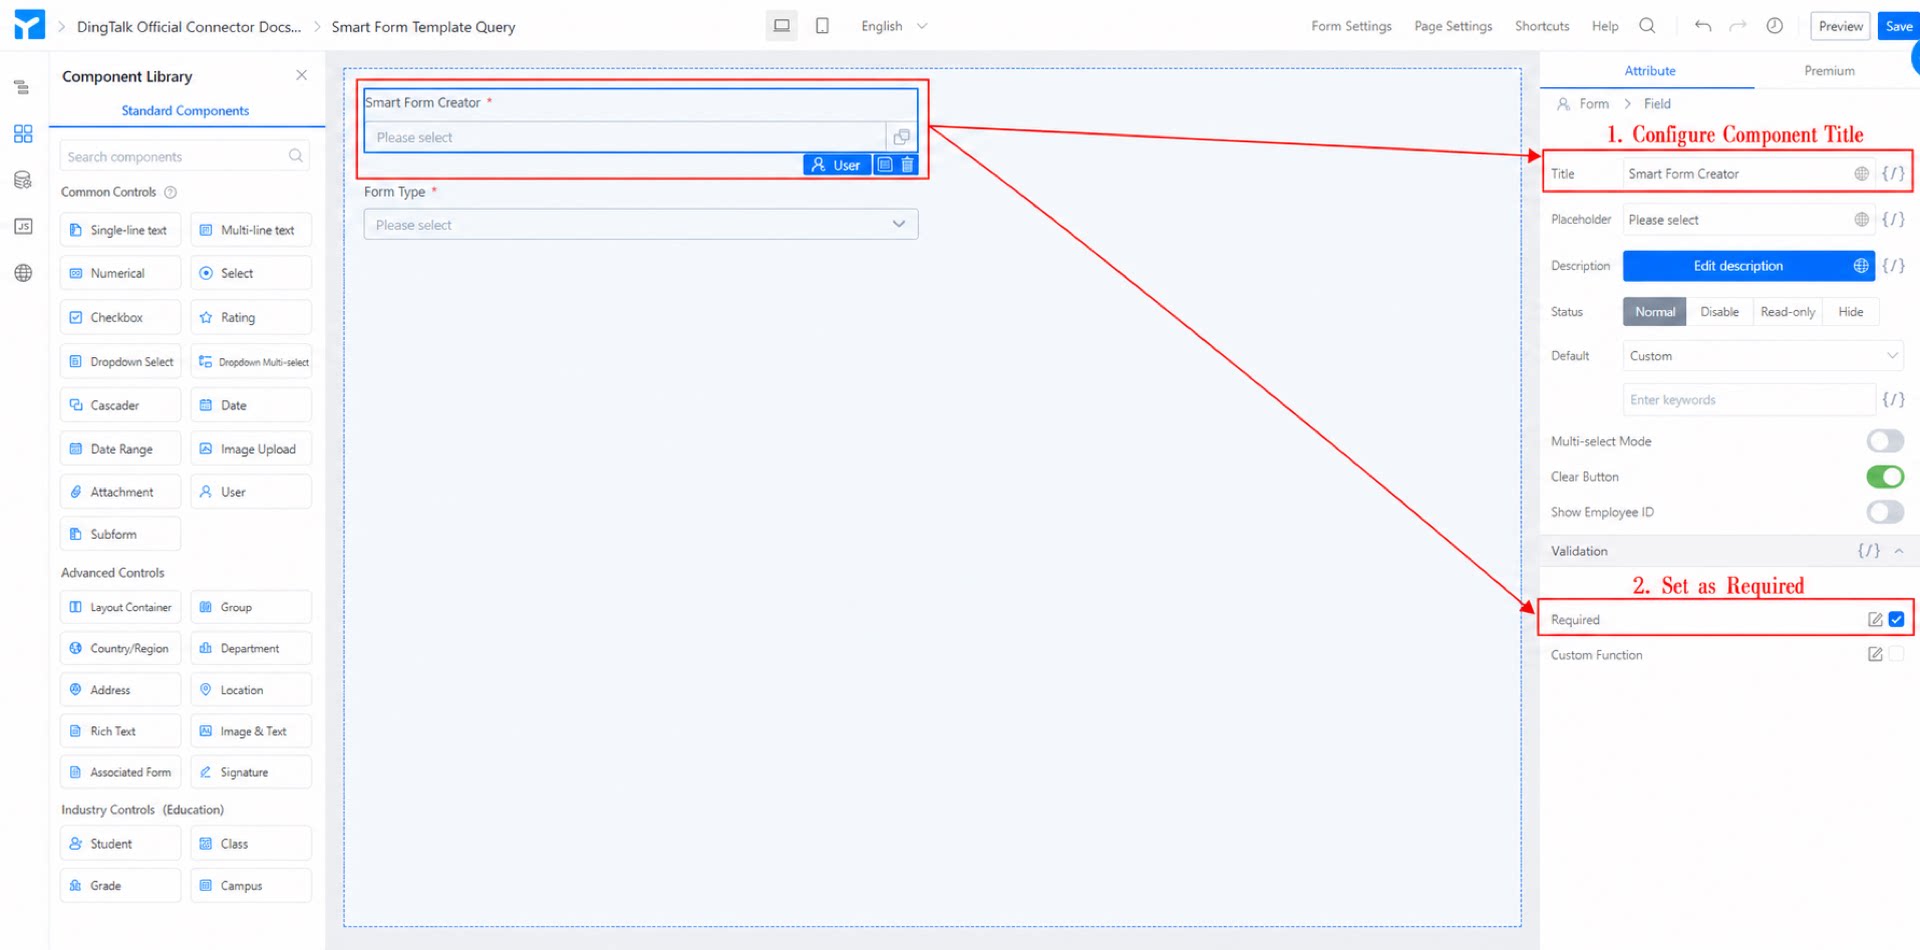
This form triggers the connector that runs the query. Steps:- Create a form named “Smart Form template query”.
- Add a member component, name it “Template creator”, and set it as required. (See Figure 2.1-1.)
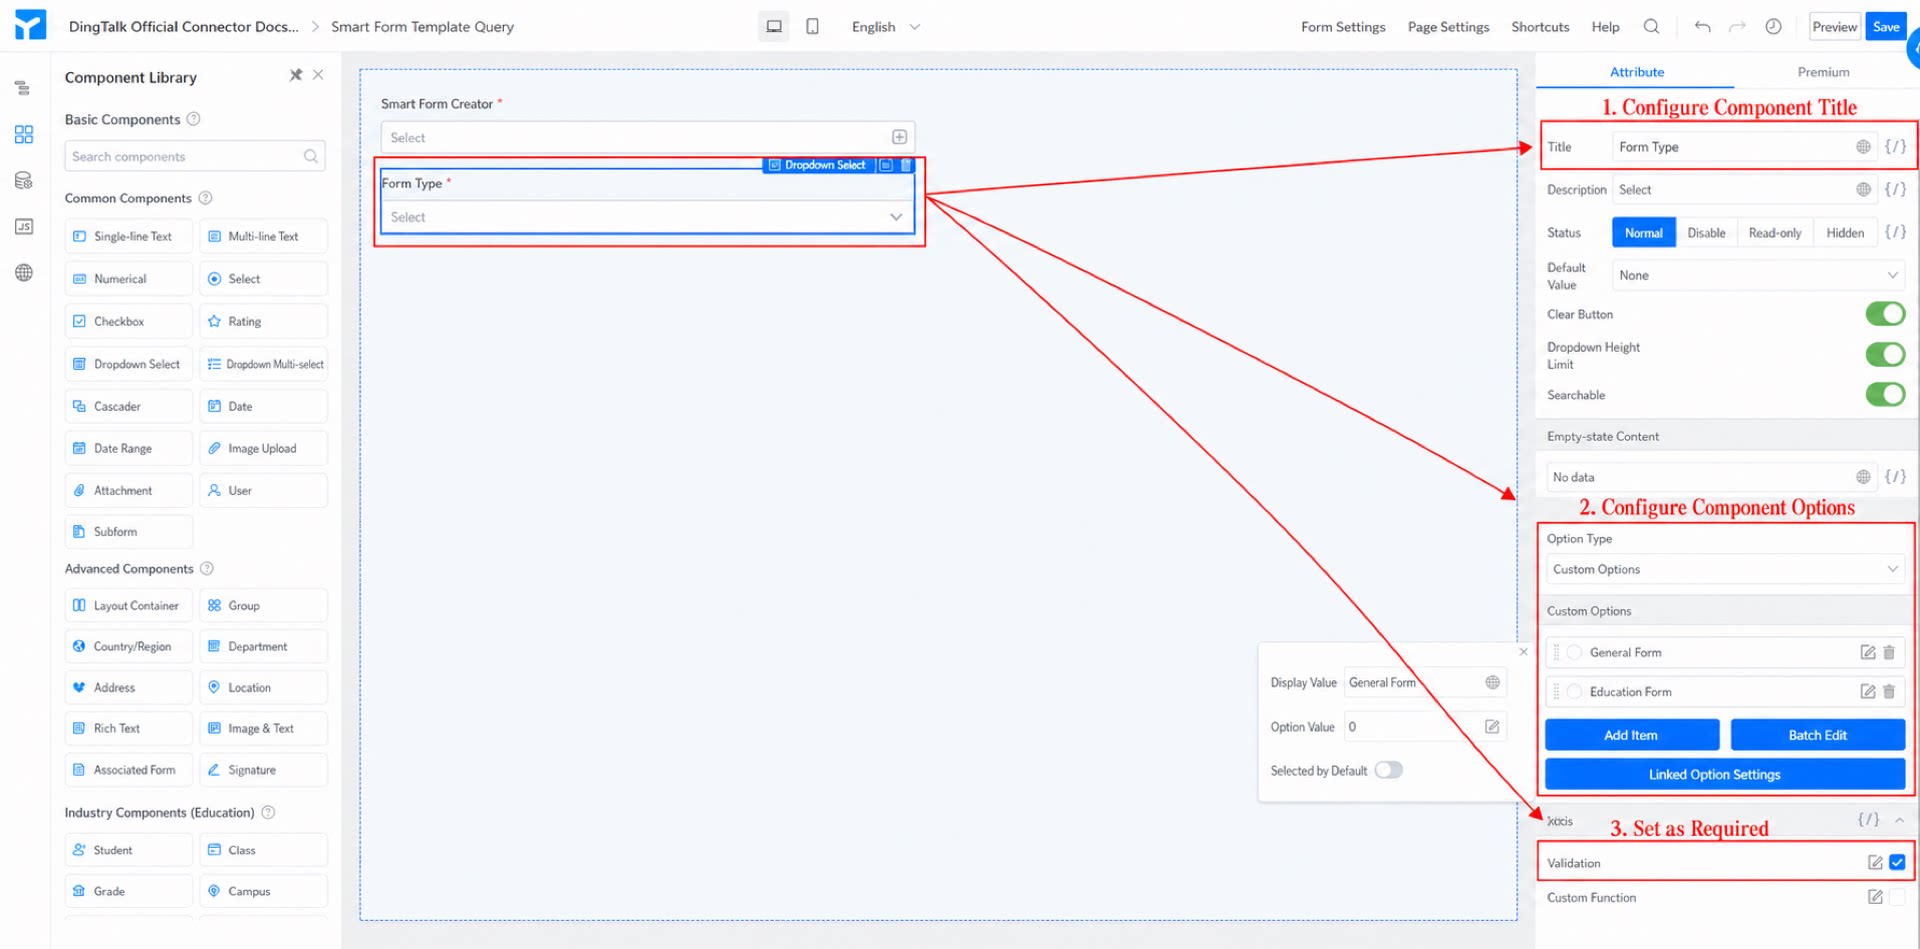
- Add a dropdown select component. Add two custom options: display value “General form” with option value “0”, and display value “Education form” with option value “1”. Set it as required. (See Figure 2.1-2.)
- Click Save in the upper-right corner.
2.2 Step 2: Create the “Query Result Record Table” Form
This form receives the results returned by the connector and displays them after processing. Steps:- Create a form named “Query result record table”.
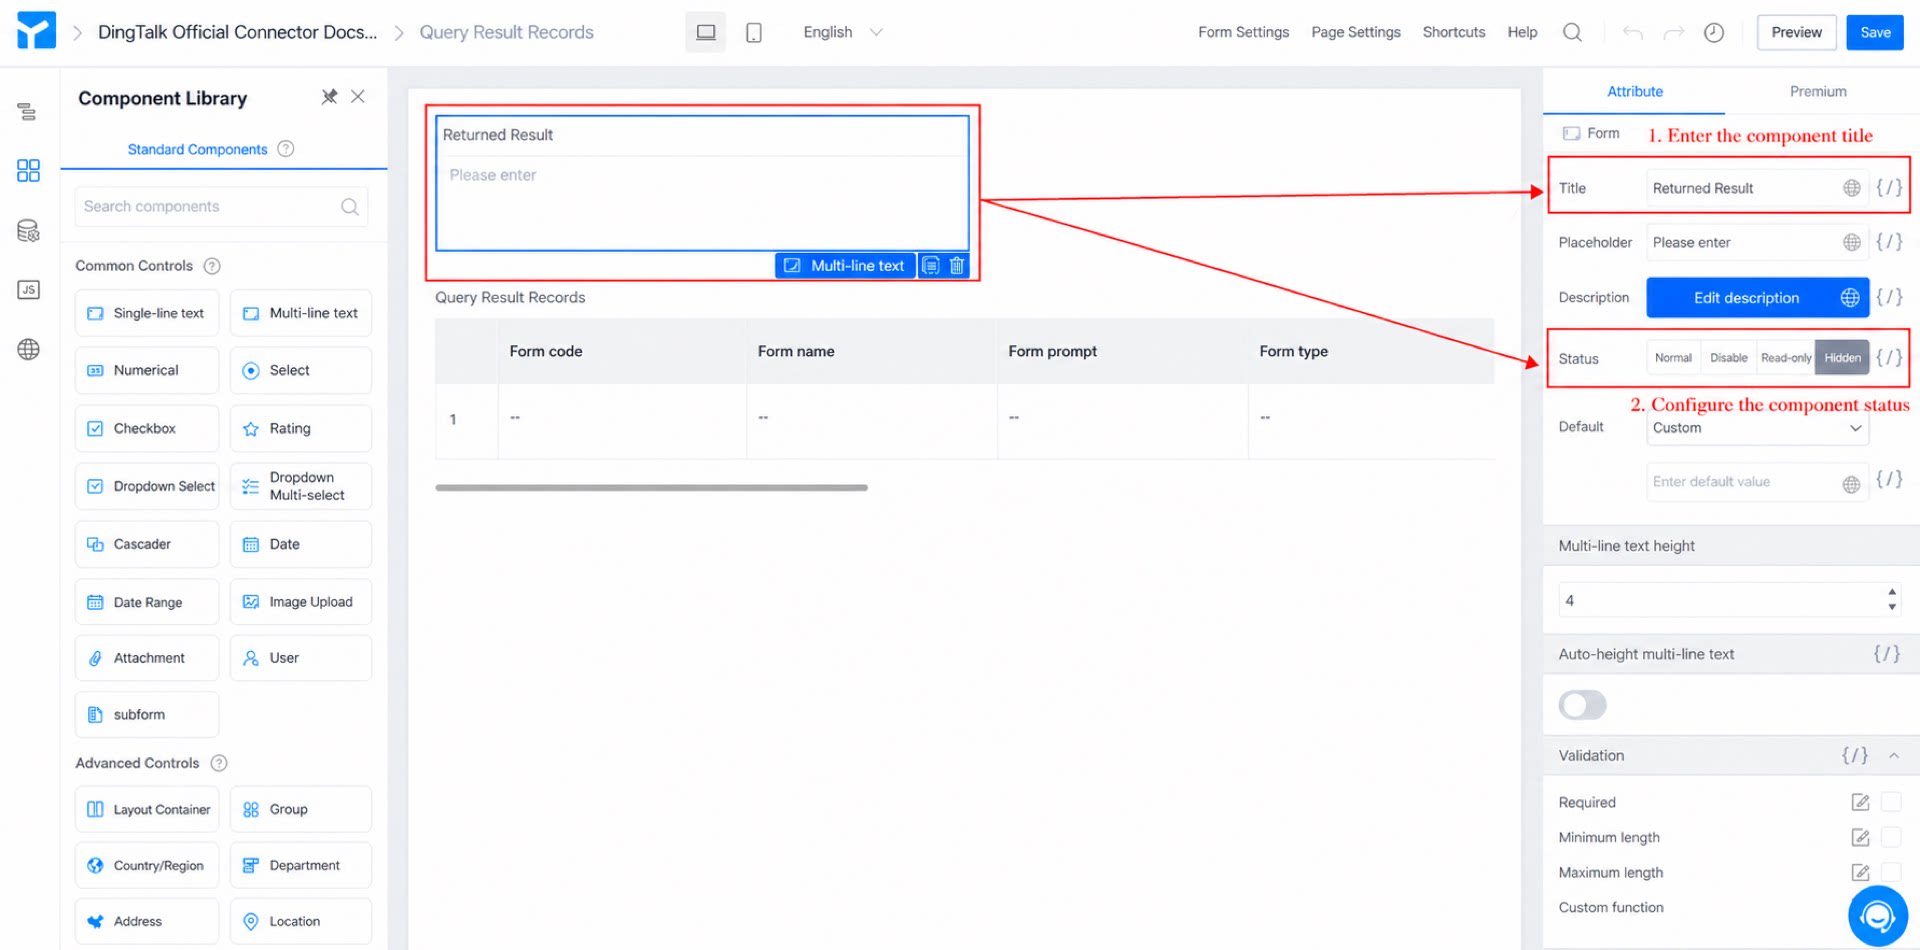
- Add a multi-line text component, name it “Returned result”, and set its status to Hidden. (See Figure 2.2-1.)
- Add a subform, name it “Query result record”, and add 10 single-line text components inside the subform, named “Form code”, “Form name”, “Form tips”, “Form type”, “Form cycle”, “Form deadline”, “Created time”, “Form category”, “Form terminated”, and “Form creator”. Set the status of each text component to Read-only. (See Figure 2.2-2.)
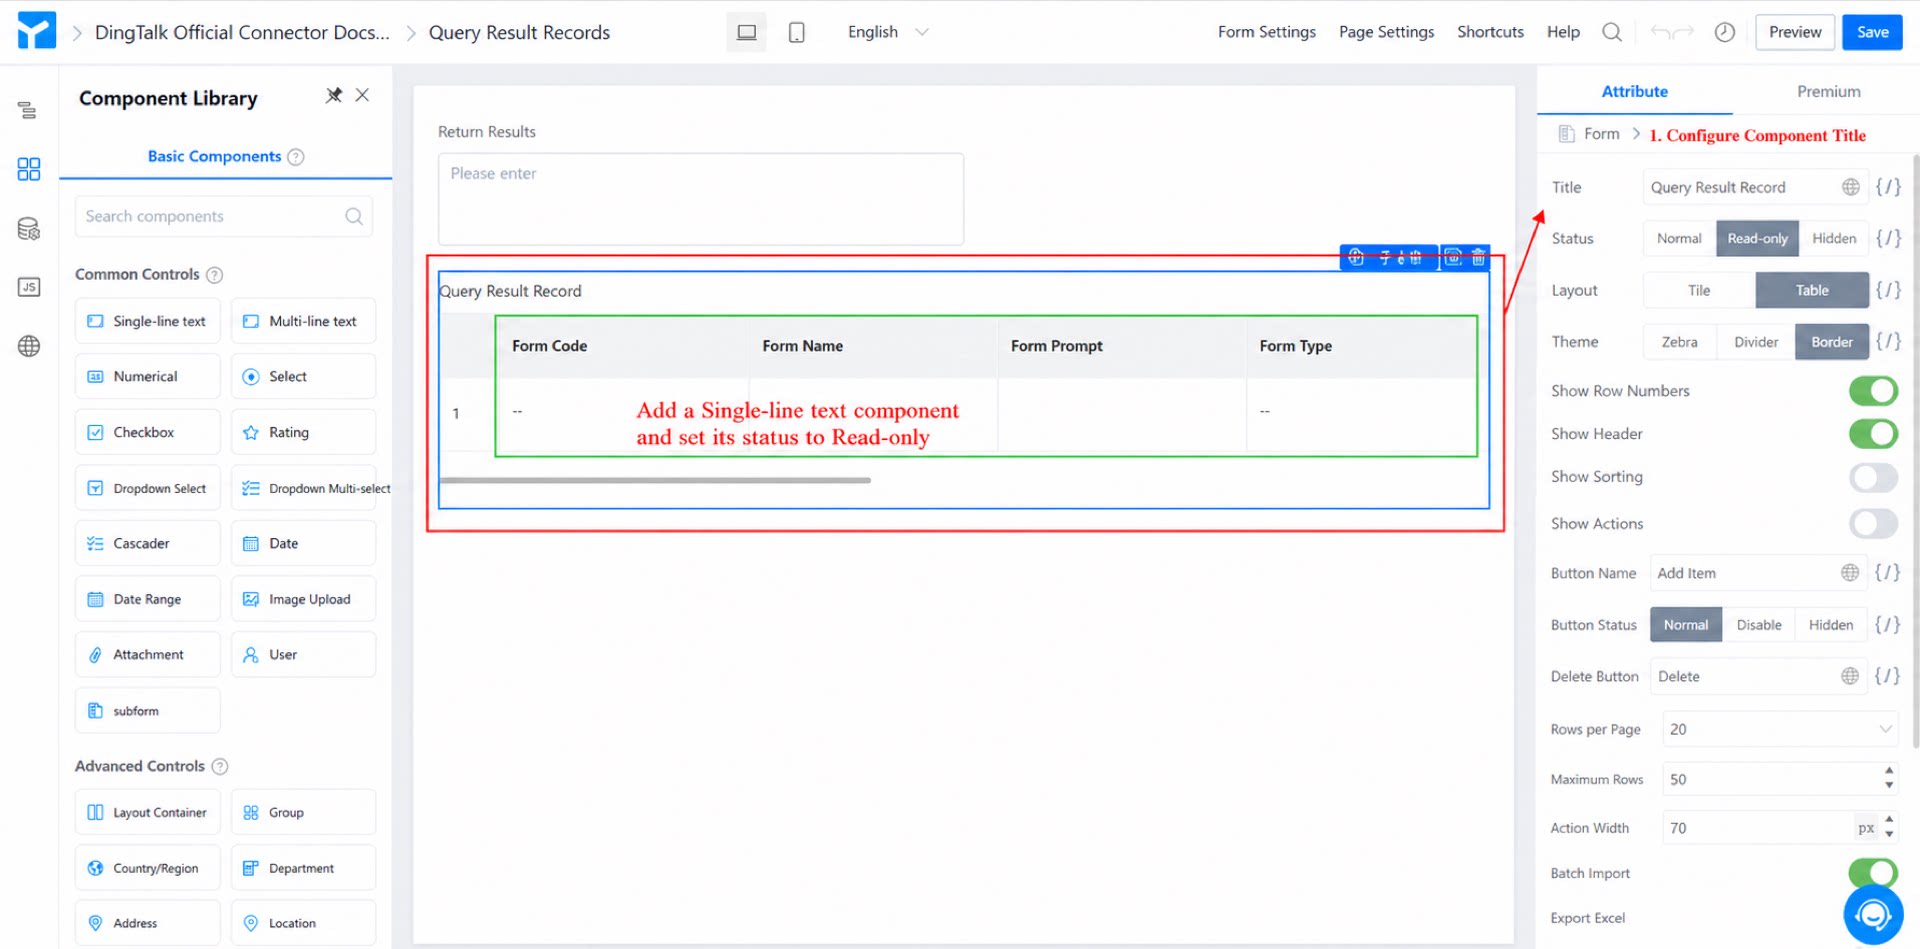
- Click Save in the upper-right corner.
2.3 Step 3: Create and Configure the Connector
For an overview of connector capabilities, see Integration & Automation - Connector.
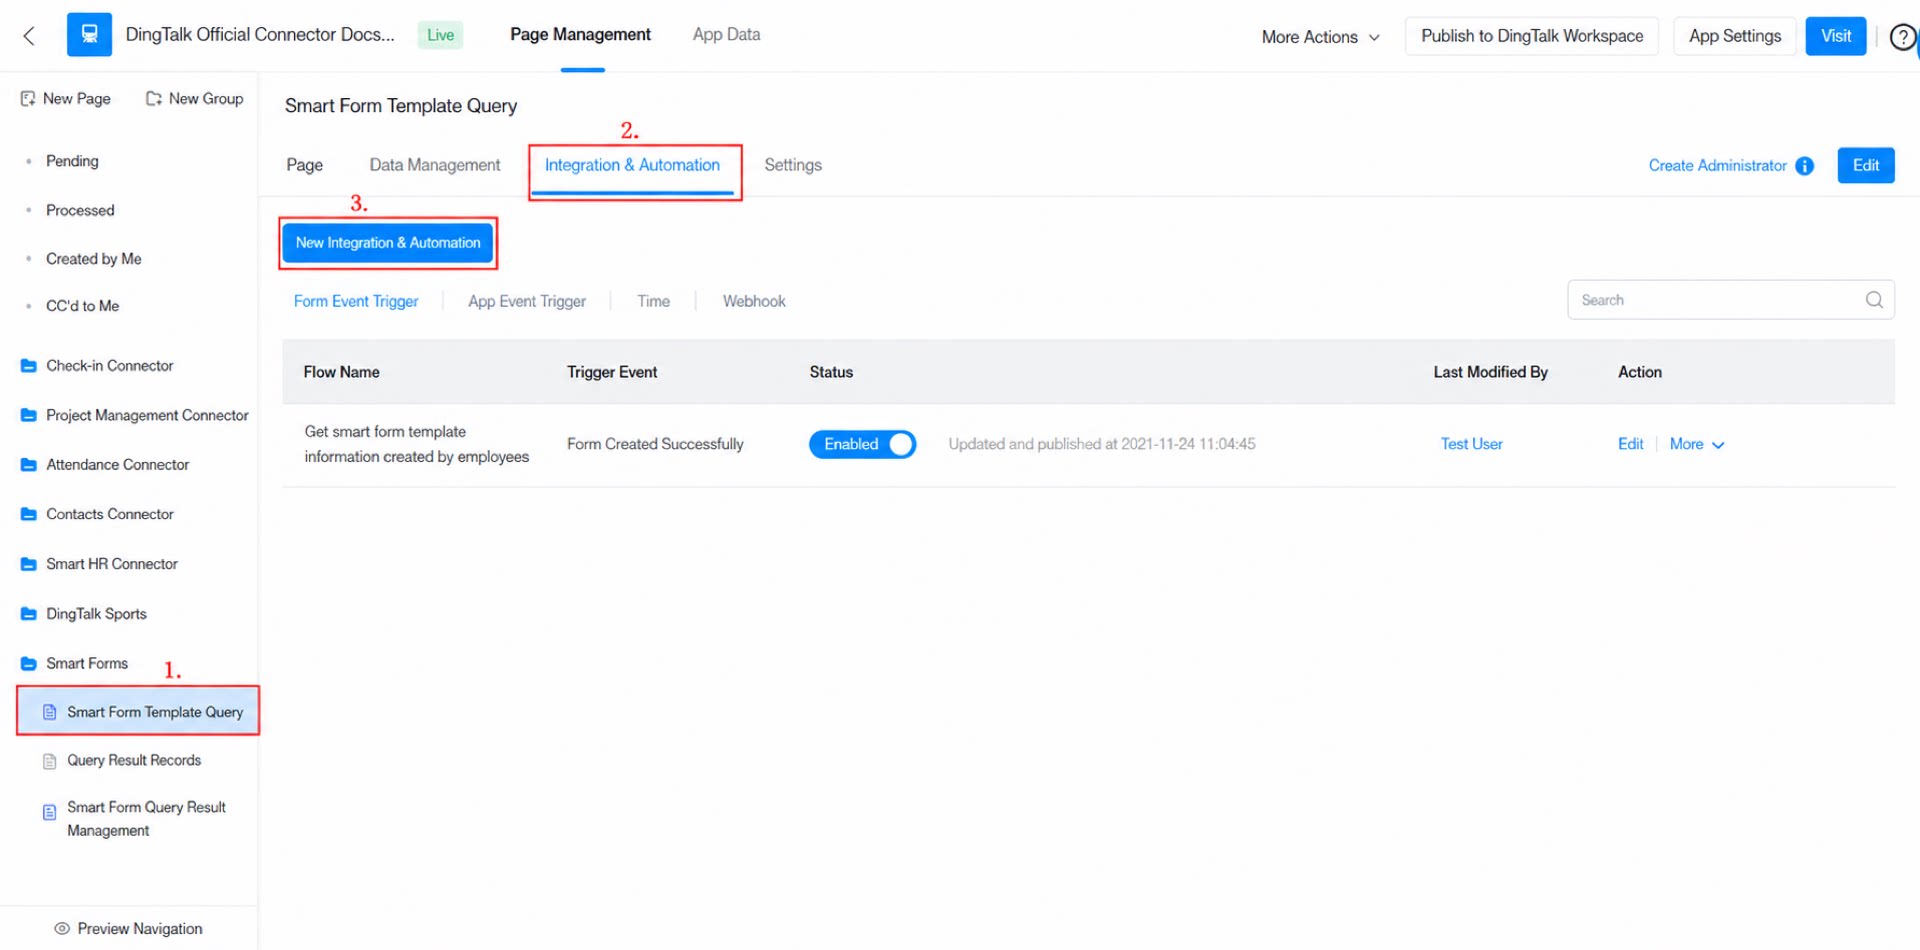
- On the admin console, select the “Smart Form template query” form, click Integration & Automation, and then click Create Integration & Automation. (See Figure 2.3-1.)
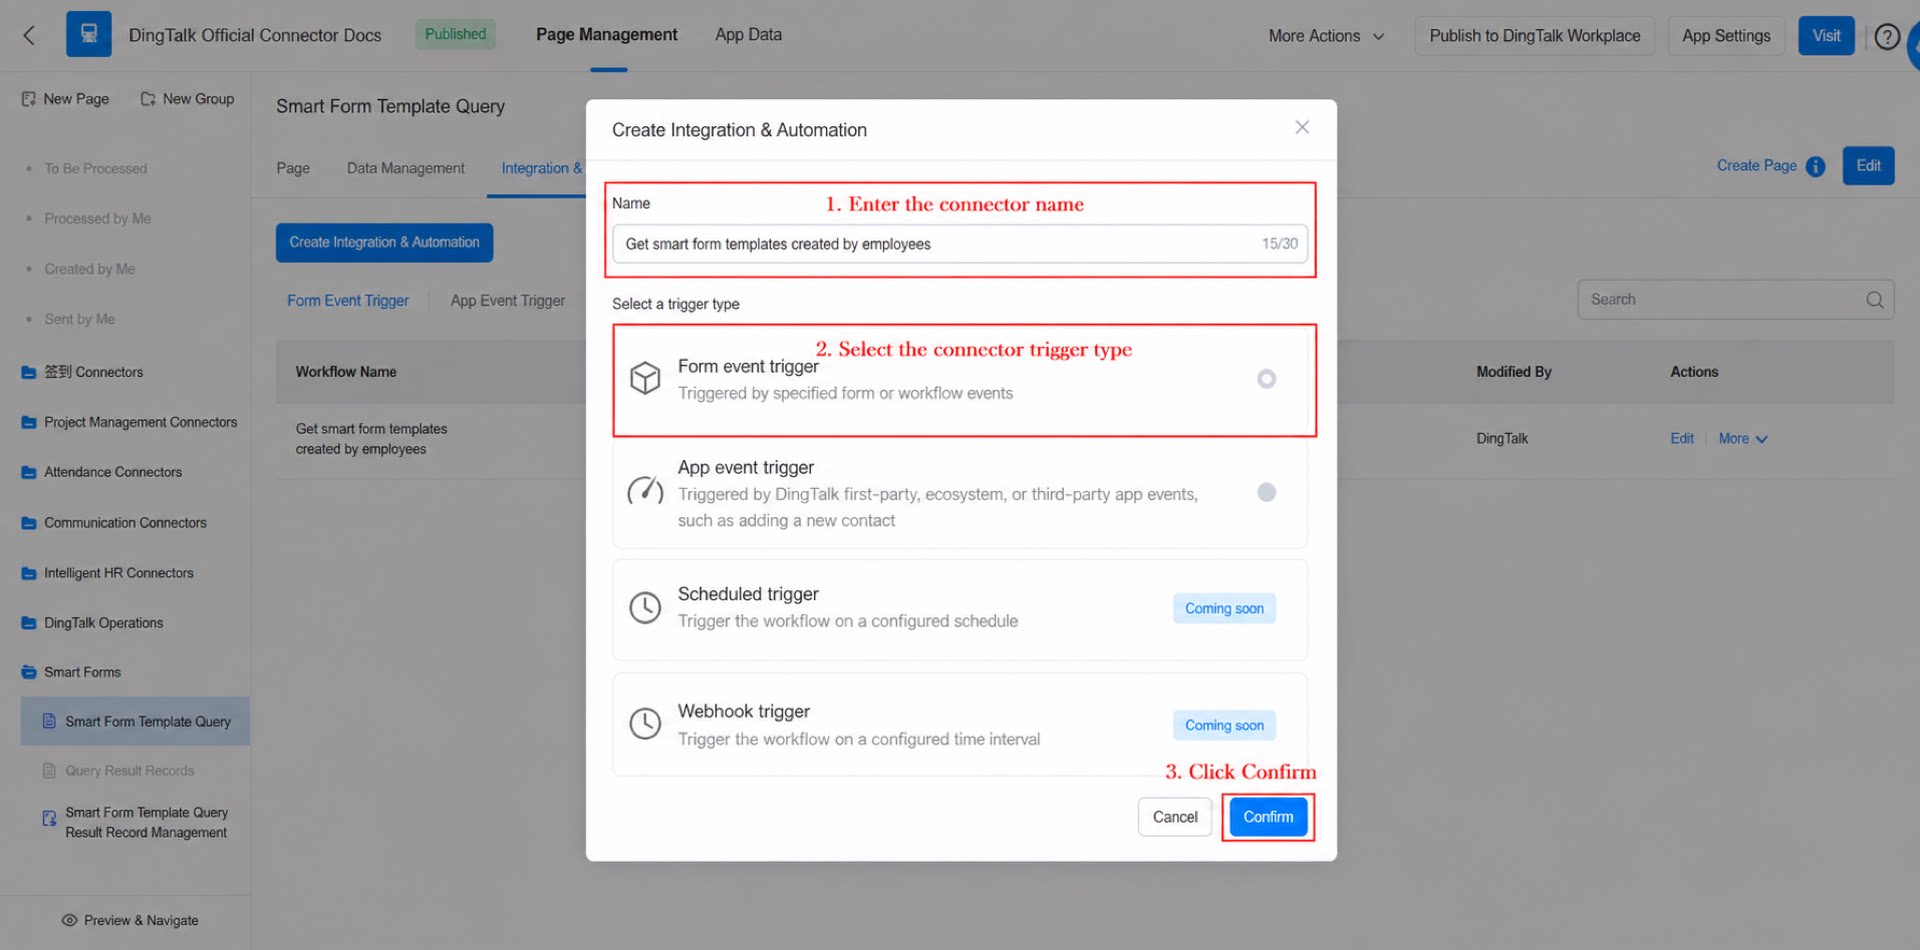
- Name the connector “Get Smart Form templates created by an employee”, select Form event trigger, and click Confirm.
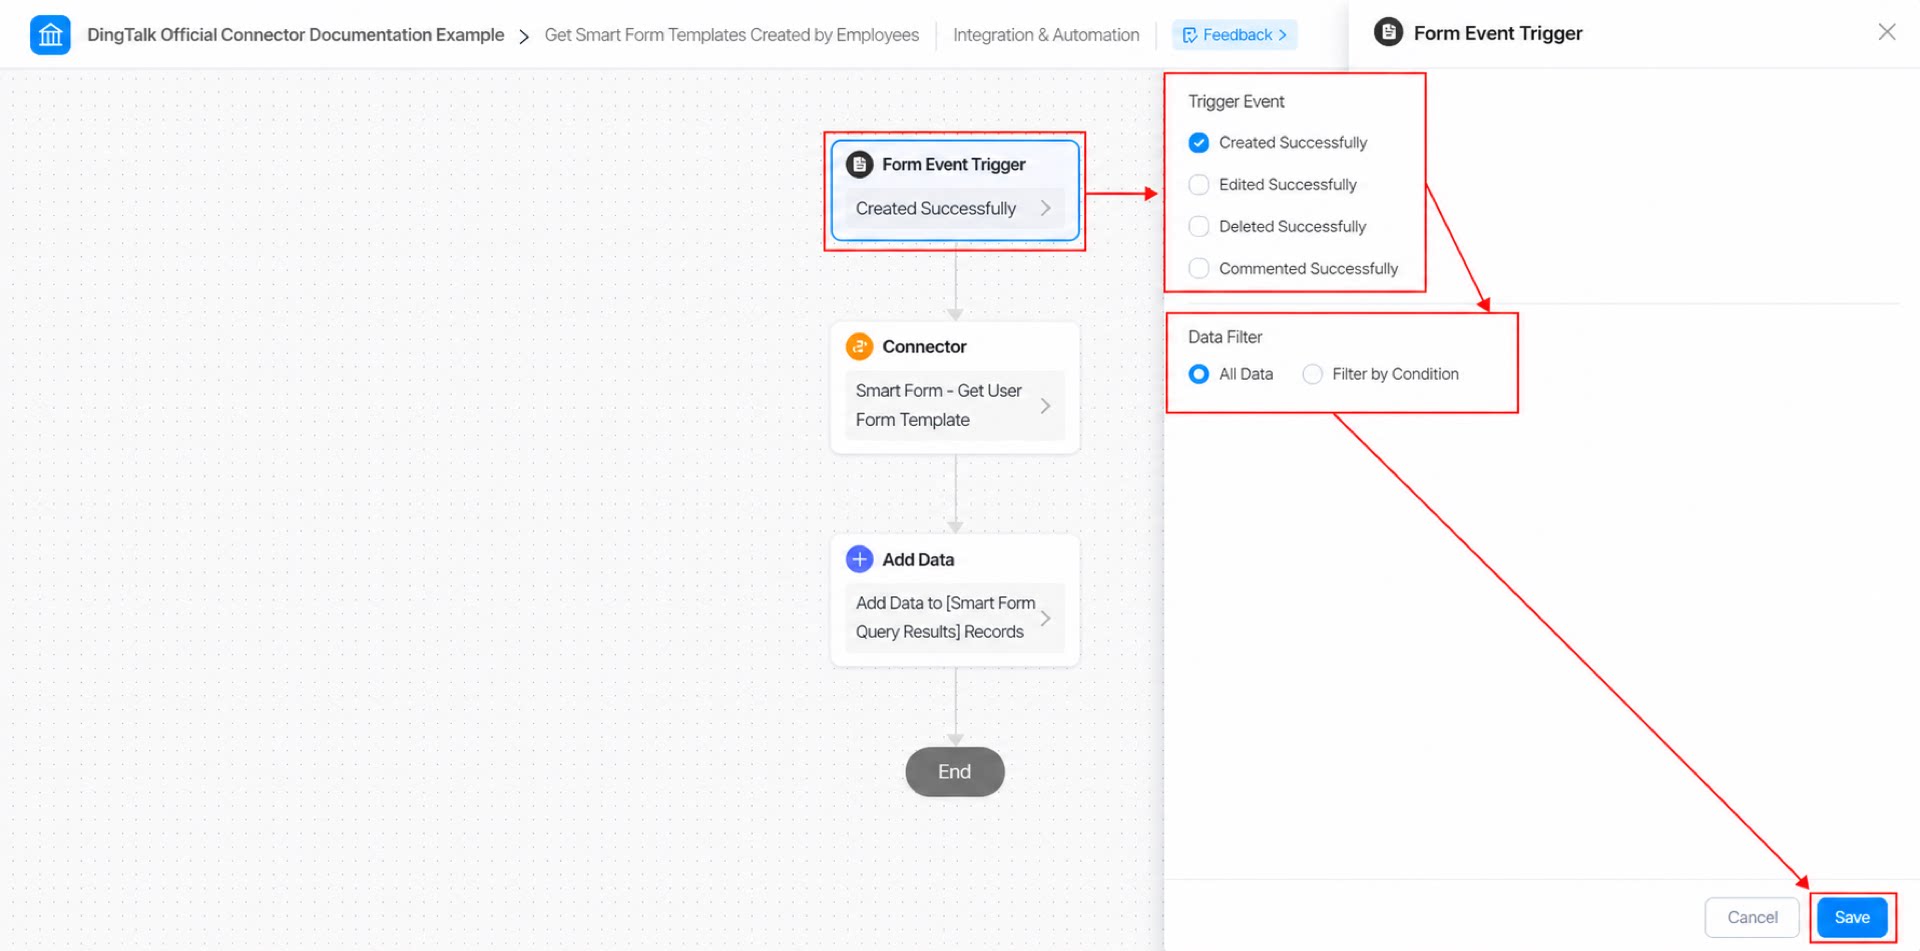
- Configure the form event trigger: set the trigger event to Created successfully, set the data filter to All data, and click Save.
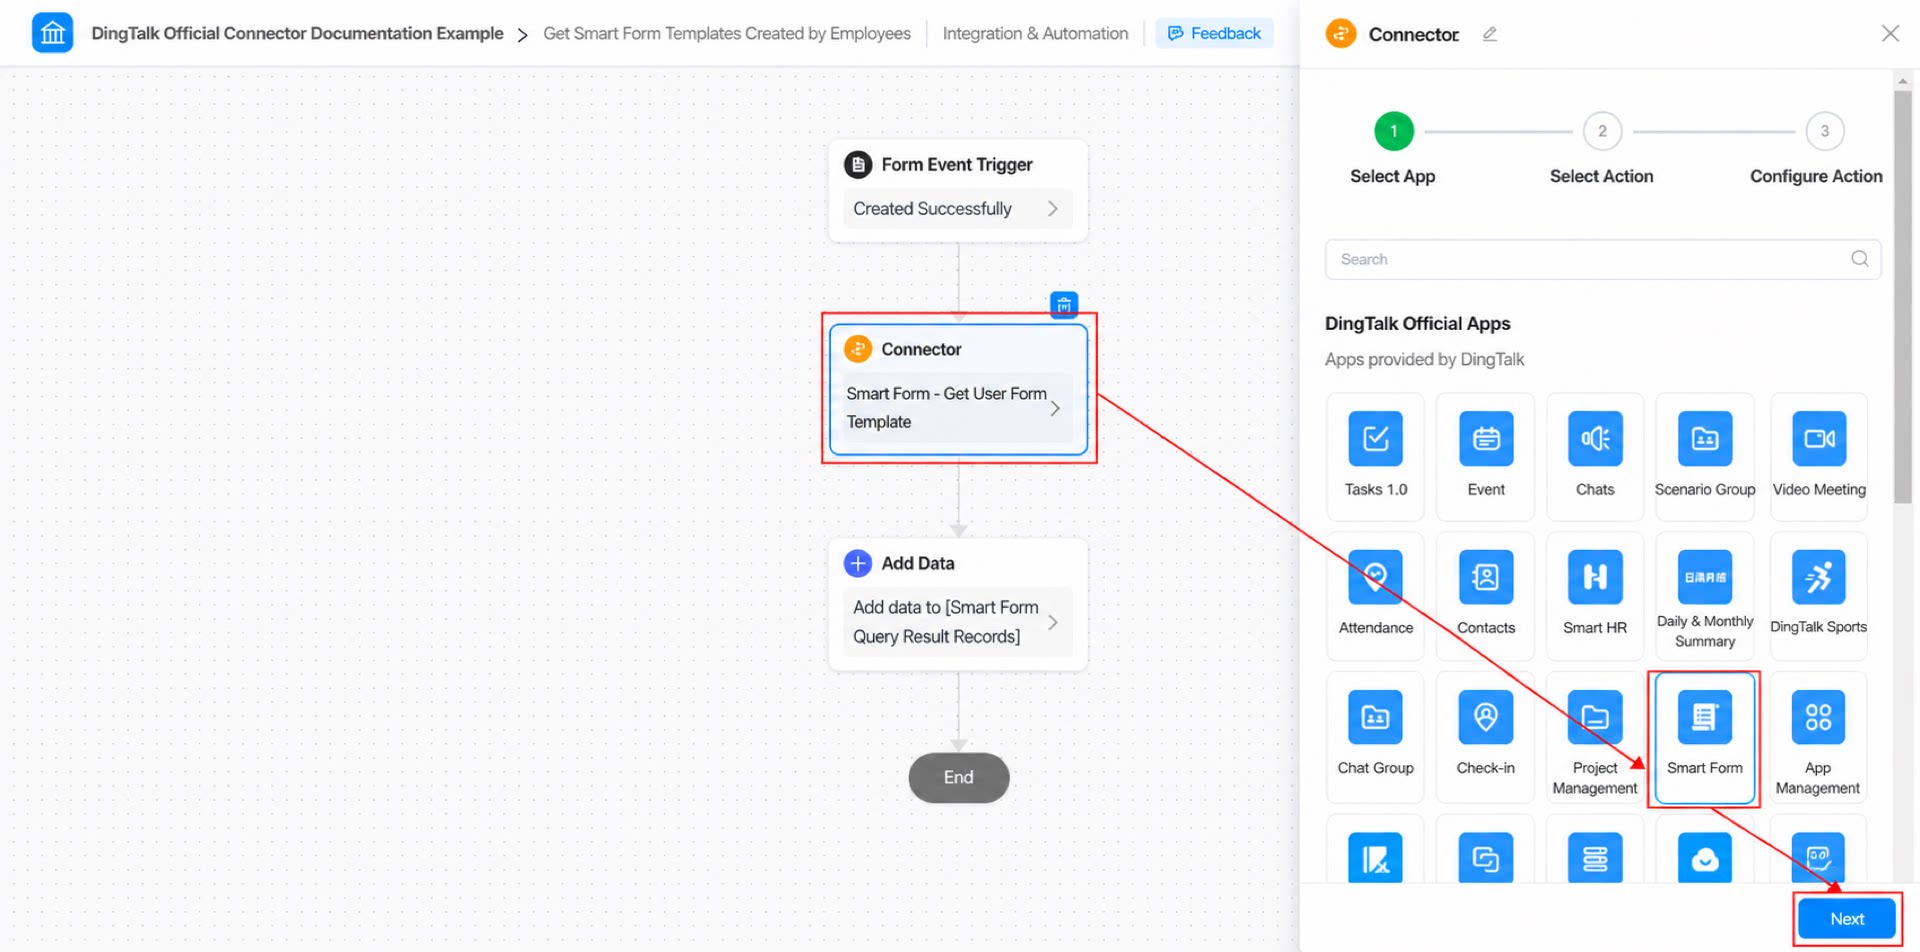
- Select the connector app: choose the Smart Form app, and click Next. (See Figure 2.3-4.)
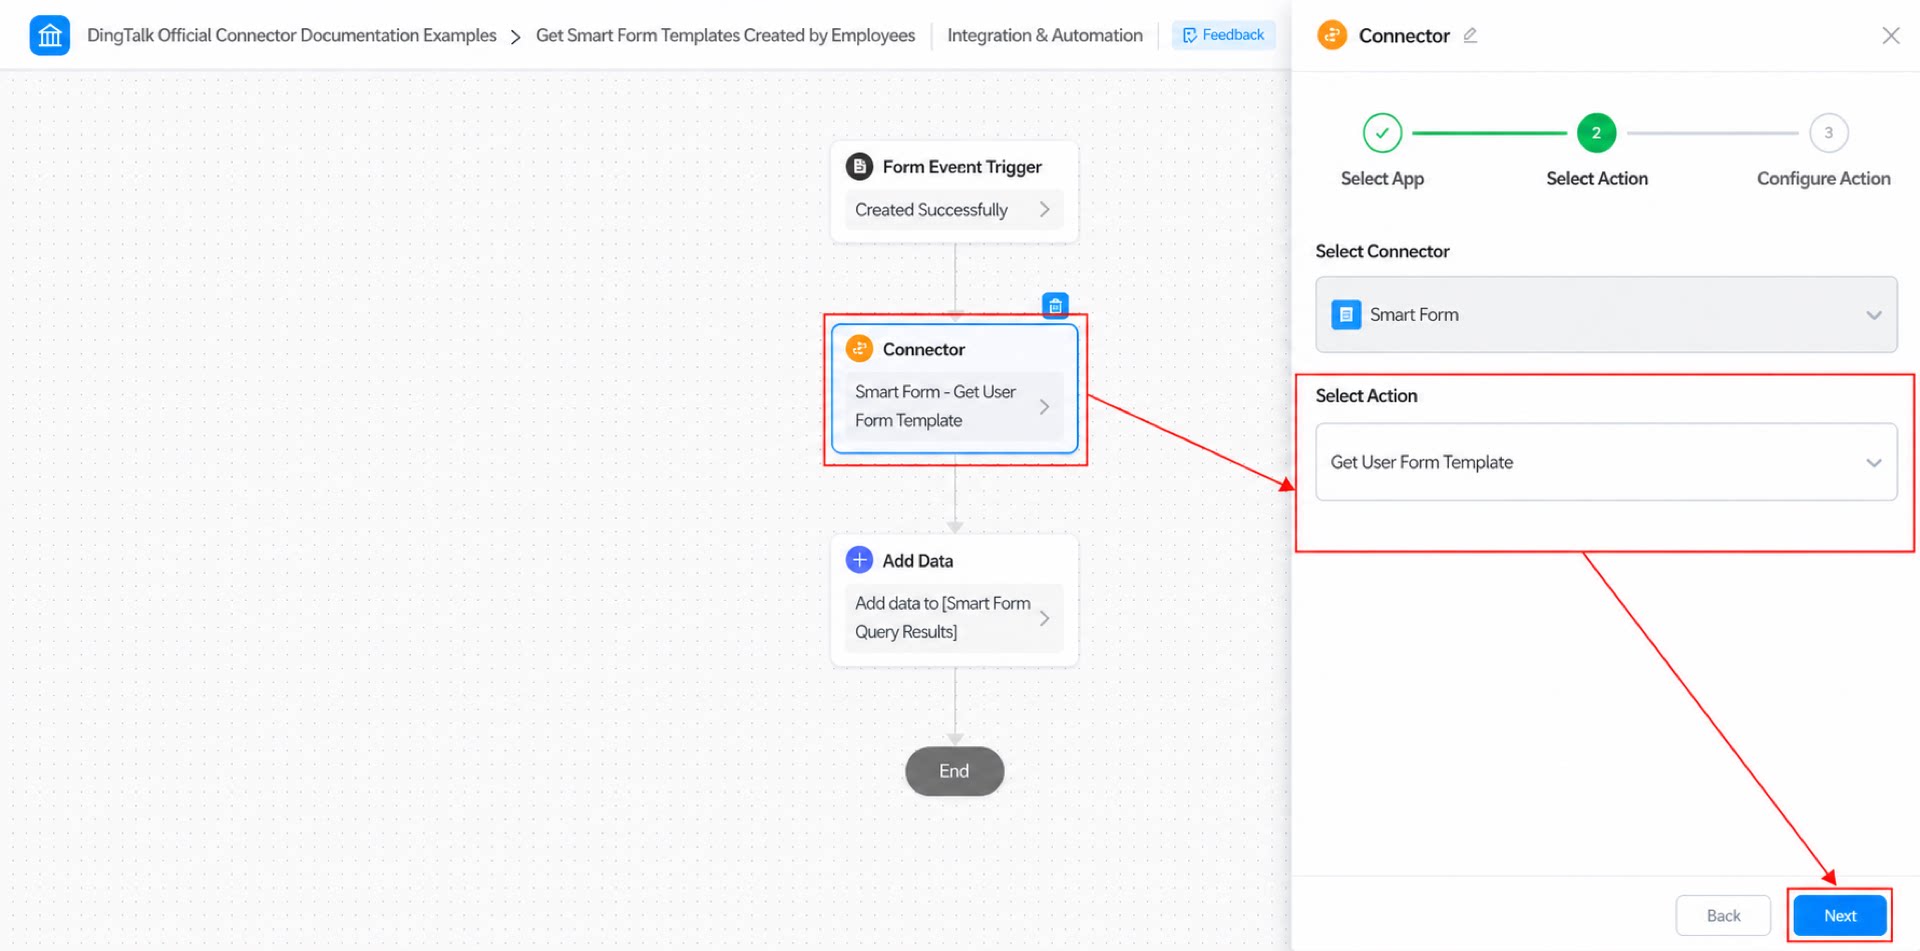
- Select the connector action: choose Get user form templates, and click Next. (See Figure 2.3-5.)
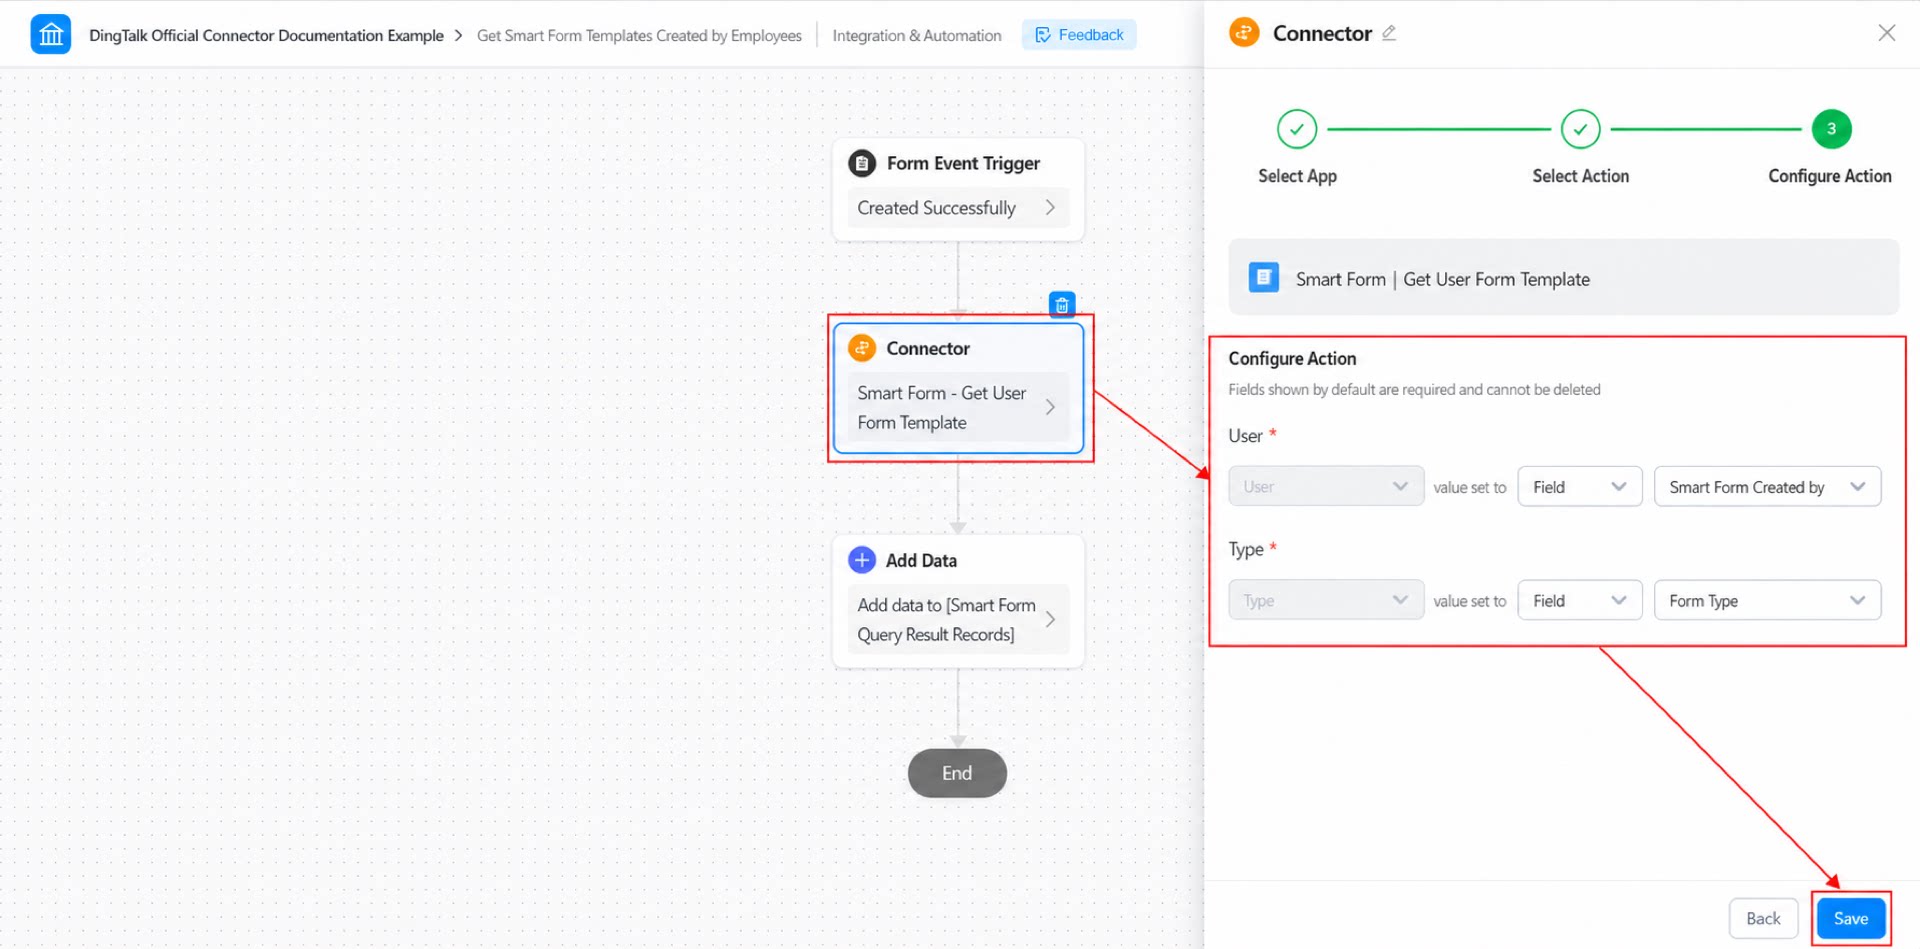
- Configure the connector action and click Save. (See Figure 2.3-6.)
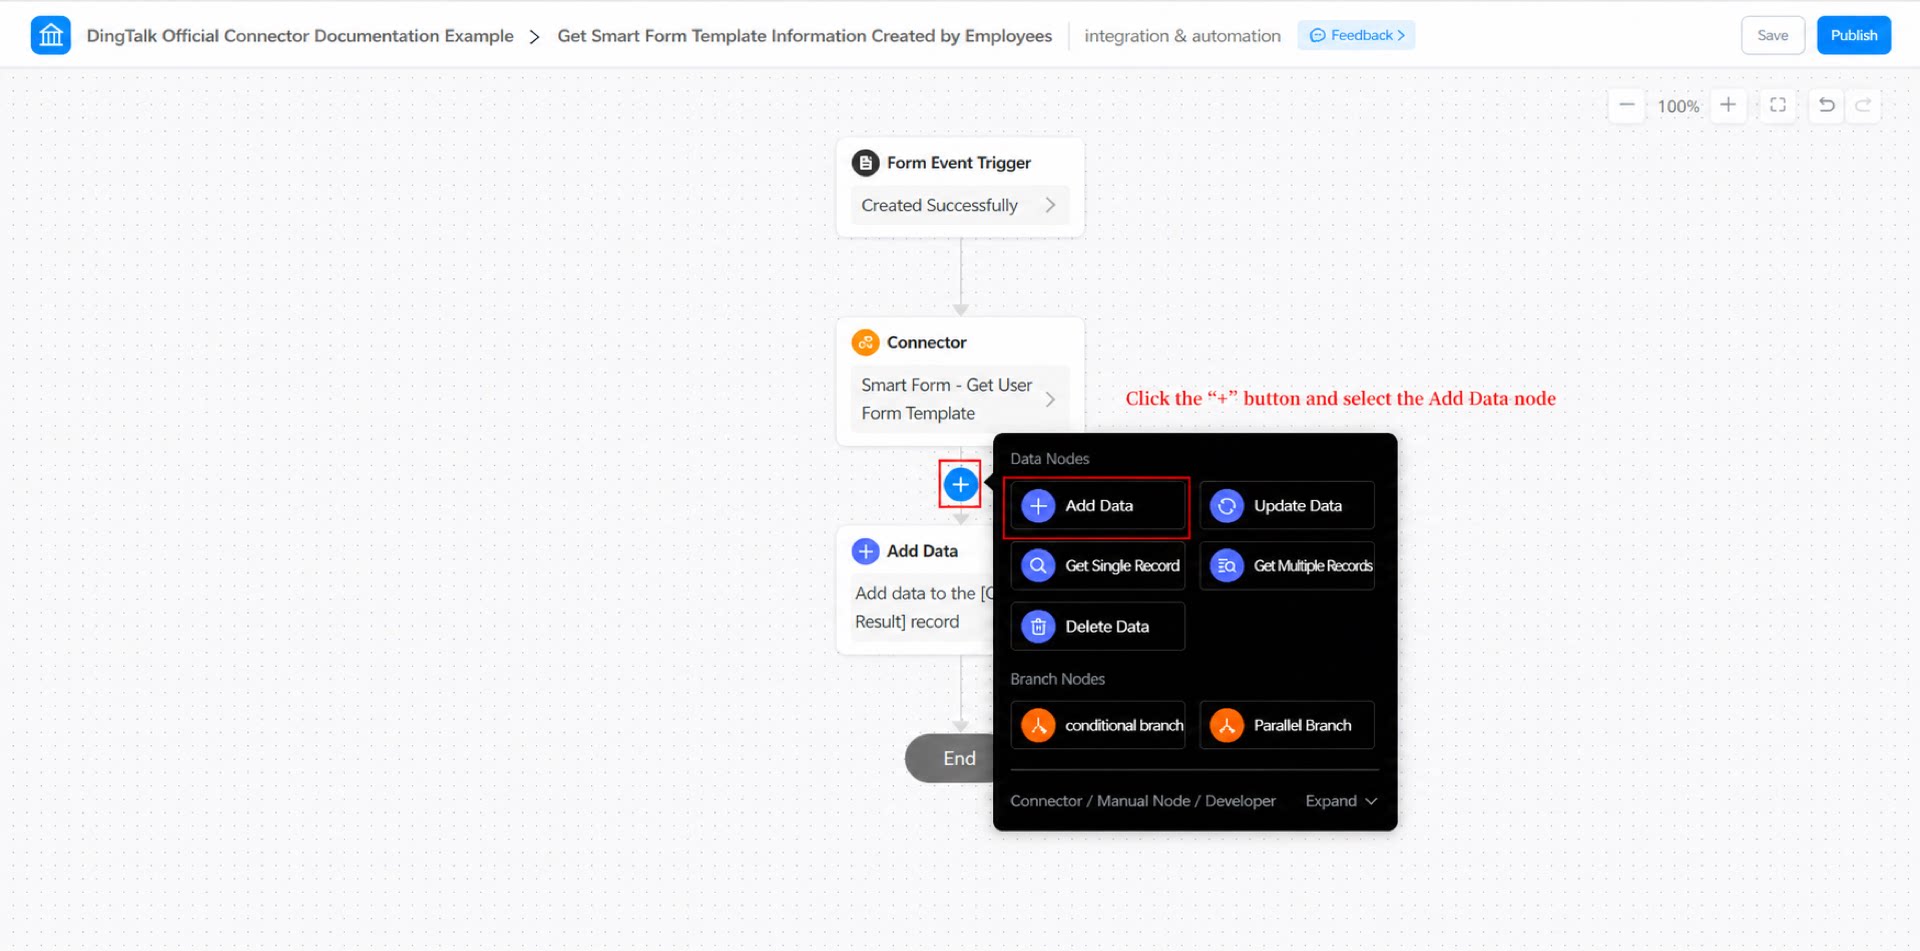
- Add a Create data node below the connector node. (See Figure 2.3-7.)
- Configure the Create data node and click Save. (See Figure 2.3-8.)
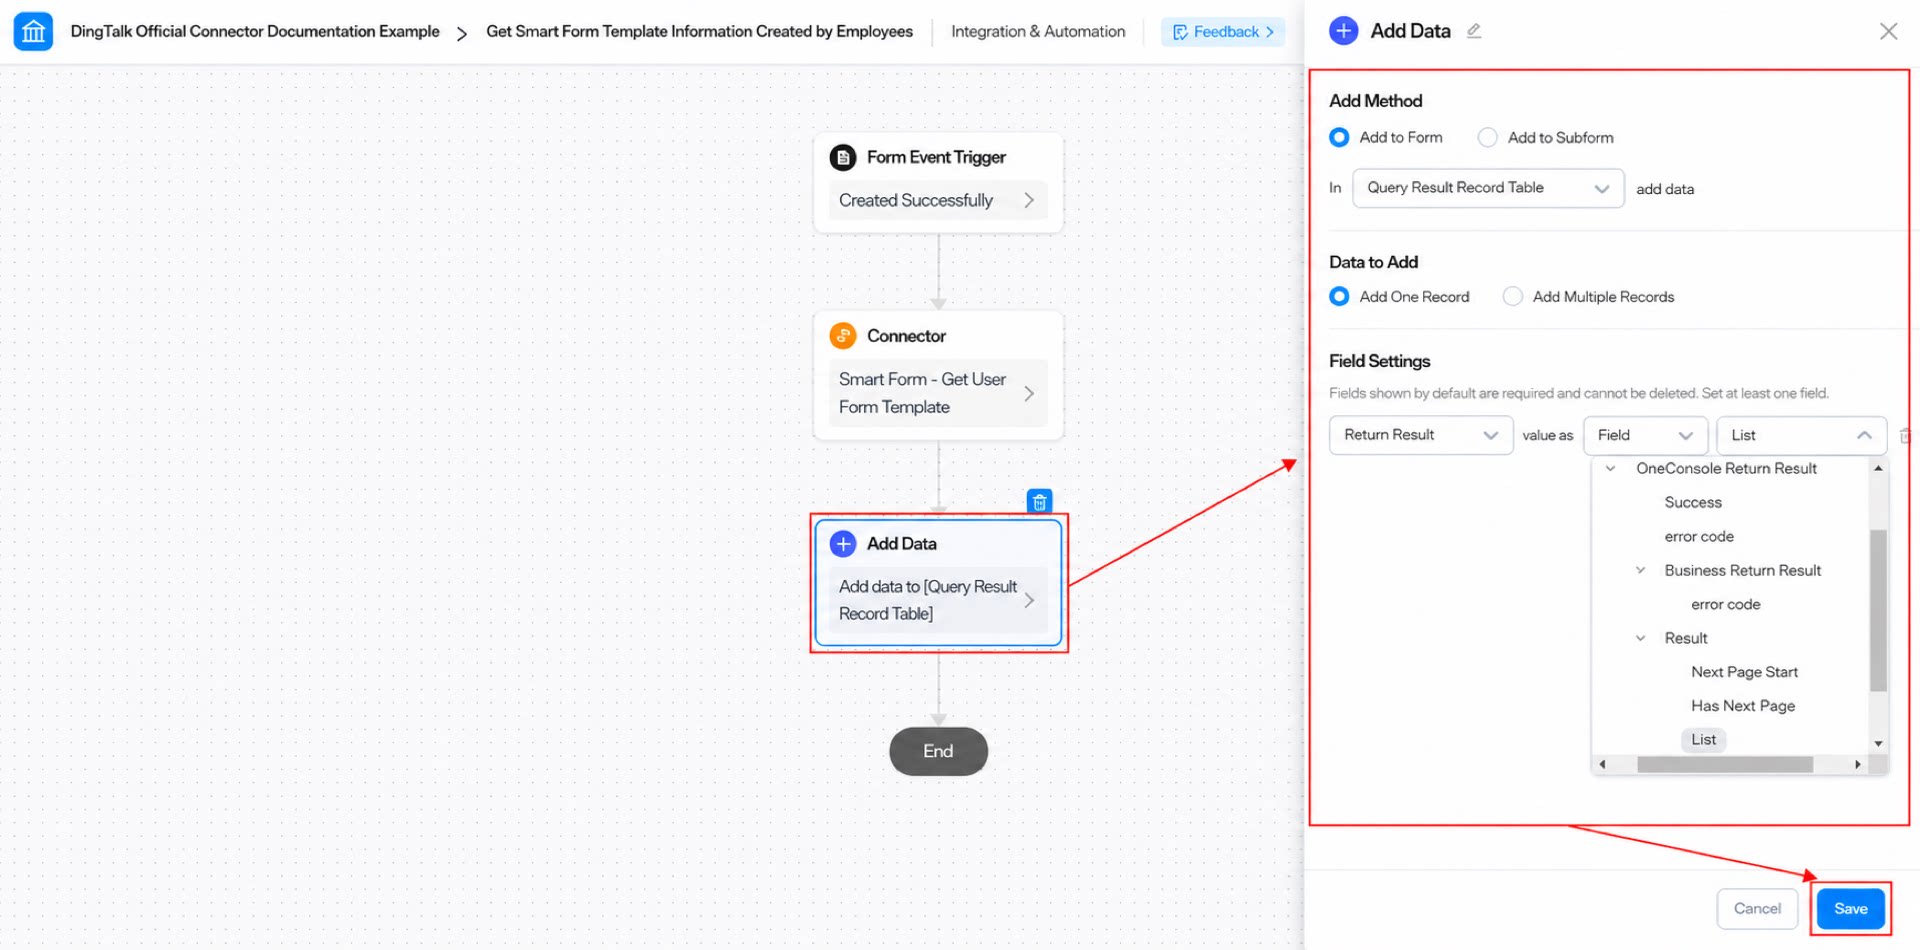
- Click Save in the upper-right corner, and then click Publish.
2.4 Step 4: Configure the “Query Result Record Table”
The previous steps set up the connector call and allow its returned data to be received. Next, process the returned data and display the processed values in the components inside the “Query result record” subform. Steps: On the form editing page, copy the following code into thedidMount function in the JS Action Panel on the left side of the page.
(See Figure 2.4-1.)
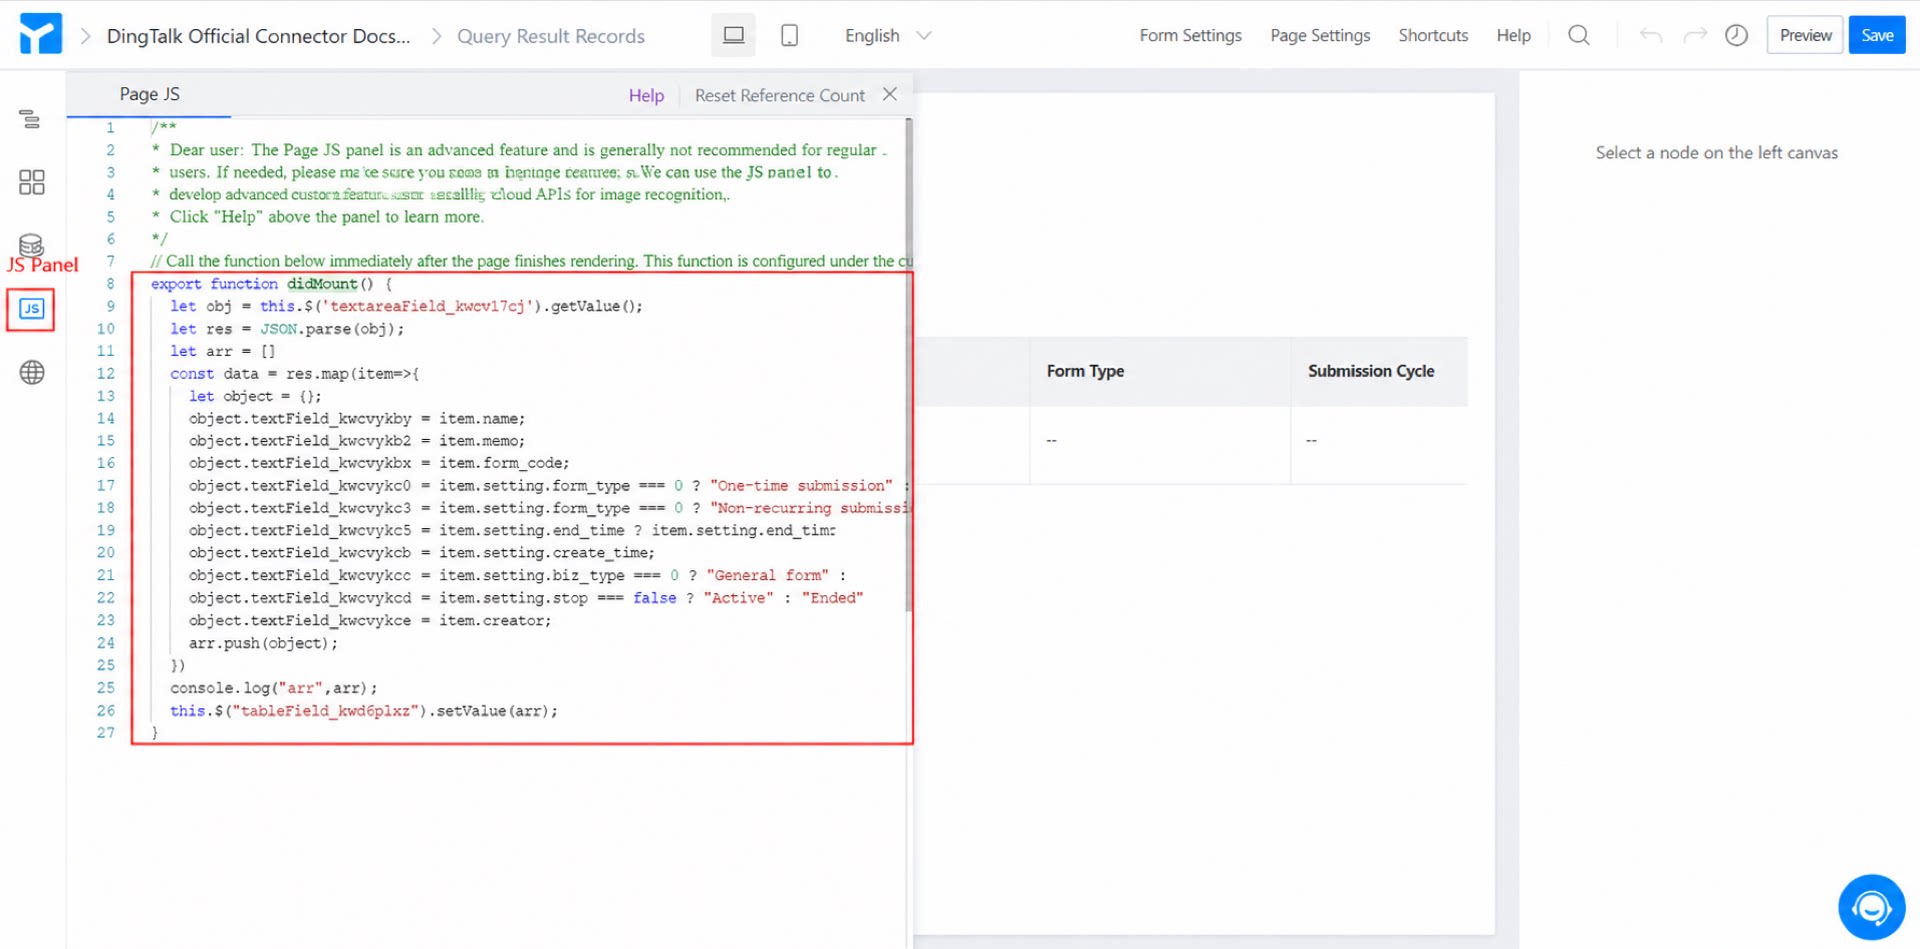
You can paste the code below directly into the JS panel. Note: you must replace the component unique identifiers.
2.5 Step 5: Submit the Form Data
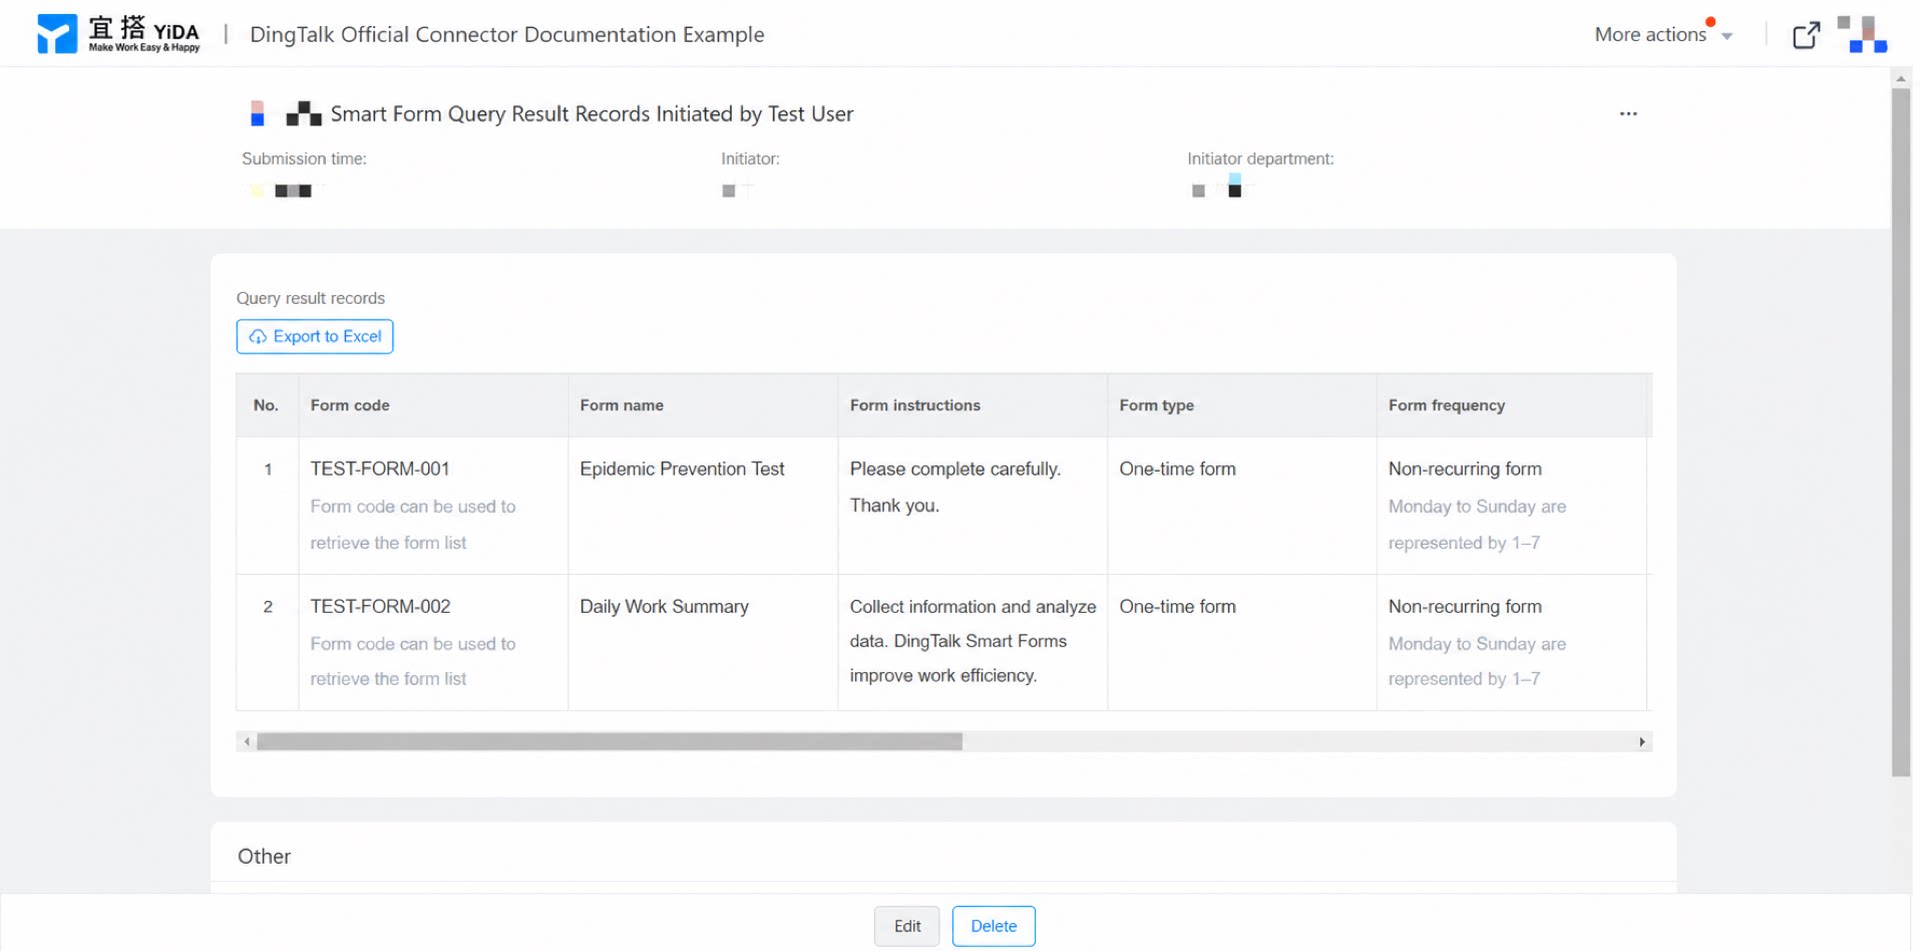
Fill in and submit the “Smart Form template query” form to trigger the connector. Then open the data management page of the “Query result record table” form to view the data returned by the connector. (See Figure 2.5-1.)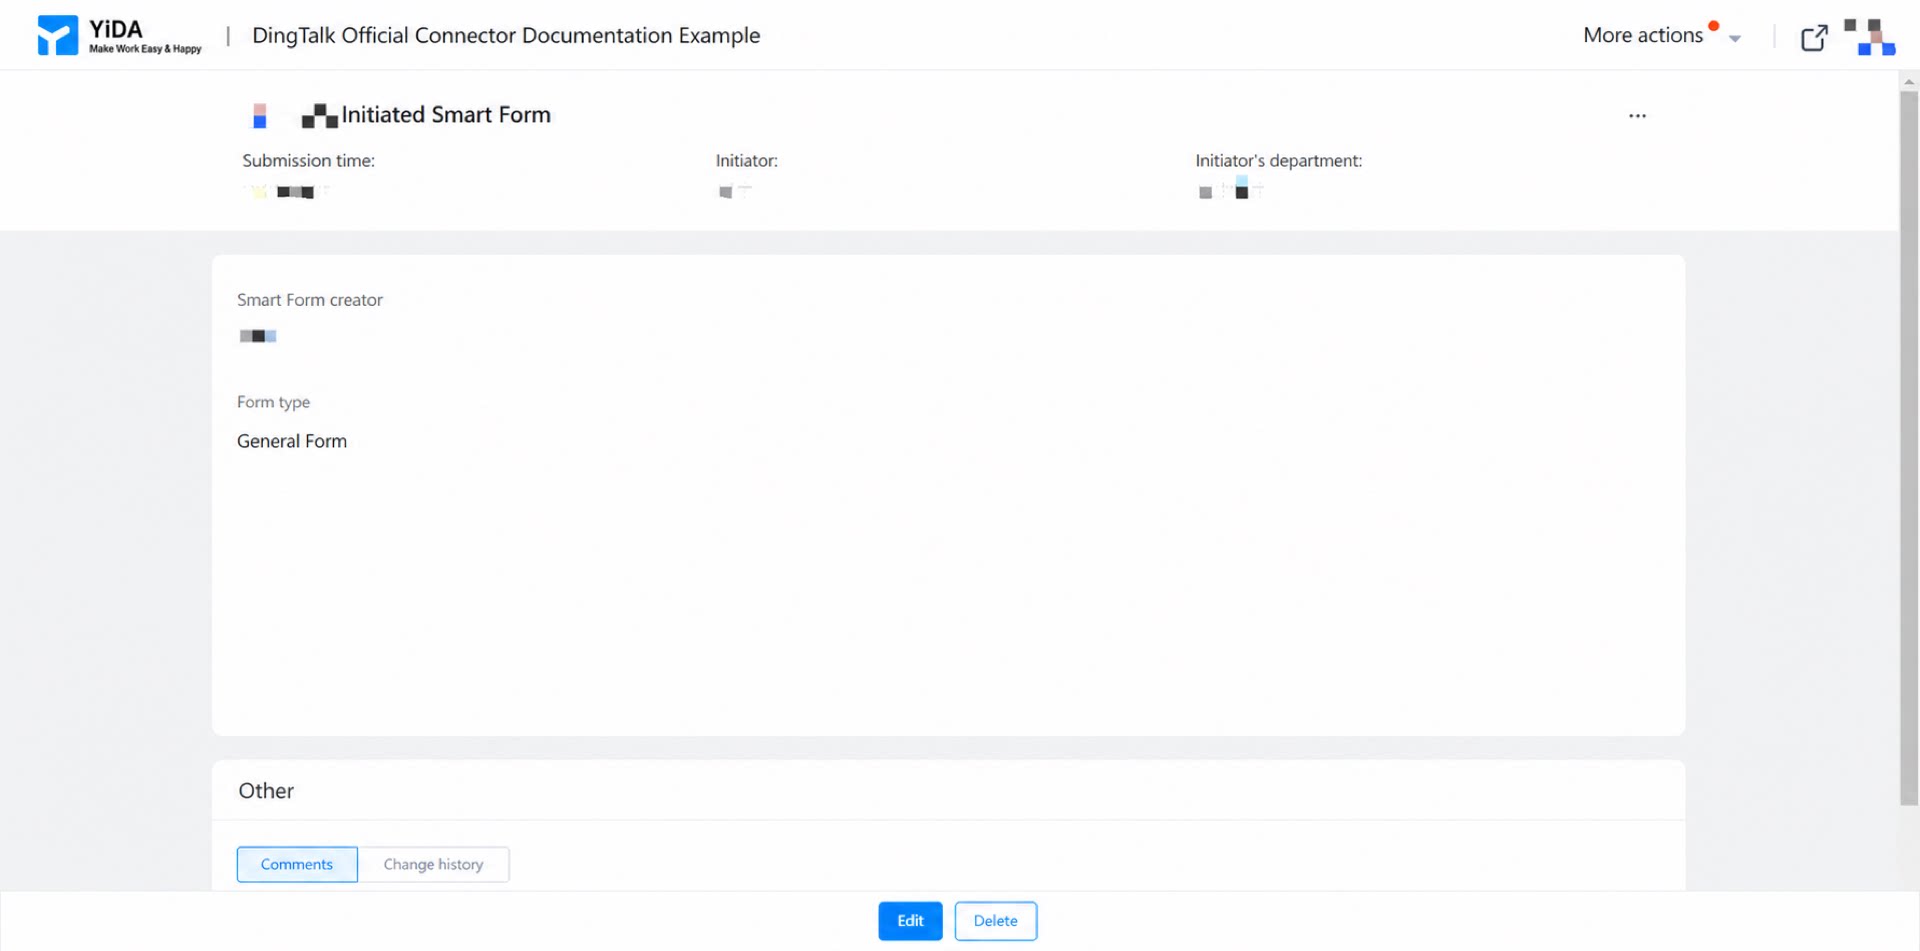
3. Result