This feature can only query data from before the current date.For example, if today is December 1, 2021, you can only query data prior to December 1.
1. Use Cases
With this connector, you can retrieve the following organizational group chat statistics:
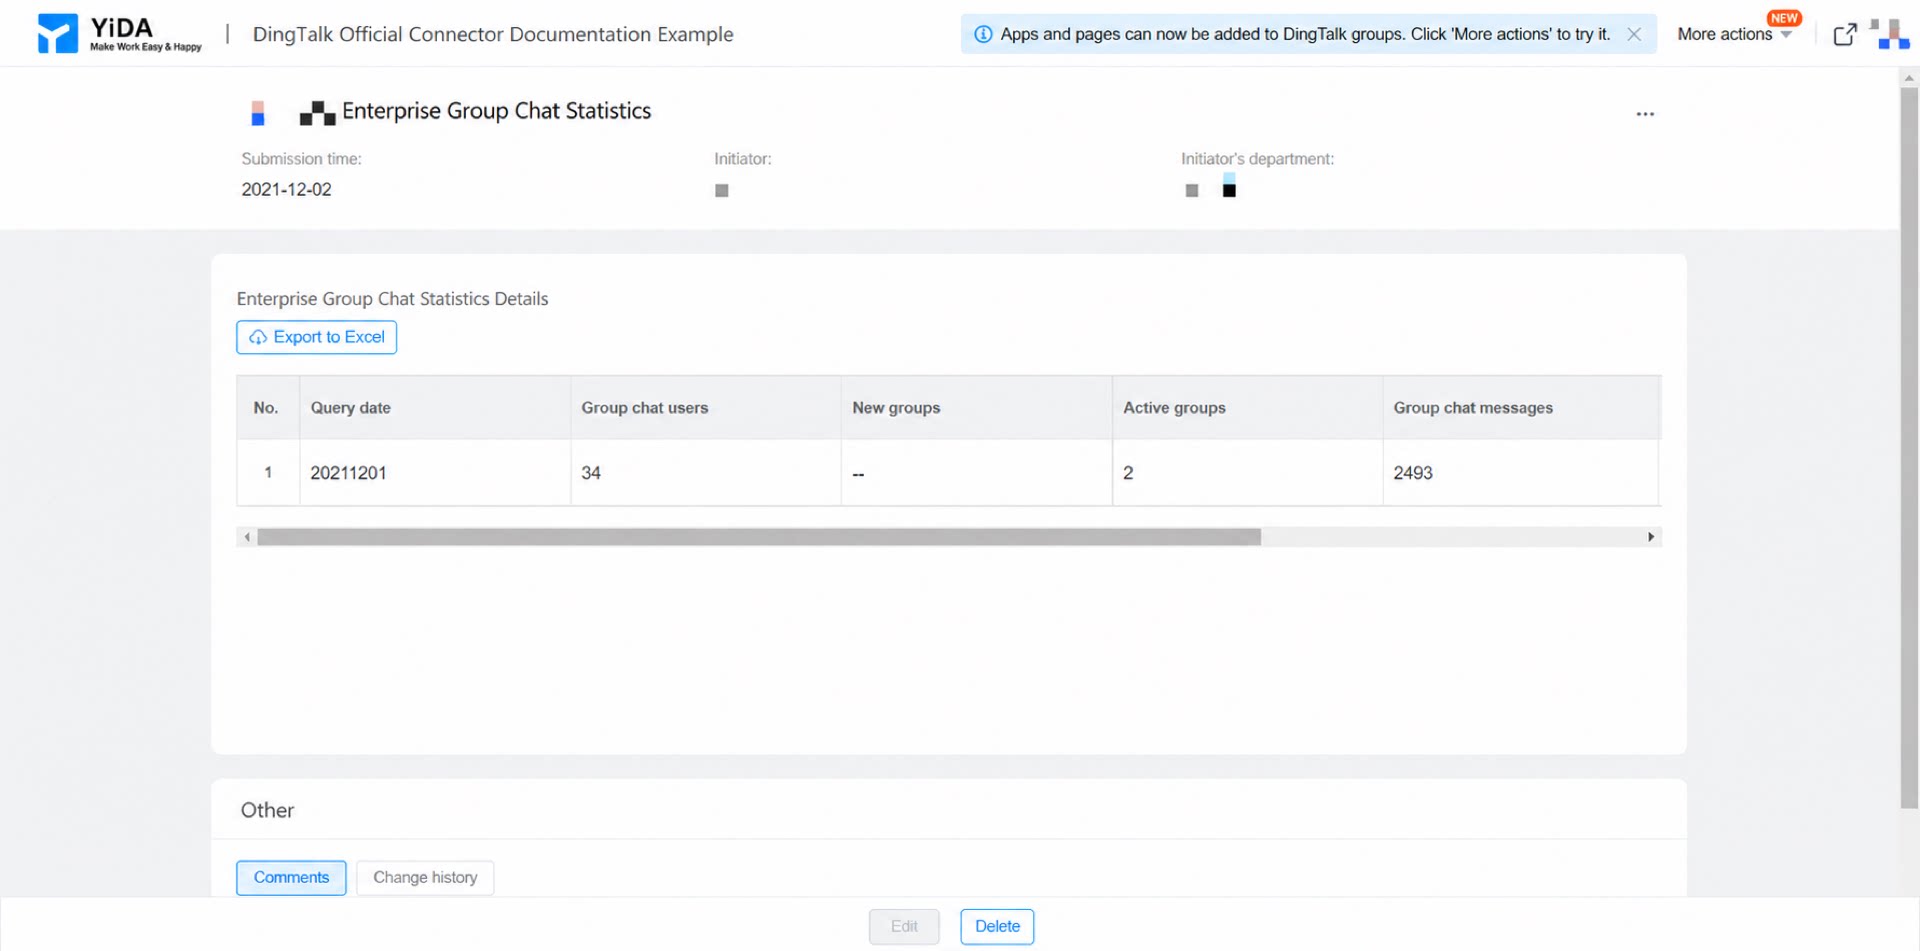
- Group chat users: the number of users who sent group chat messages within the organization.
- New groups: the number of new Internal Groups created within the organization.
- Active groups: the number of Internal Groups in which messages were sent within the organization.
- Group chat messages: the number of messages sent in Internal Groups within the organization.
- Internal Groups: the current number of Internal Groups within the organization.
- Department Chats: the current number of Department Chats.
2. Procedure
Create two forms — one to trigger the connector, and the other to receive and display the data returned by the connector.
Steps:
- Create a regular form and name it “Query organization group chat statistics”.
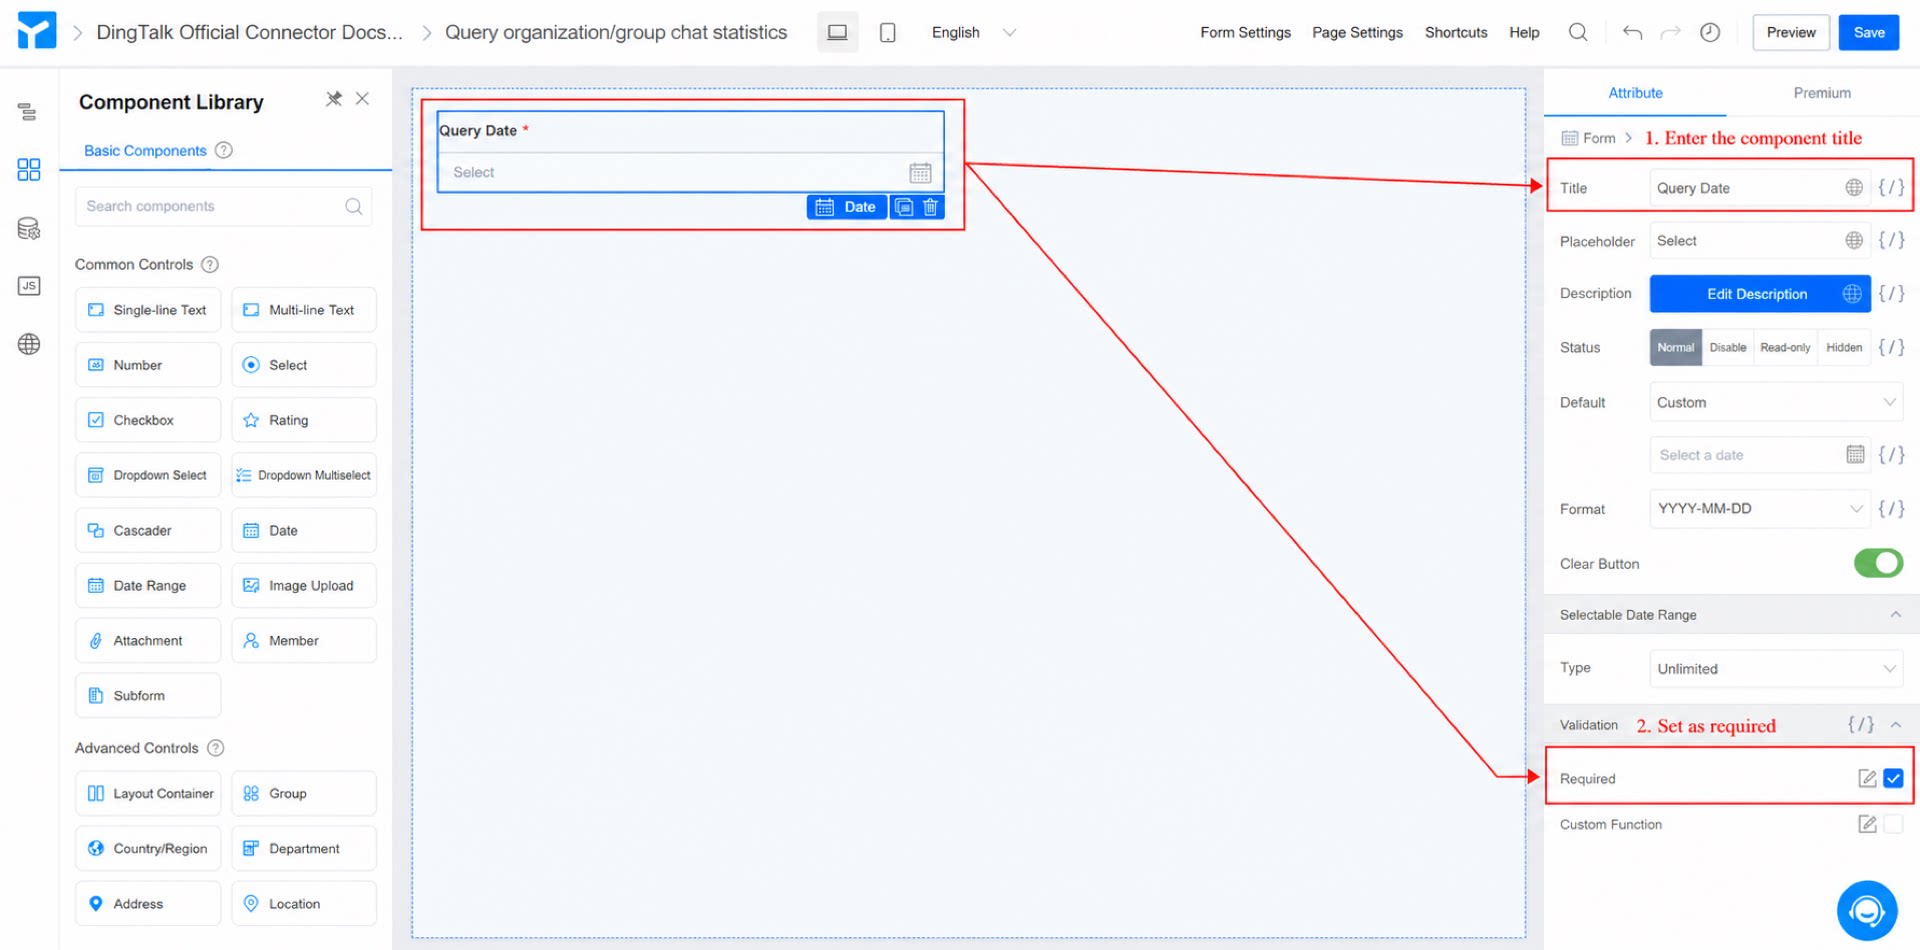
- Add a Date component, name it “Query date”, and mark it as required. (See Figure 2.1-1)
Figure 2.1-1 Add and configure the Date component
- Click Save in the upper-right corner of the page.
Steps:
- Create a regular form and name it “Organization group chat data details”.
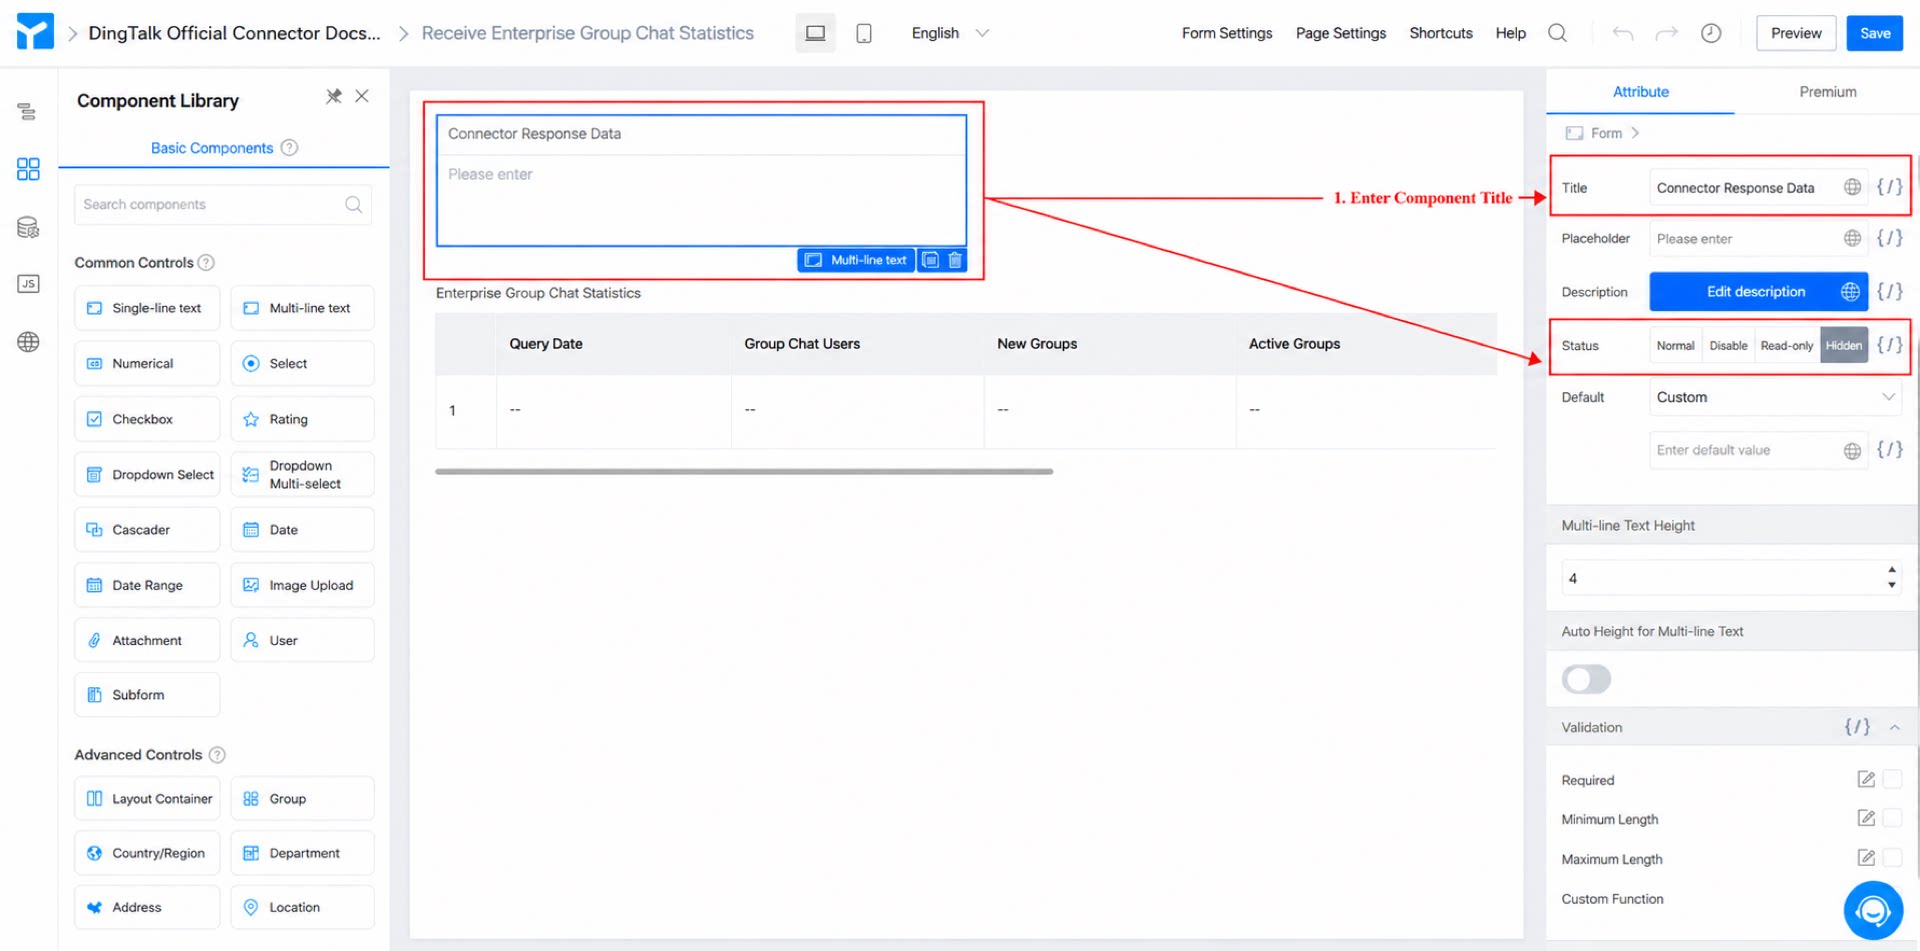
- Add a Multi-line text component, name it “Returned data”, and set its state to “Hidden”. (See Figure 2.1-2)
Figure 2.1-2 Add and configure the Multi-line text component
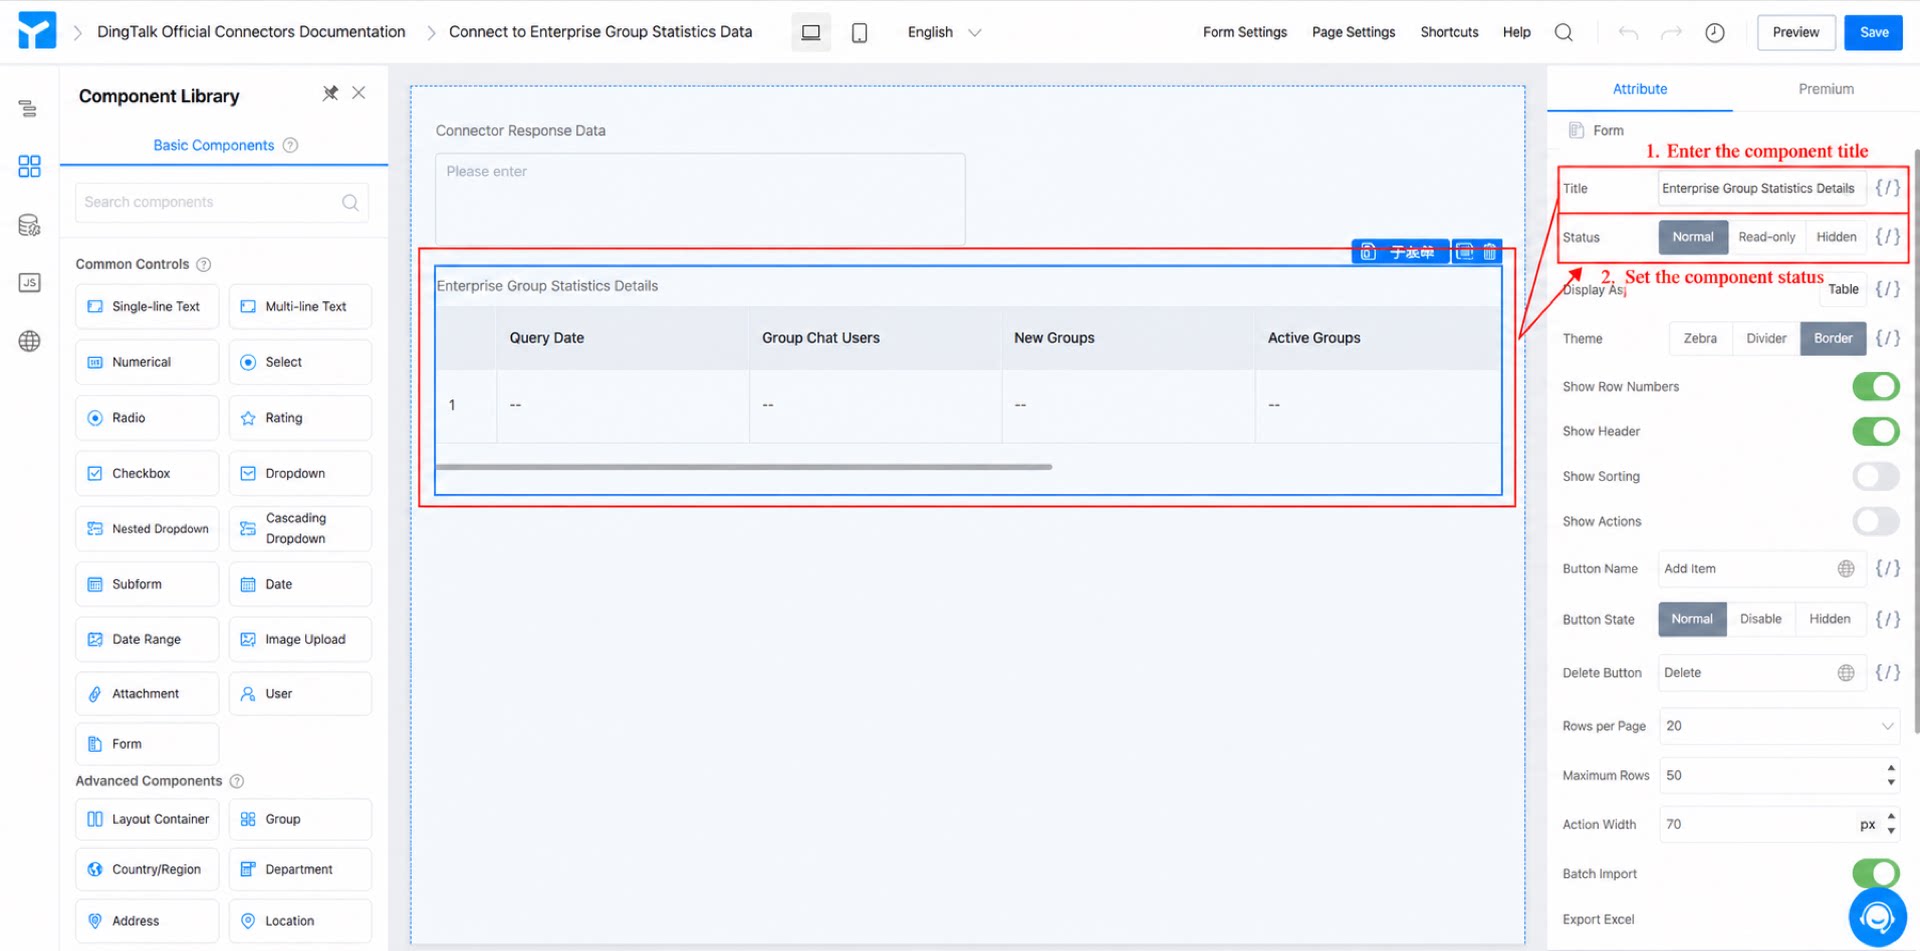
- Add a subform component, name it “Organization group chat statistics details table”, and set its state to “Read-only”. (See Figure 2.1-3)
Figure 2.1-3 Add and configure the subform component
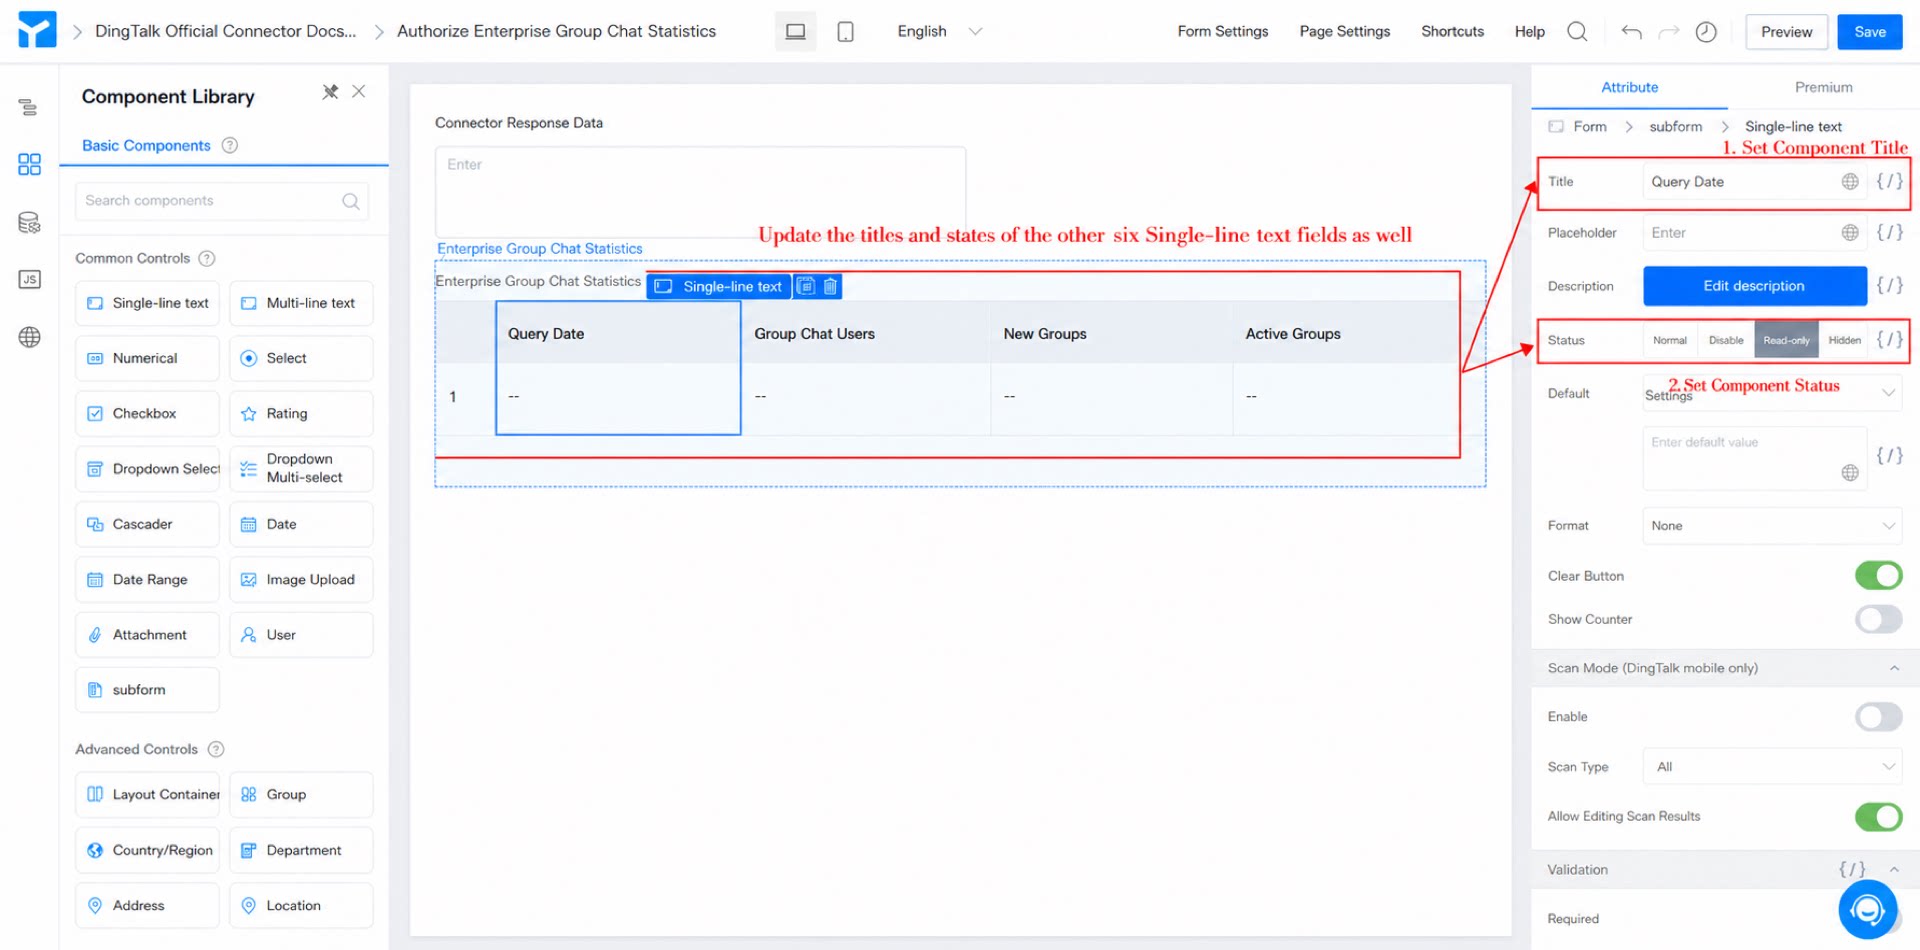
- Inside the subform, add 7 Single-line text components and name them “Query date, Group chat users, New groups, Active groups, Group chat messages, Internal Groups, Department Chats”. Set all of their states to “Read-only”. (See Figure 2.1-4)
Figure 2.1-4 Add and configure the 7 Single-line text components inside the subform
- Add the following code to the JS panel to process the data. (See Figure 2.1-5)
Figure 2.1-5 Add JS code to process the data
The code is as follows:
Be sure to replace the unique identifiers of the components.
- Click Save in the upper-right corner of the page.
2.2 Step 2: Add the Connector
For a detailed introduction to connectors, see Introduction to Integration & Automation.
Add a connector to the “Query organization group chat statistics” form to integrate with the DingTalk Data Catalog connector.
Steps:
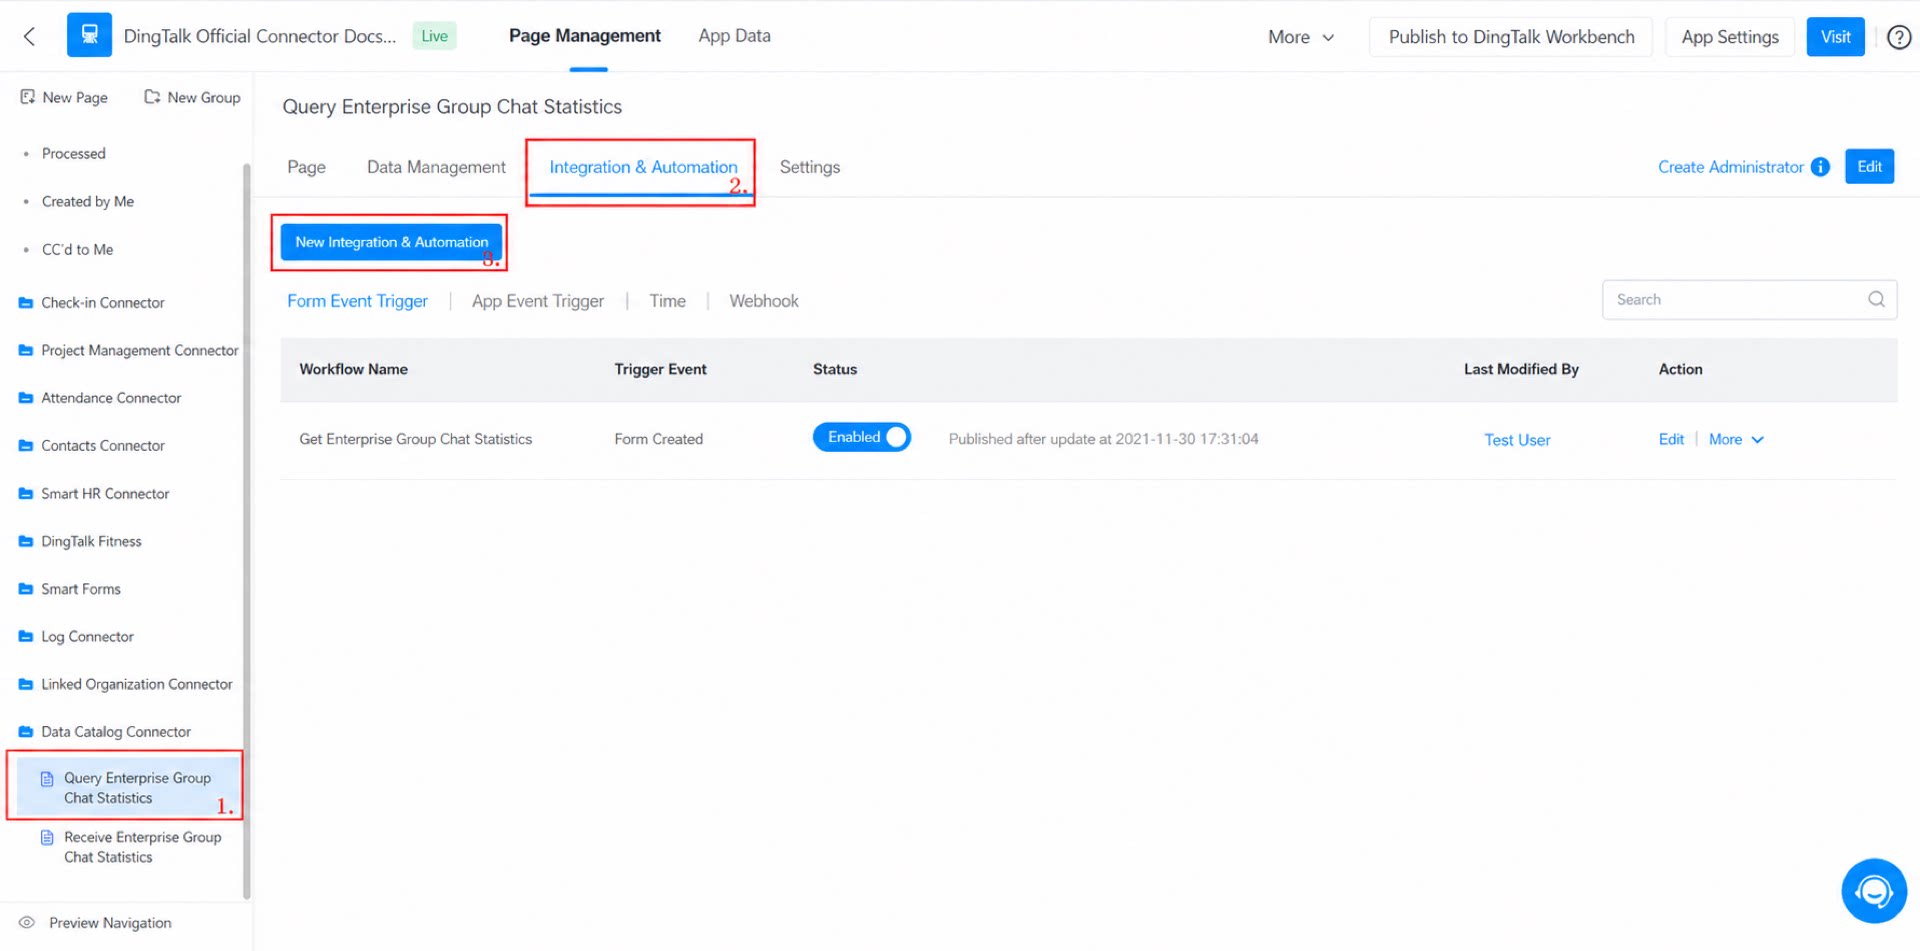
- On the Admin page, select the “Query organization group chat statistics” form, choose Integration & Automation, and then click Create Integration & Automation. (See Figure 2.2-1)
Figure 2.2-1 Connector entry point
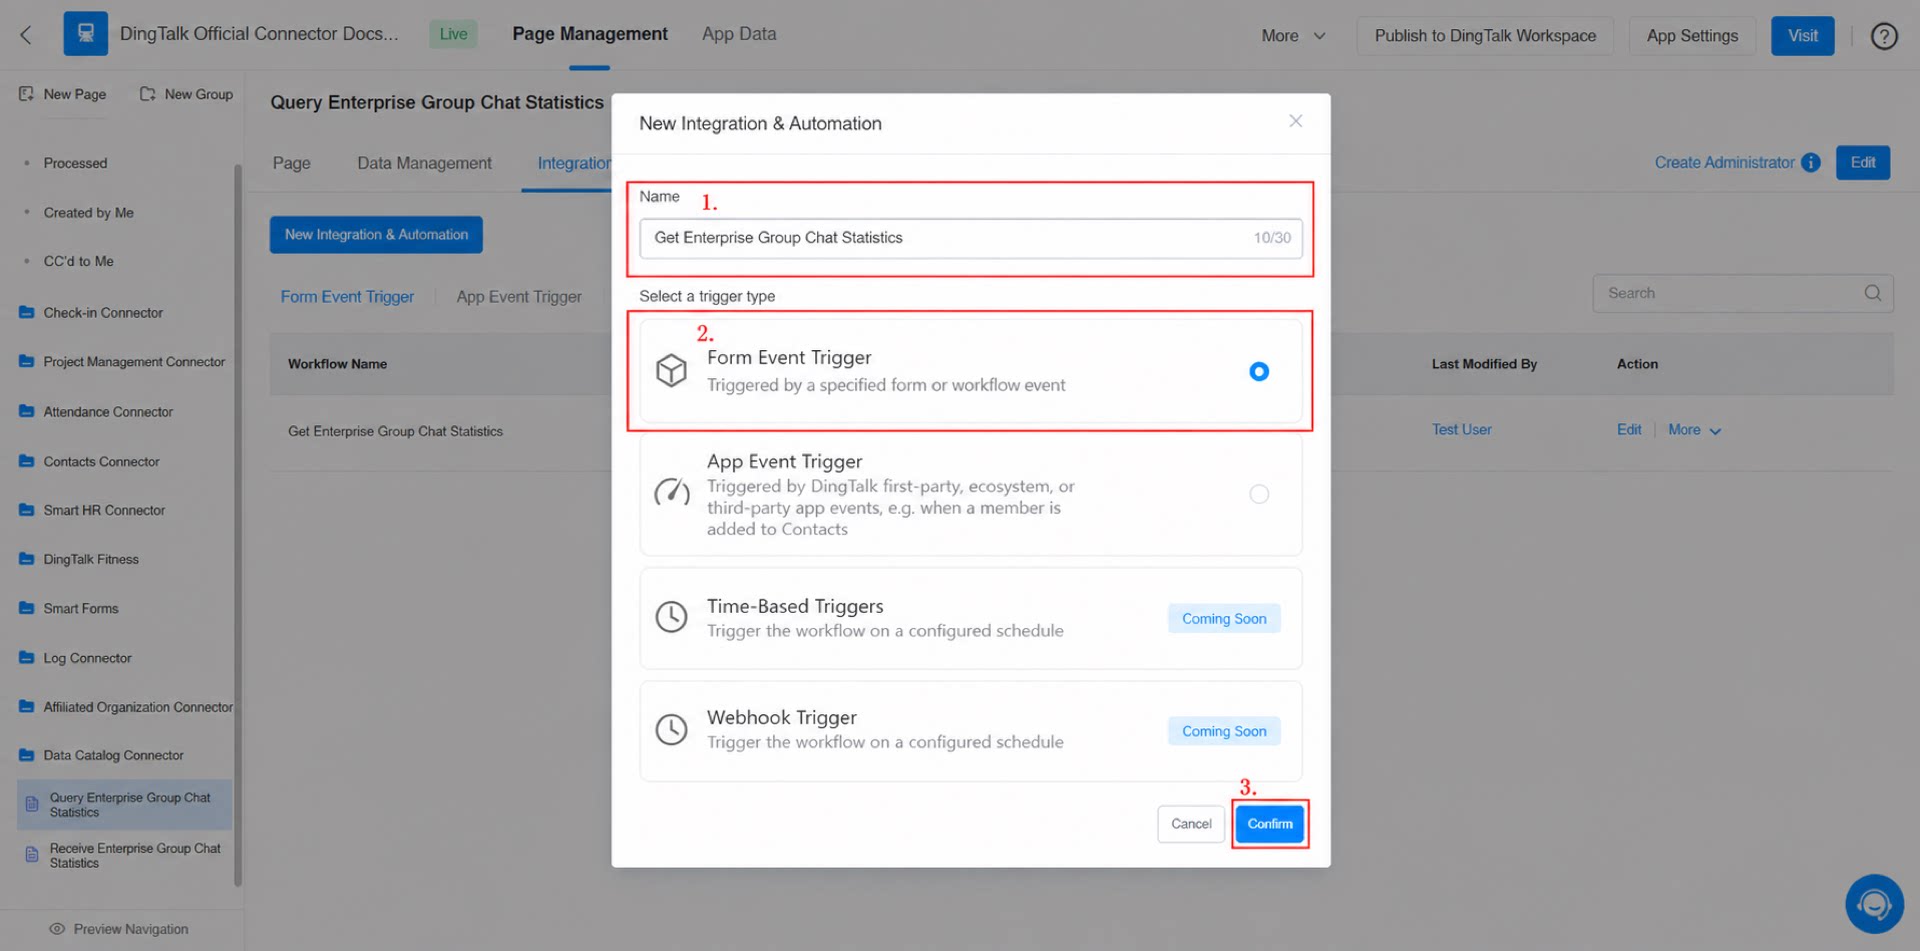
- Create a connector named “Query organization statistics”. Select “Form event trigger” as the Trigger type, and then click Confirm.
(See Figure 2.2-2)
Figure 2.2-2 Create the connector
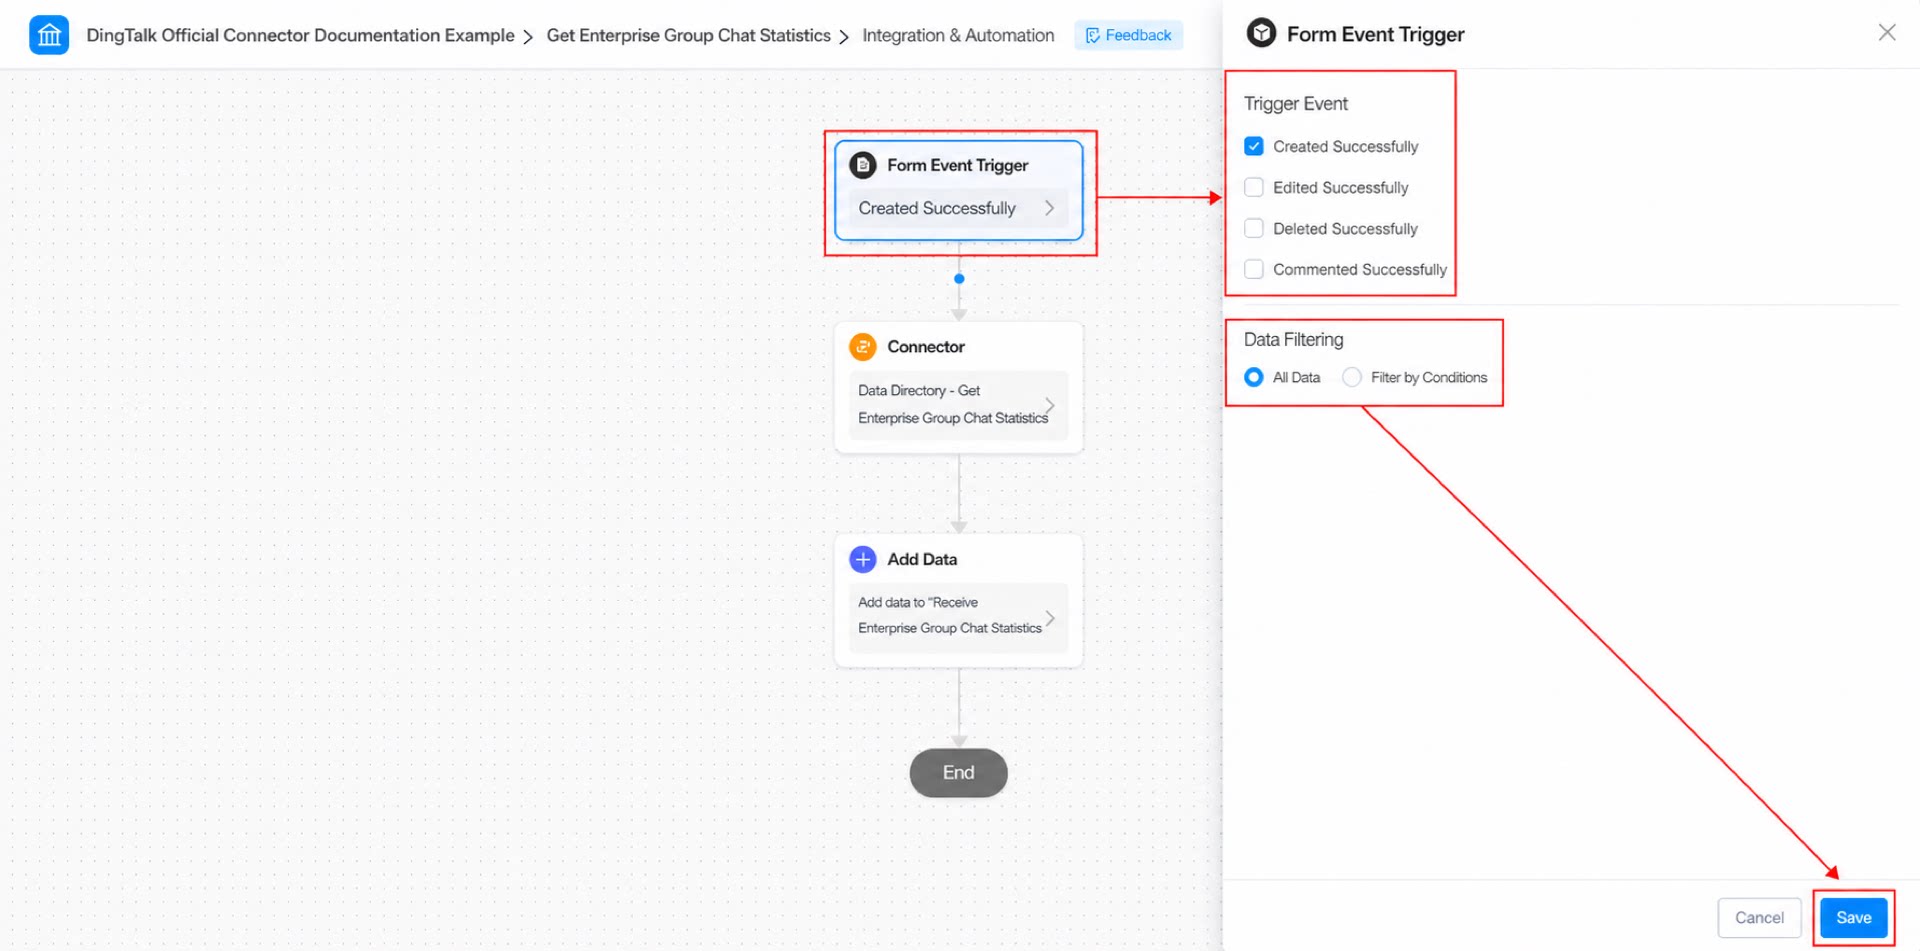
- Configure the form event trigger: select “Create success” as the trigger event, select “All data” for data filtering, and then click Save.
(See Figure 2.2-3)
Figure 2.2-3 Configure the form event trigger for the connector
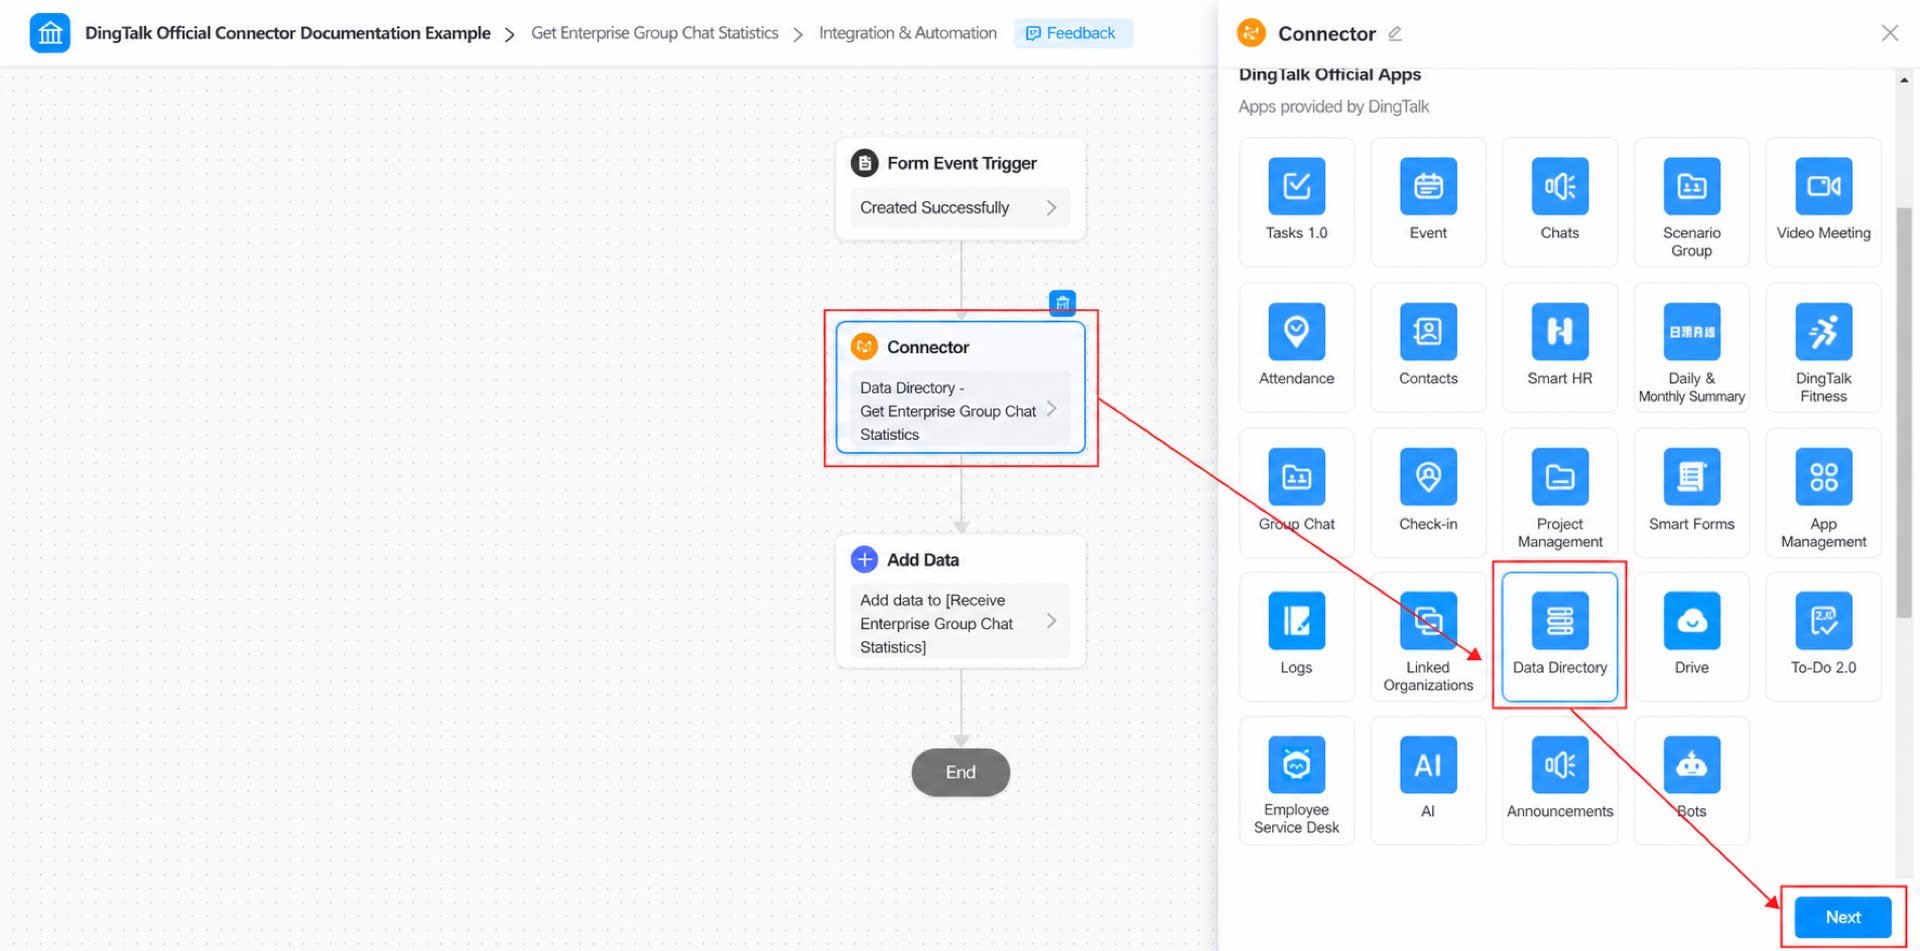
- Select the app > Data Catalog > Next. (See Figure 2.2-4)
Figure 2.2-4 Select the connector app
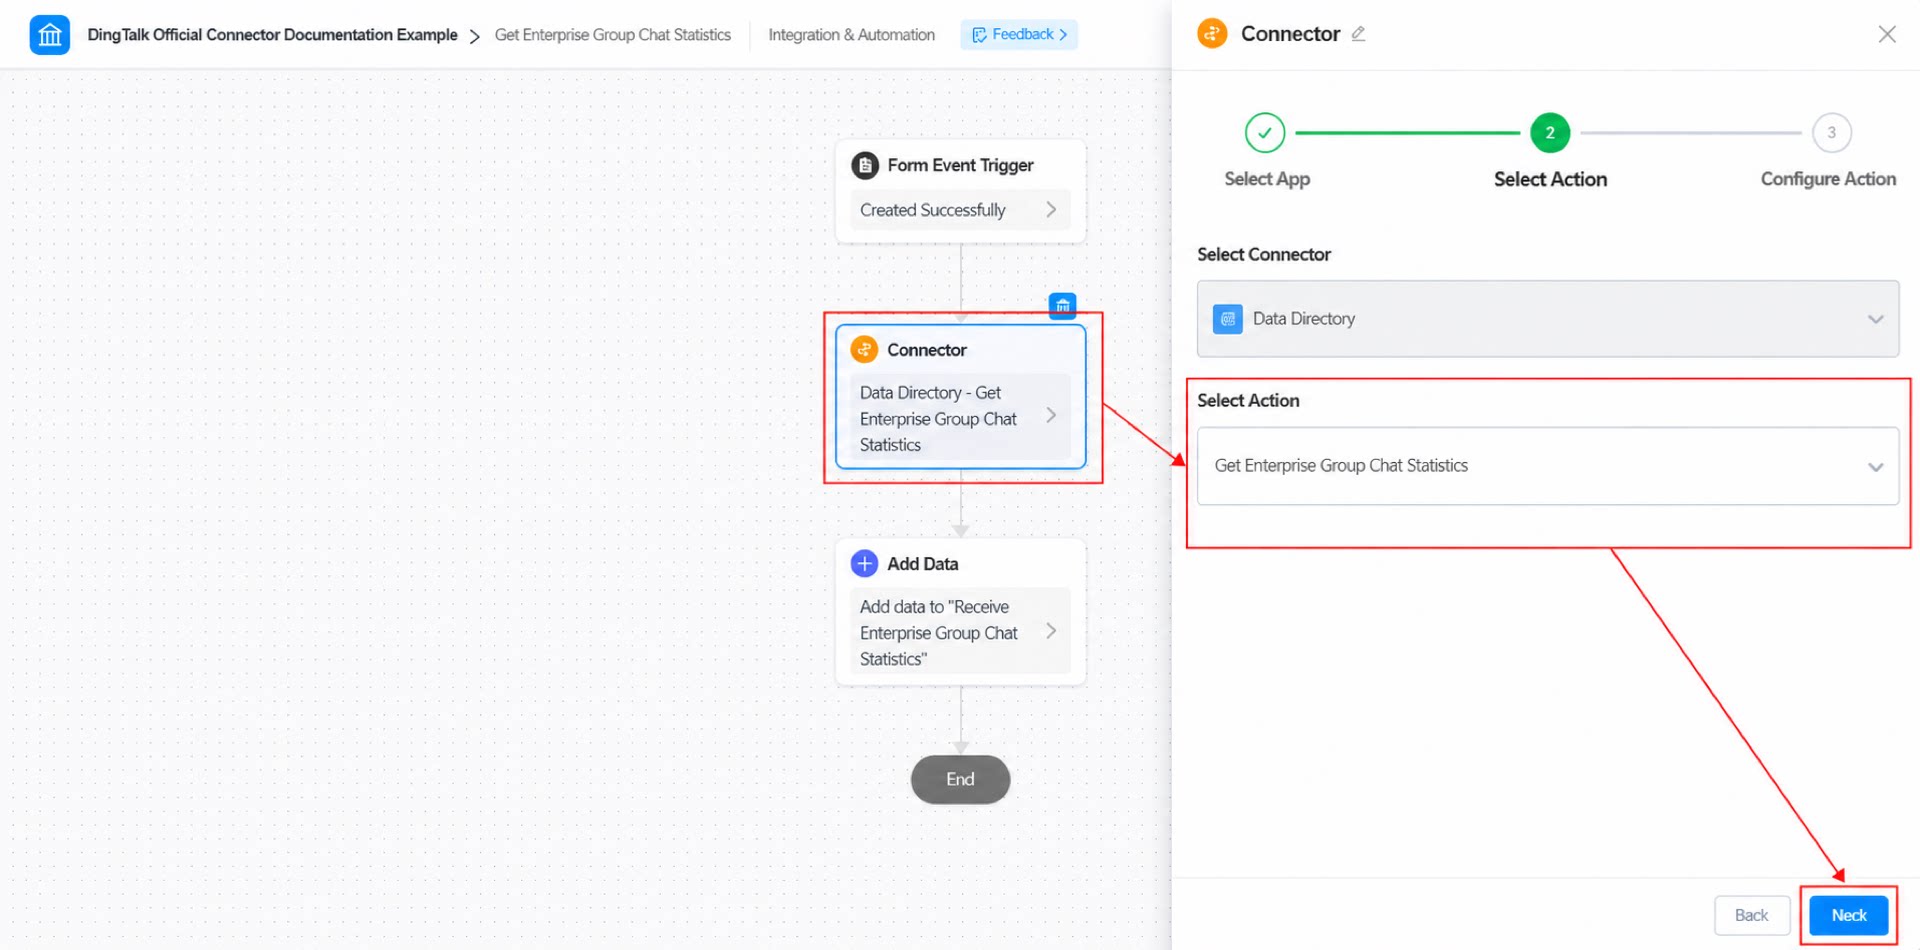
- Select the action > Get organization group chat statistics > Next. (See Figure 2.2-5)
Figure 2.2-5 Select the connector action
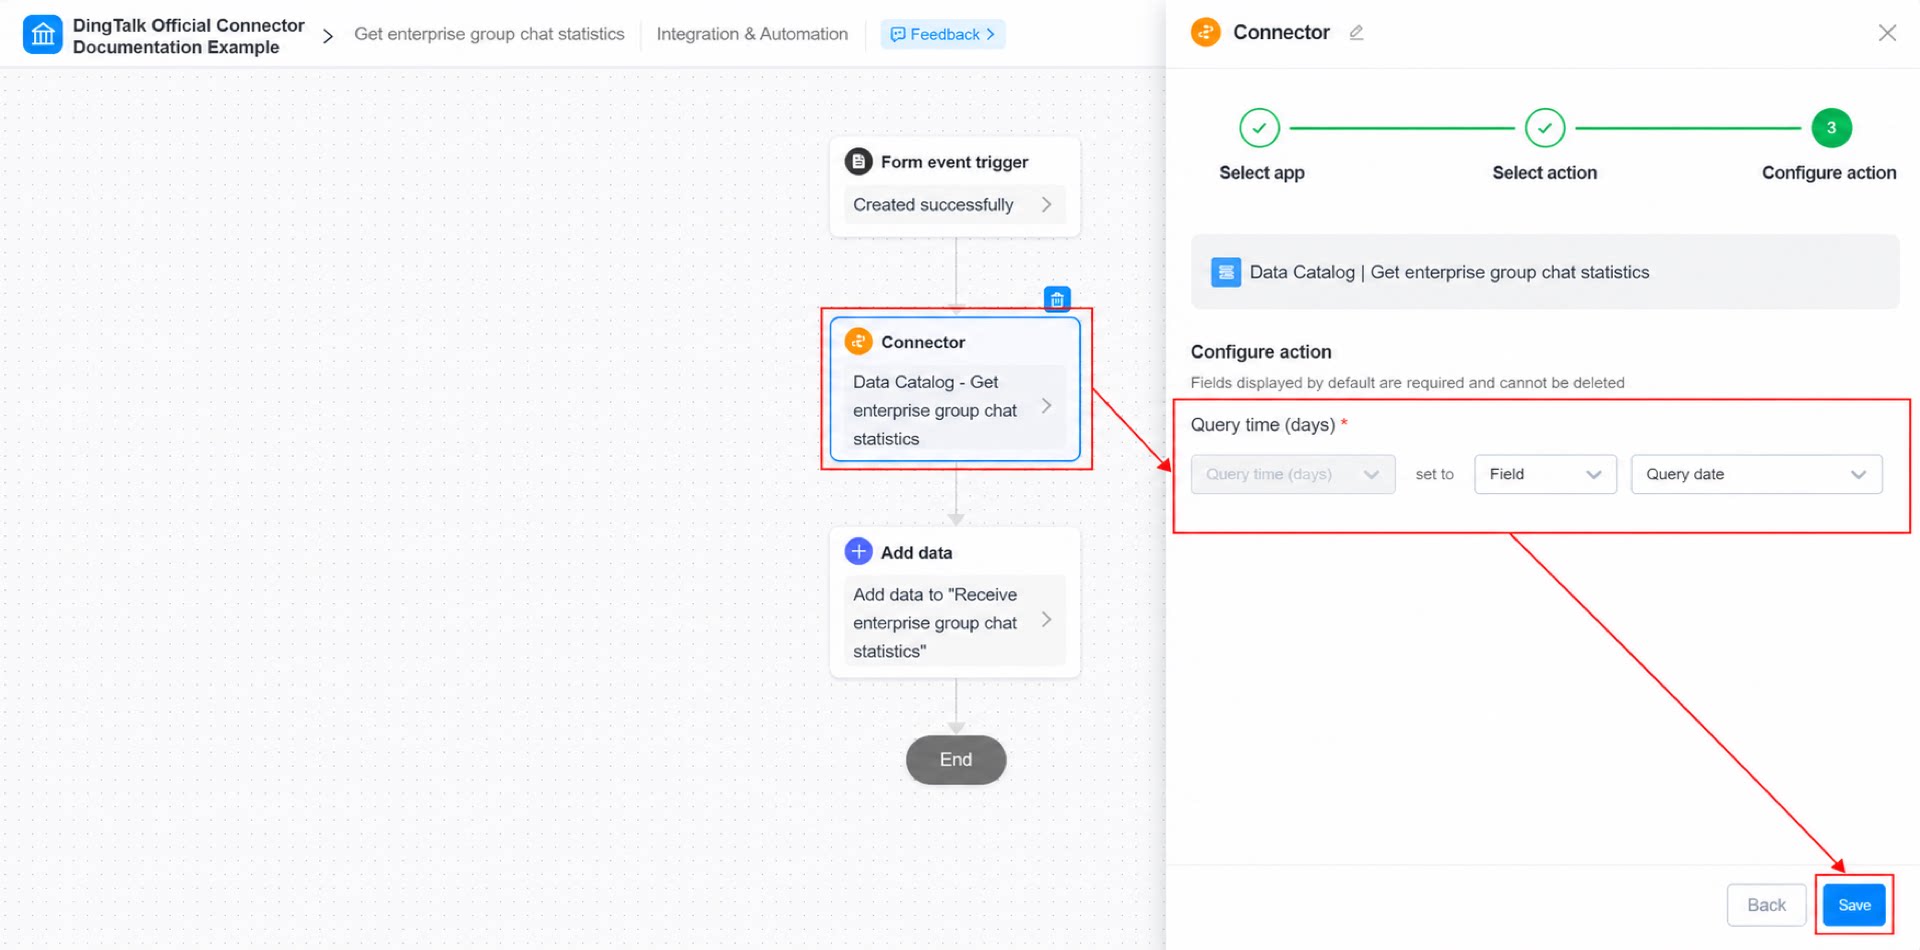
- Configure the action > Query time > Field > Query date > Save. (See Figure 2.2-6)
Figure 2.2-6 Configure the connector action
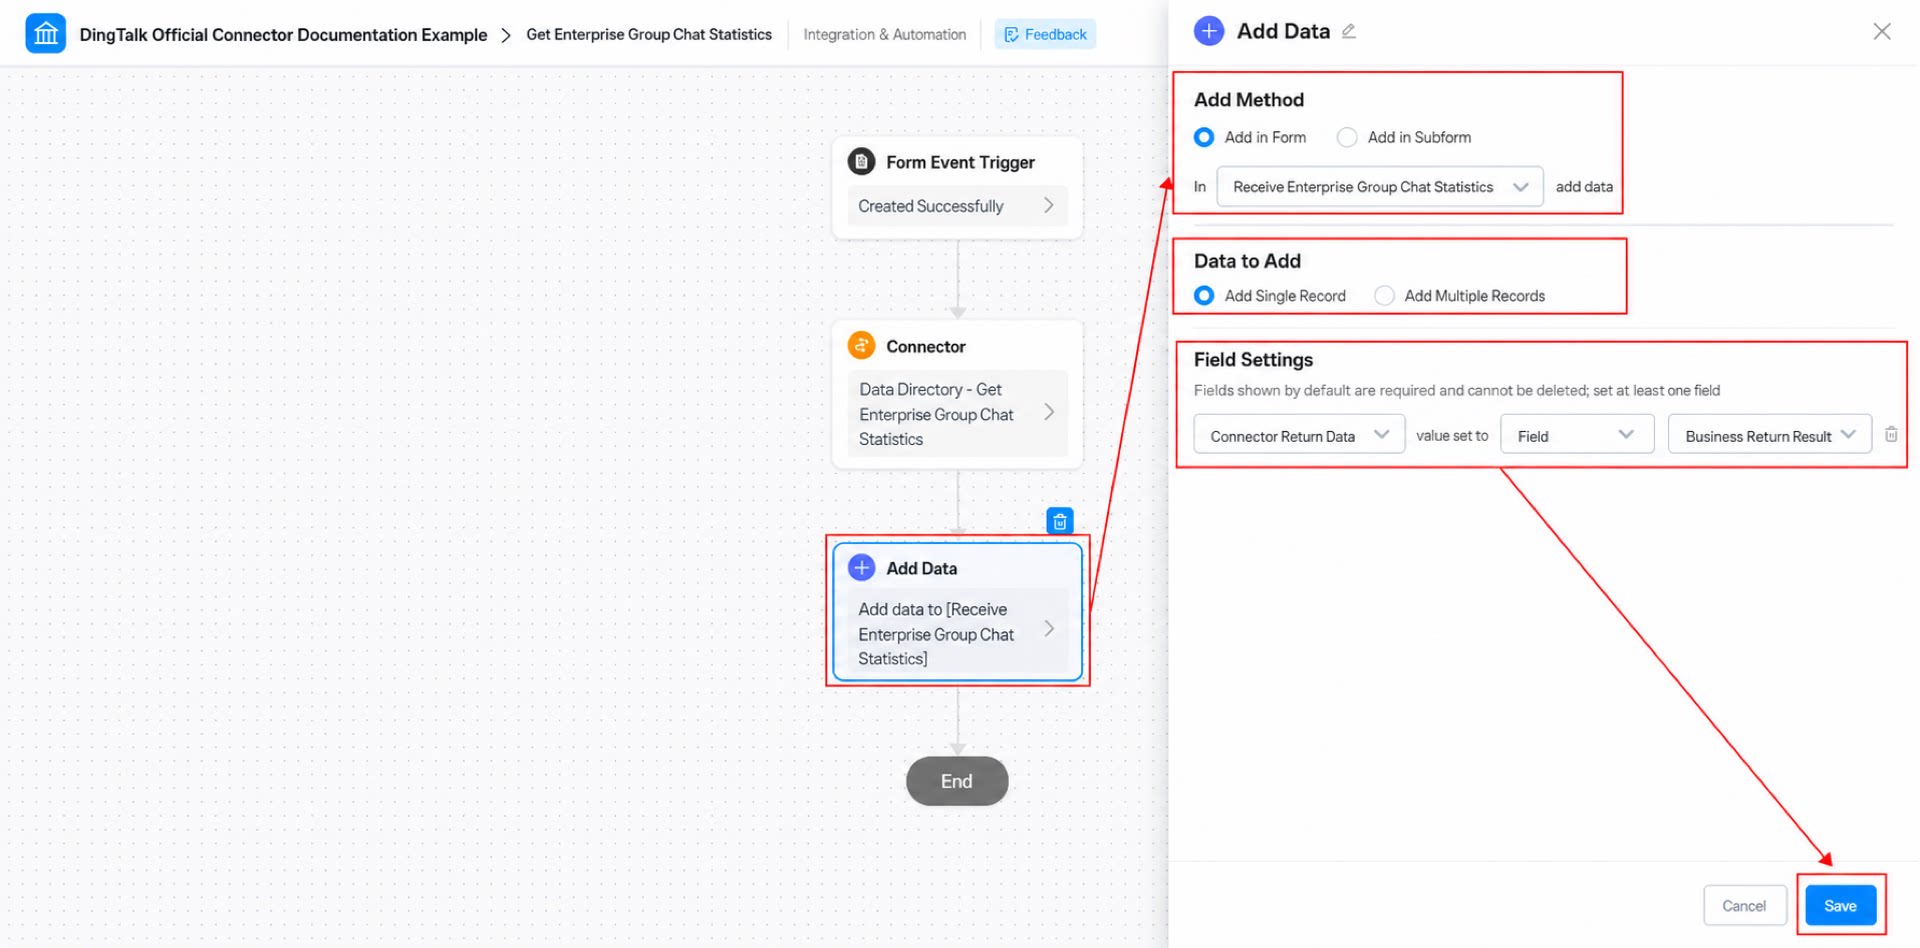
- Add a Create Data node. In the “Receive organization group chat statistics” form, create a single record and set the value of “Connector returned data” to “Business result” > “Field”. (See Figure 2.2-7)
Figure 2.2-8 Add and configure the Create Data node
- Click Save in the upper-right corner of the page, and then click Publish.
Steps:
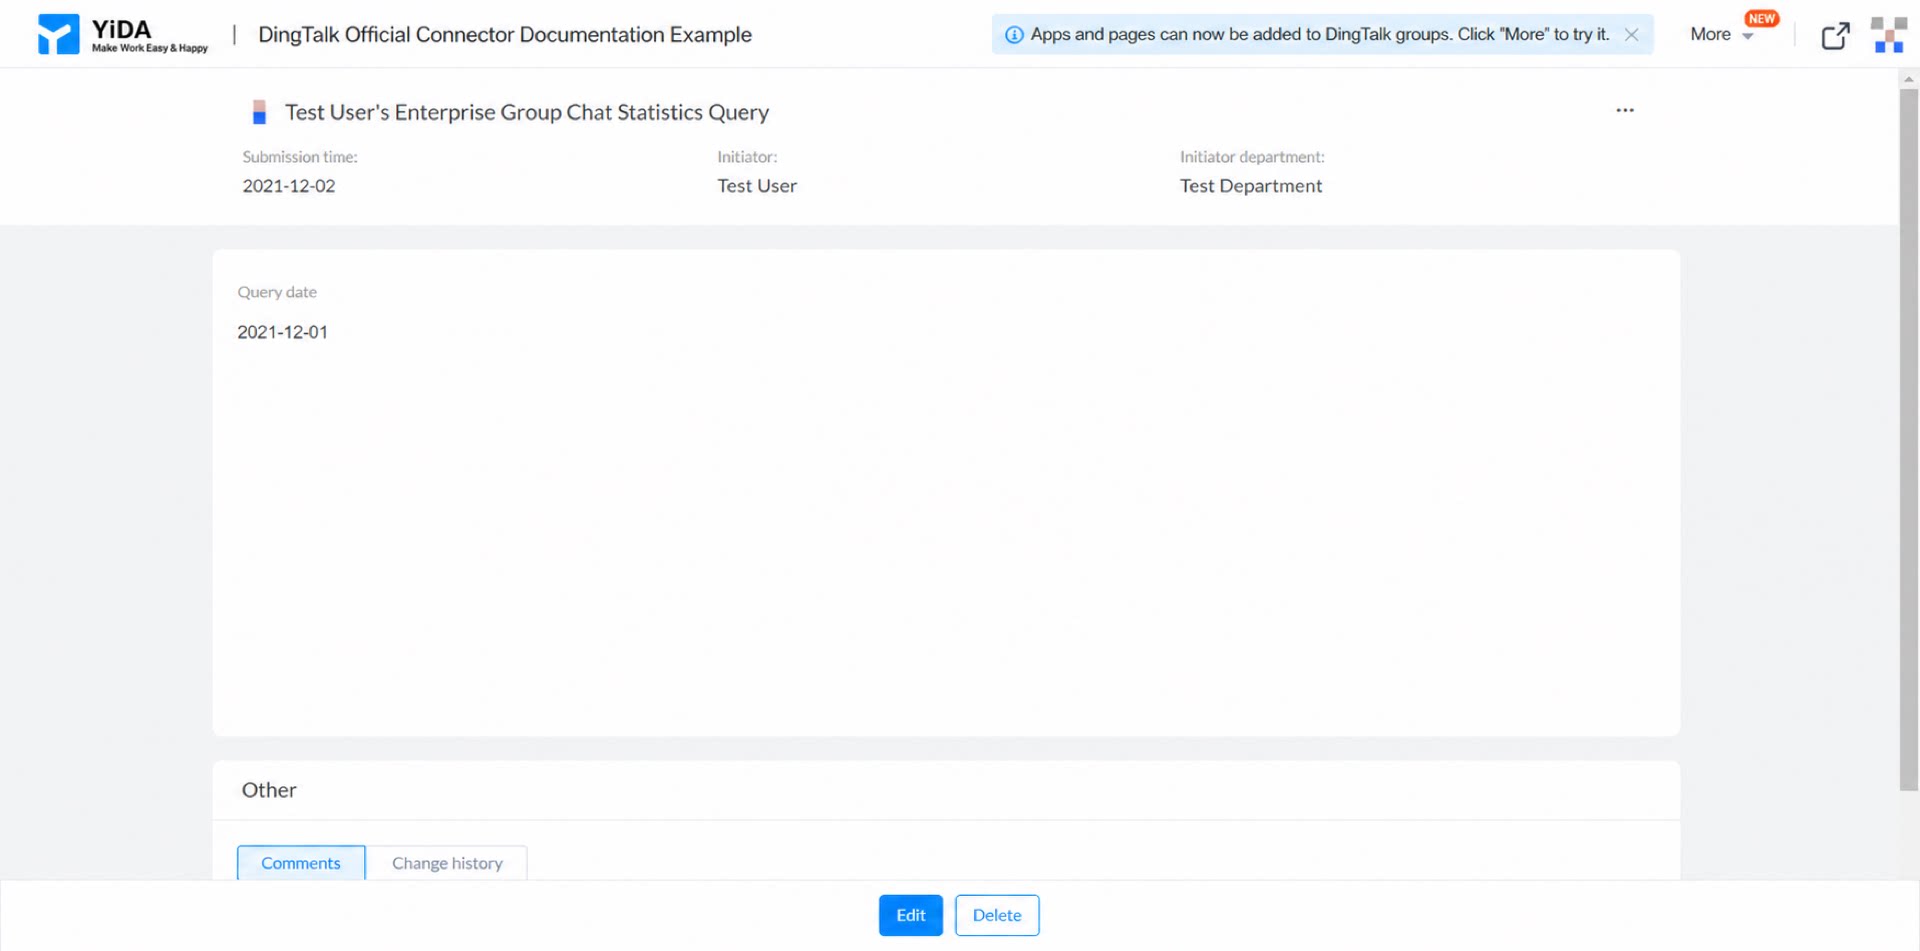
Submit the “Query organization group chat statistics” form to trigger the connector. You can view the connector’s response in the “Organization group chat statistics details” form. (See Figure 2.3-1)
Figure 2.3-1 Submit the form
3. Result
Path: Admin page > “Organization group chat data details” > Data management > View details. (See Figure 3.1 for the final result.)
Figure 3.1 Final result of the connector

 Chats
Chats Calendar
 Meetings
 Contacts
 Mail
Mail Docs
Docs Drive
Drive AI Table
 AI Minutes
 Attendance
 Approval
 YiDA
YiDA Admin Console