Chats
Chats Calendar
 Meetings
 Contacts
 Mail
Mail Docs
Docs Drive
Drive AI Table
 AI Minutes
 Attendance
 Approval
 YiDA
YiDA Admin Console
1. Use Cases
Association Organization is typically used in the following scenarios:- Cross-organization communication, business approval, and work reporting.
- Multi-organization permission management with real-time user structure synchronization for higher management efficiency.
2. Implementation Steps
2.1 Step 1: Basic Form Design
2.1.1 Create and Configure the Query Form
Steps:- Create a regular form and name it “Get Organization Info”.
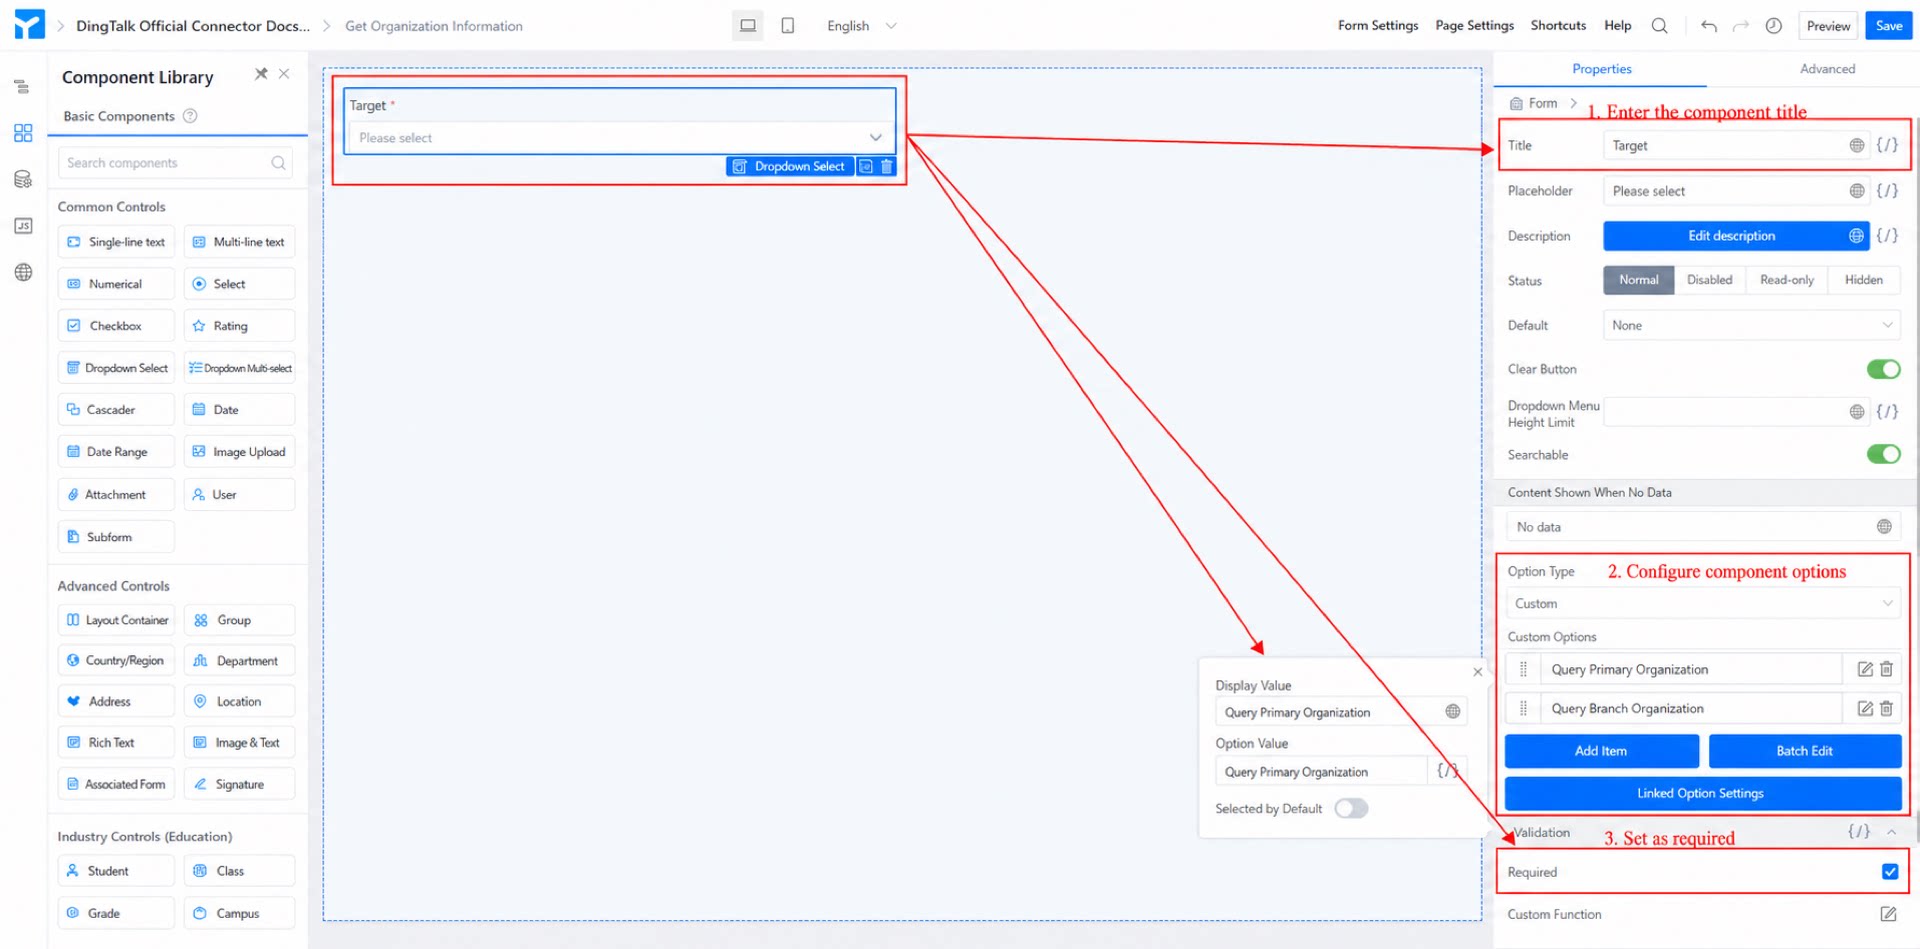
- Add a dropdown Select component, name it “Target”, and add two options: “Query Parent Organization” and “Query Branch Organization”. Set it as required. (See Figure 2.1-1.)
- Click Save in the upper-right corner of the page.
2.1.2 Create and Configure the Query Result Record Table
Steps:- Create a regular form and name it “Parent Organization Query Result Record”.
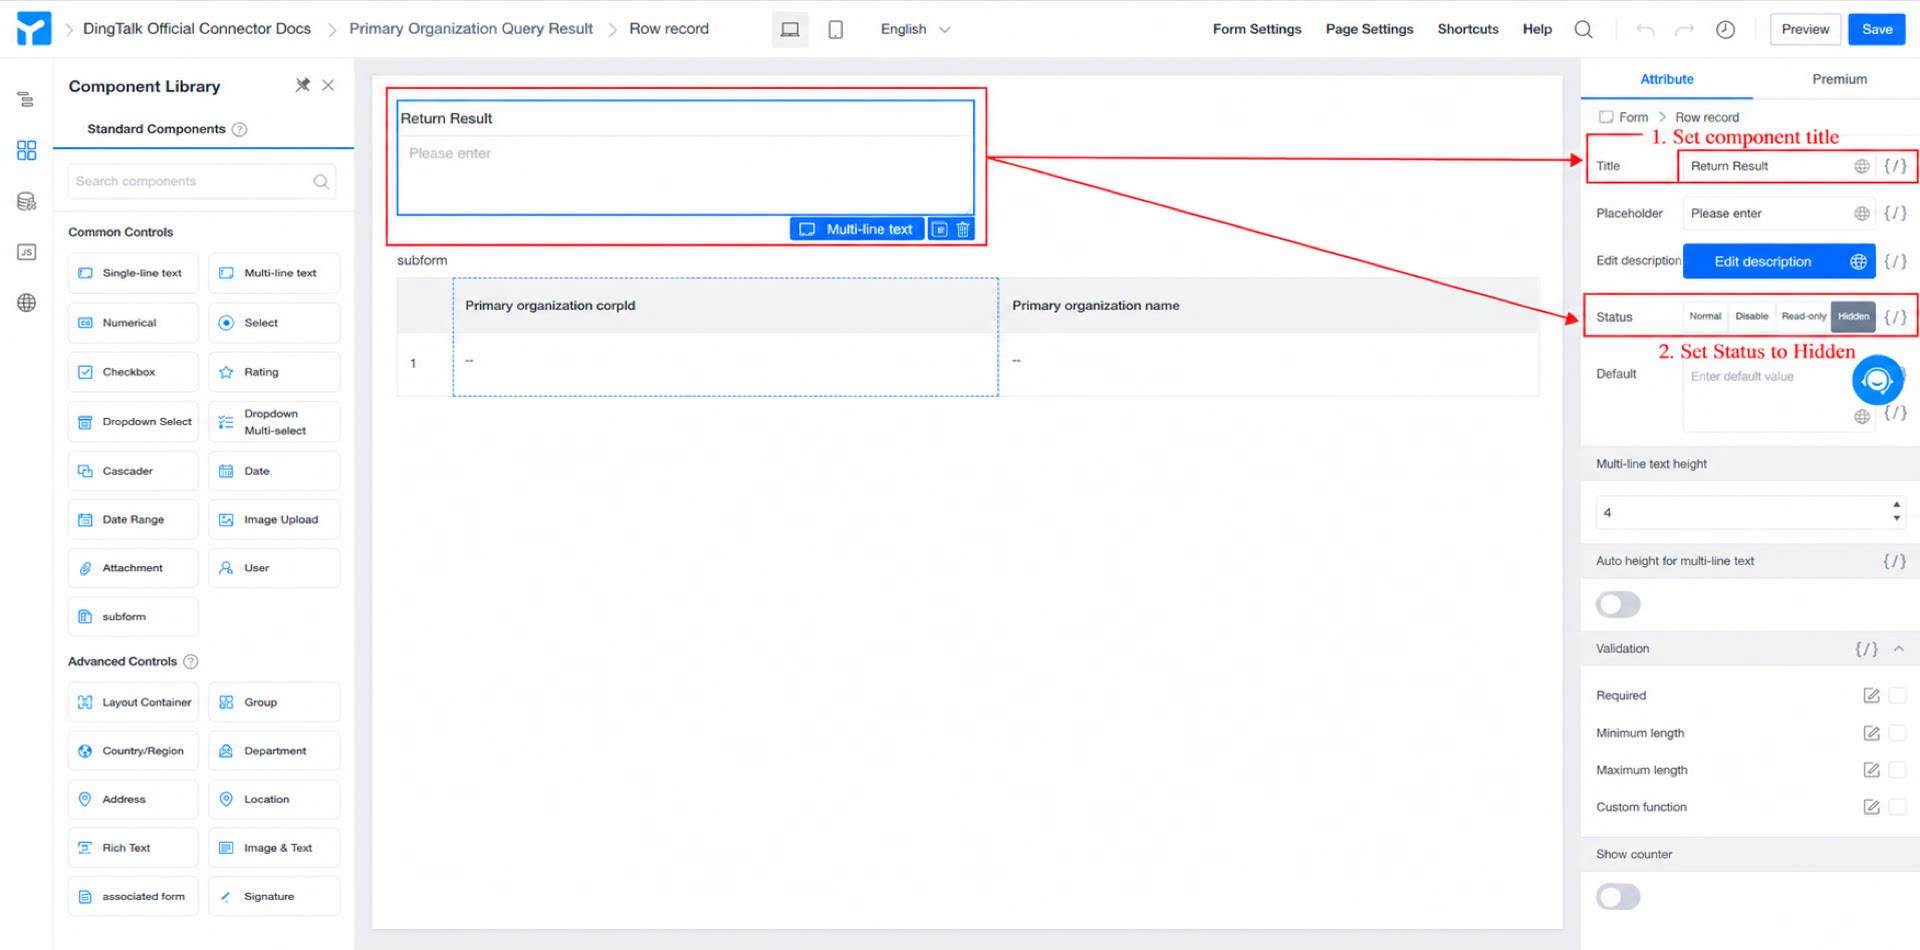
- Add a Multi-line text component, name it “Connector Return Result”, and set its status to hidden. (See Figure 2.1-2.)
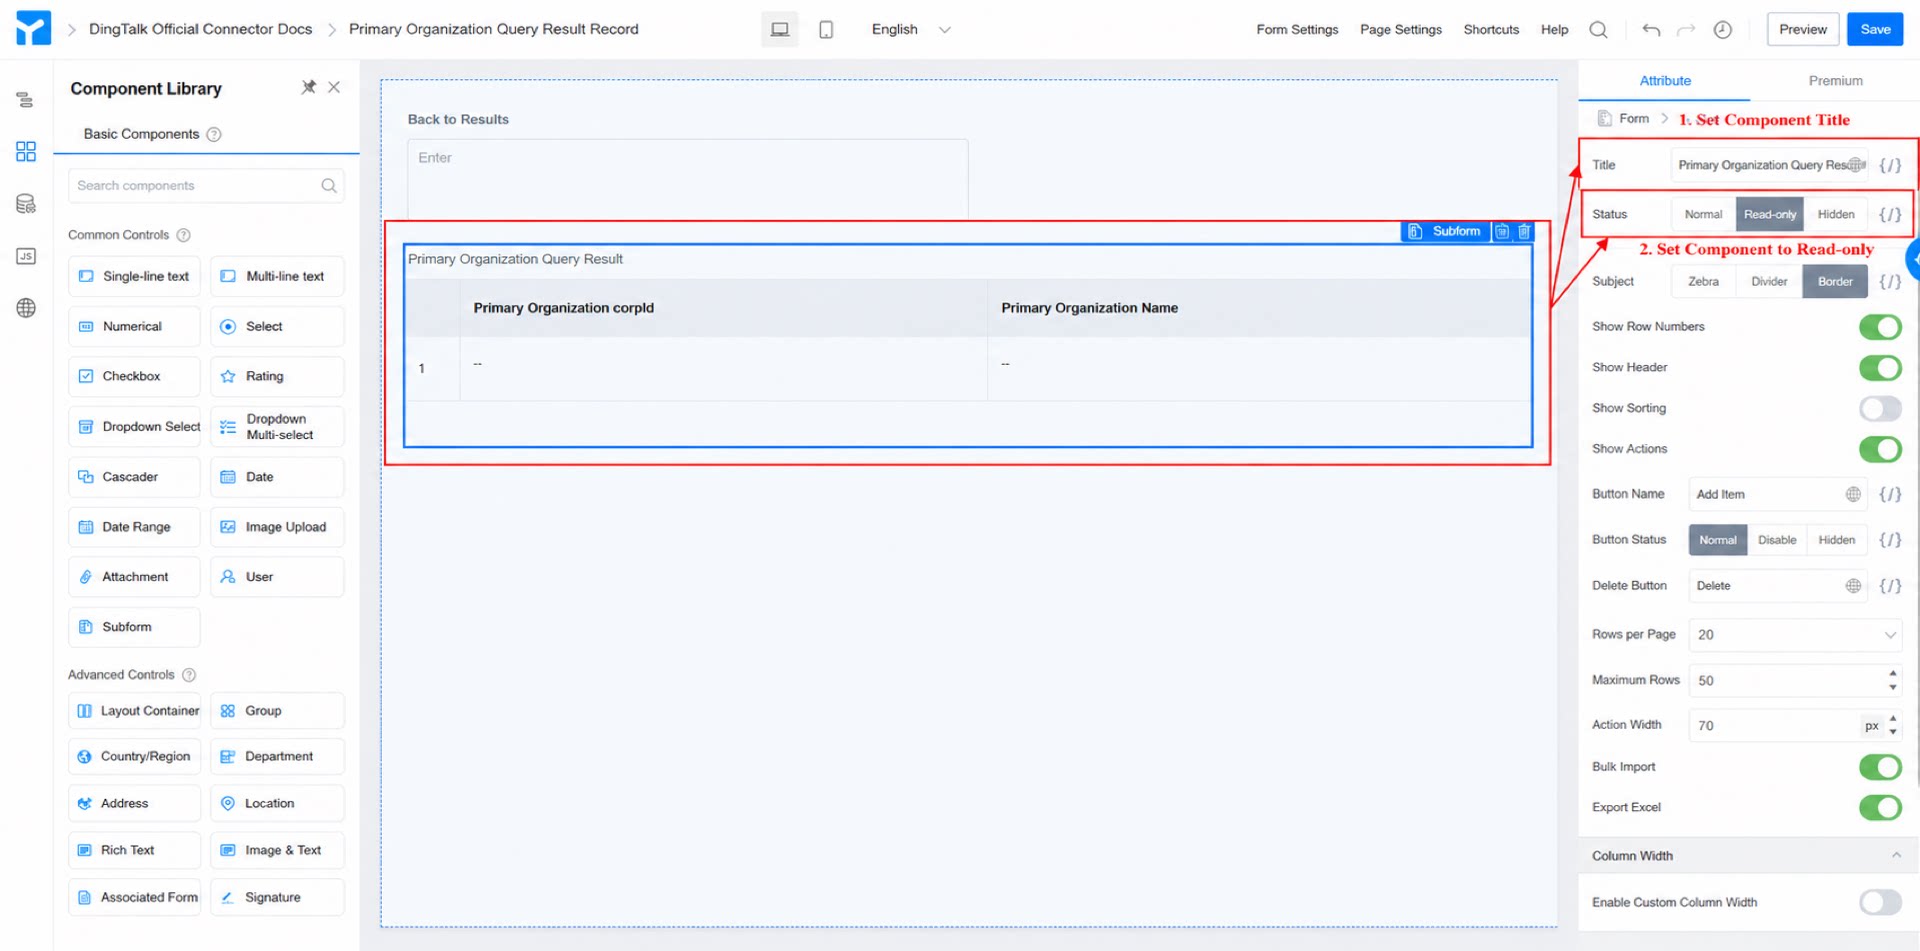
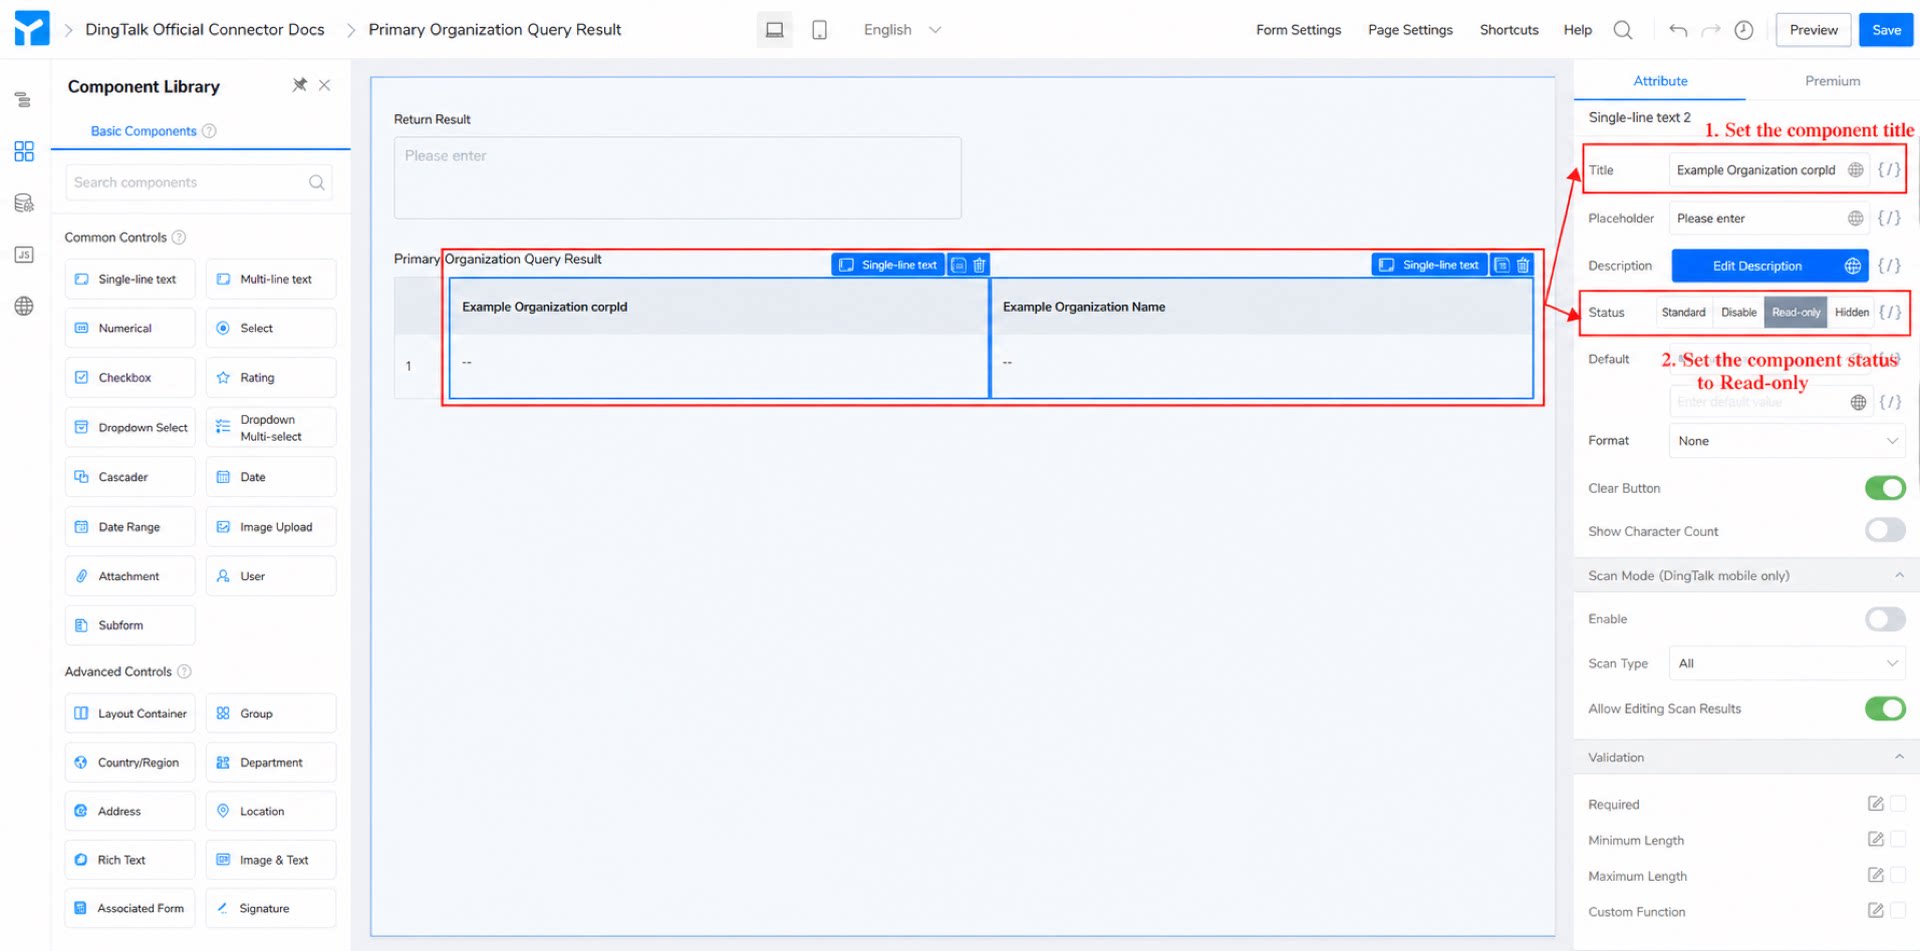
- Add a subform component, name it “Parent Organization Query Result”, and set its status to read-only. (See Figure 2.1-3.)
- Inside the subform, add two Single-line text fields named “Parent Organization Name” and “Parent Organization CorpID”, and set their status to read-only. (See Figure 2.1-4.)
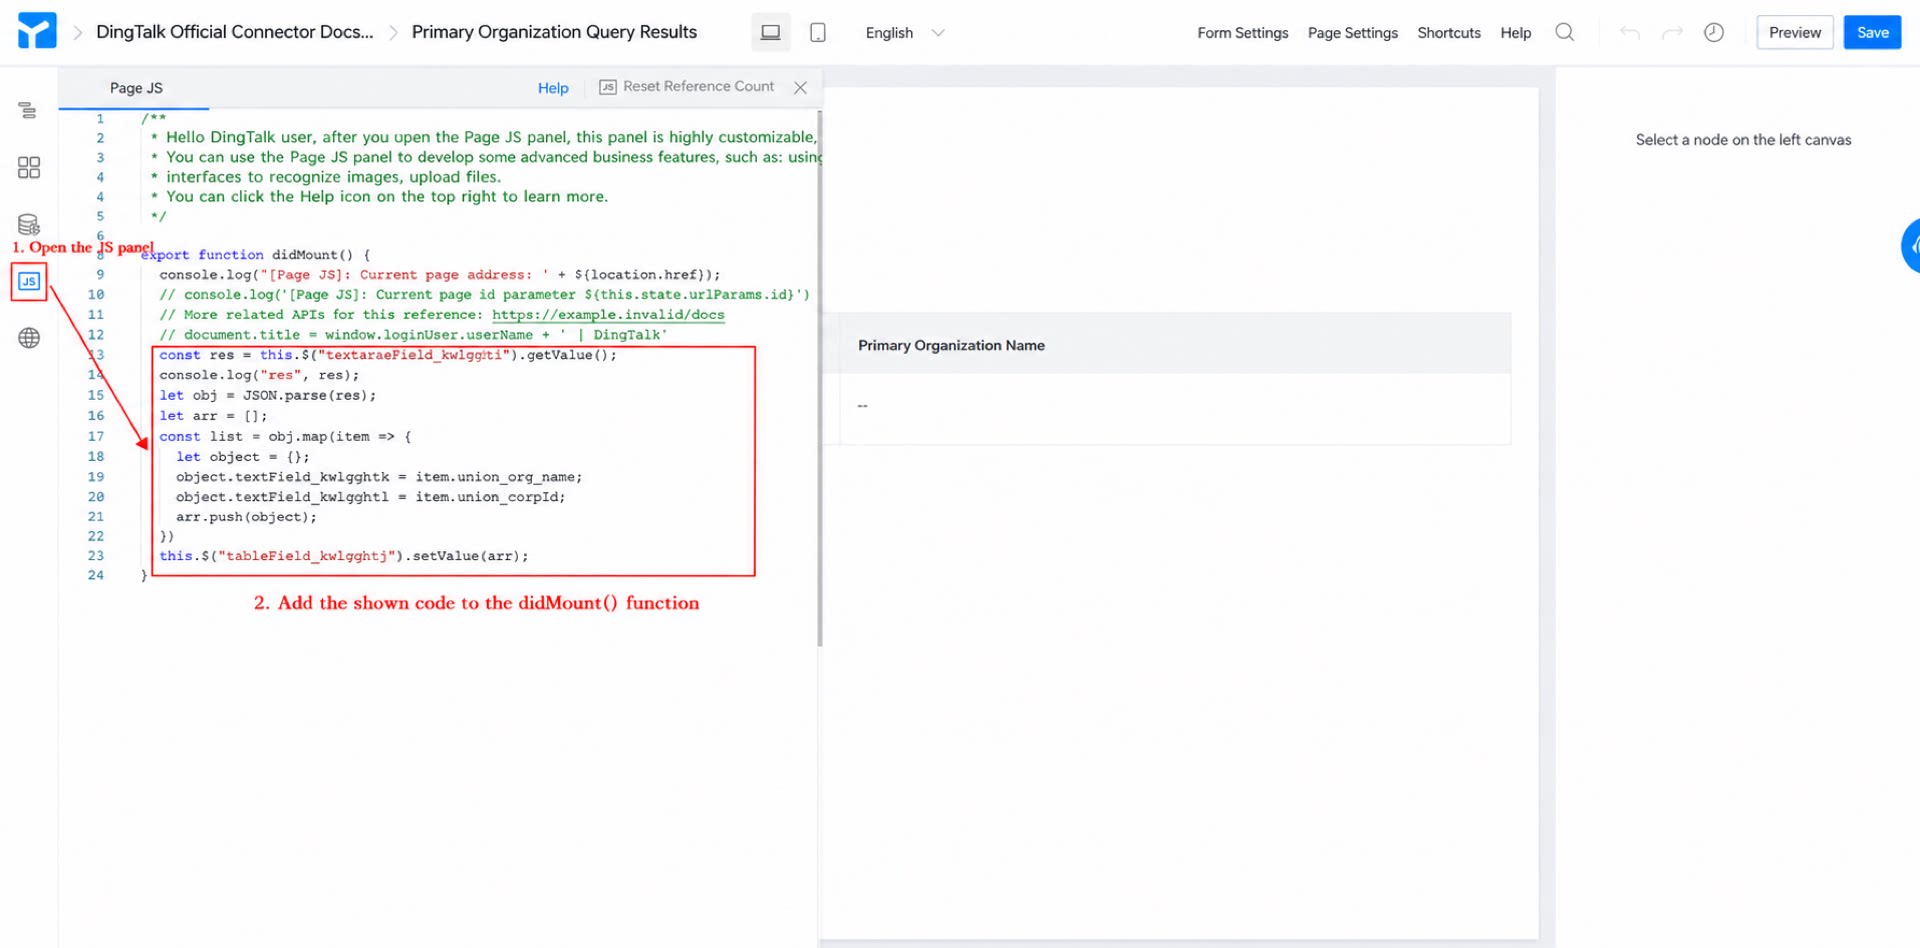
- Open the JS Action Panel on the left side of the page and add the following code to the
didMountfunction. (See Figure 2.1-5.)
- Click Save in the upper-right corner of the page.
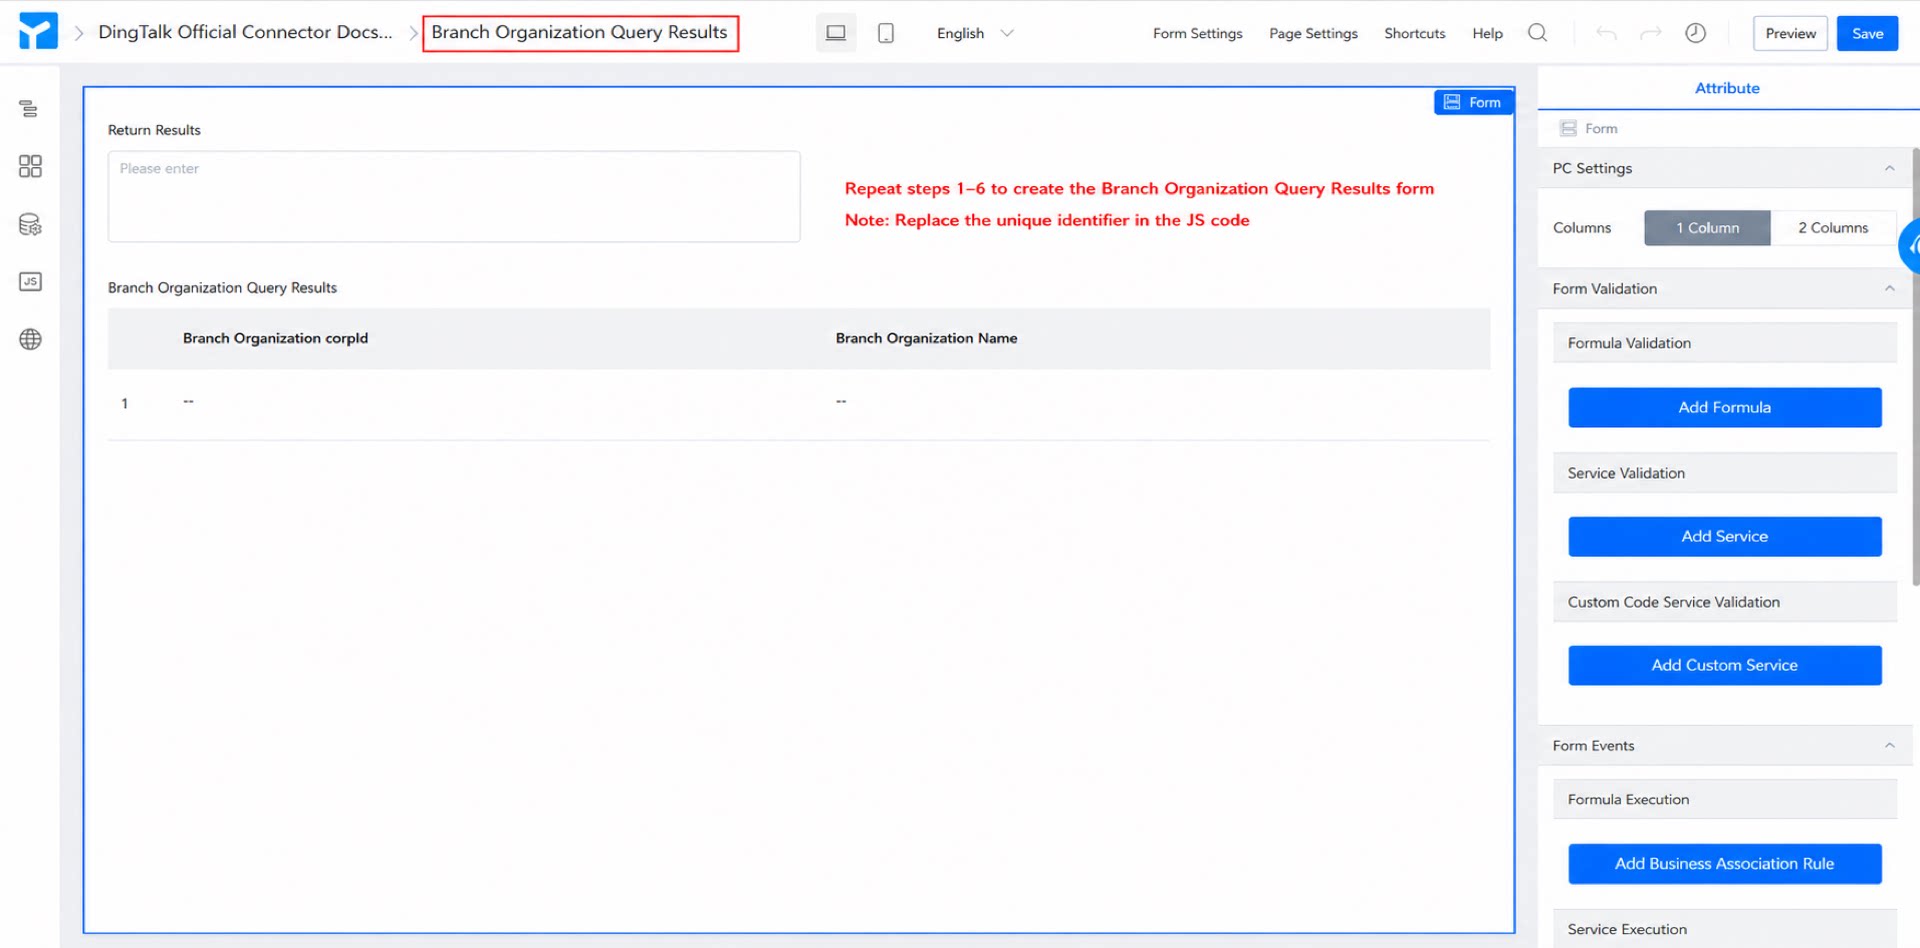
- Repeat steps 1–6 to create the “Branch Organization Query Result Record”. (See Figure 2.1-6 for the result.)
2.2 Step 2: Create and Configure the Connector
For an introduction to the YiDA Connector feature, see Integration & Automation - Connector.
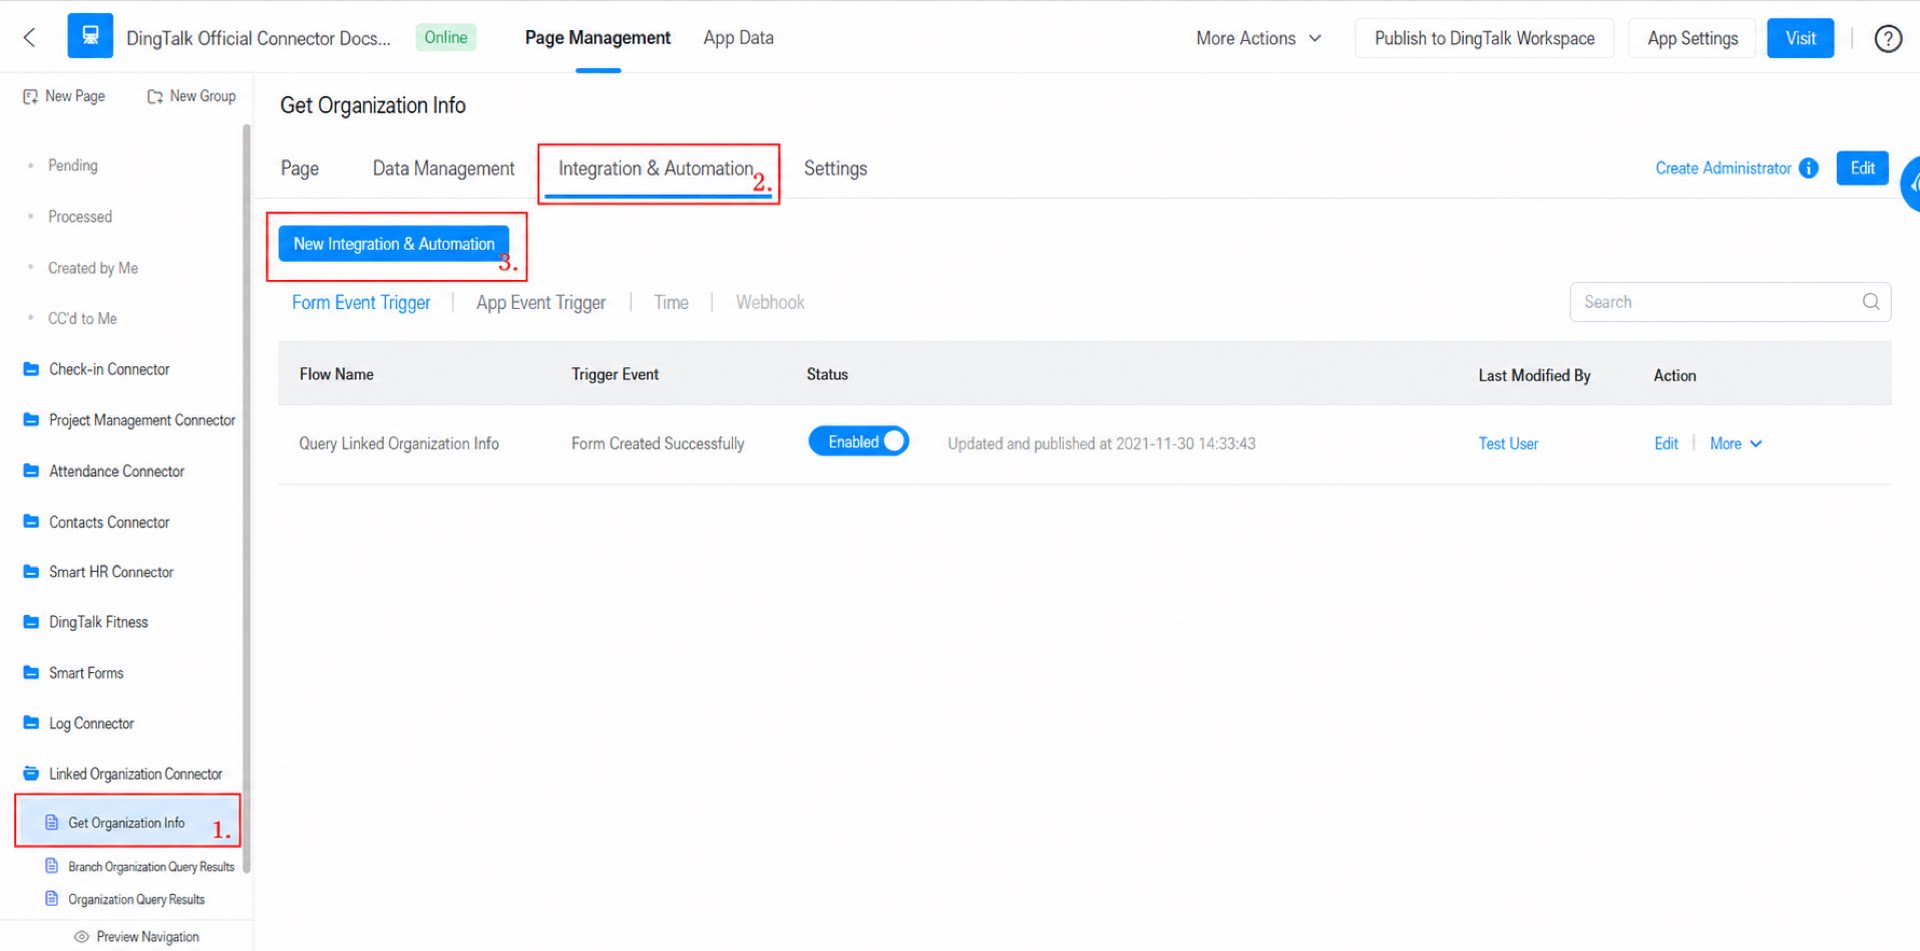
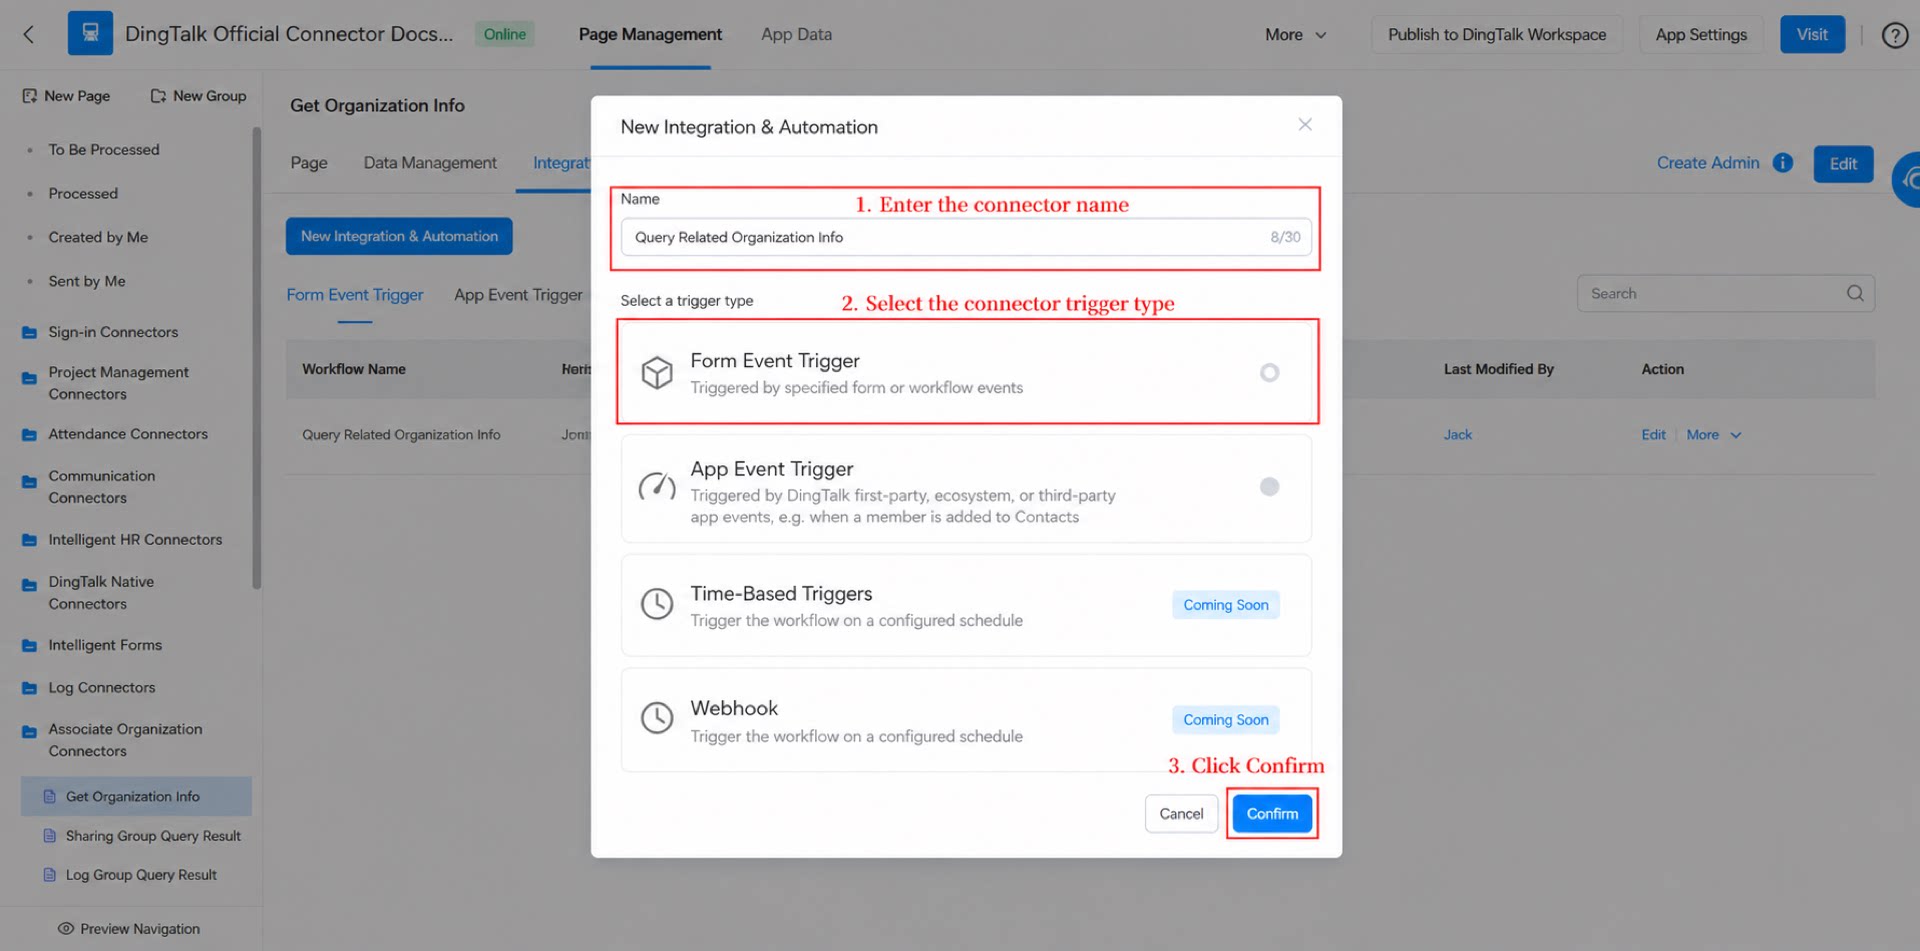
- Go to the backend management page > Get Organization Info > Integration & Automation > Create Integration & Automation. (See Figure 2.2-1.)
- Name the connector “Query Association Organization Info”, select Form event trigger as the trigger type, and click Confirm.
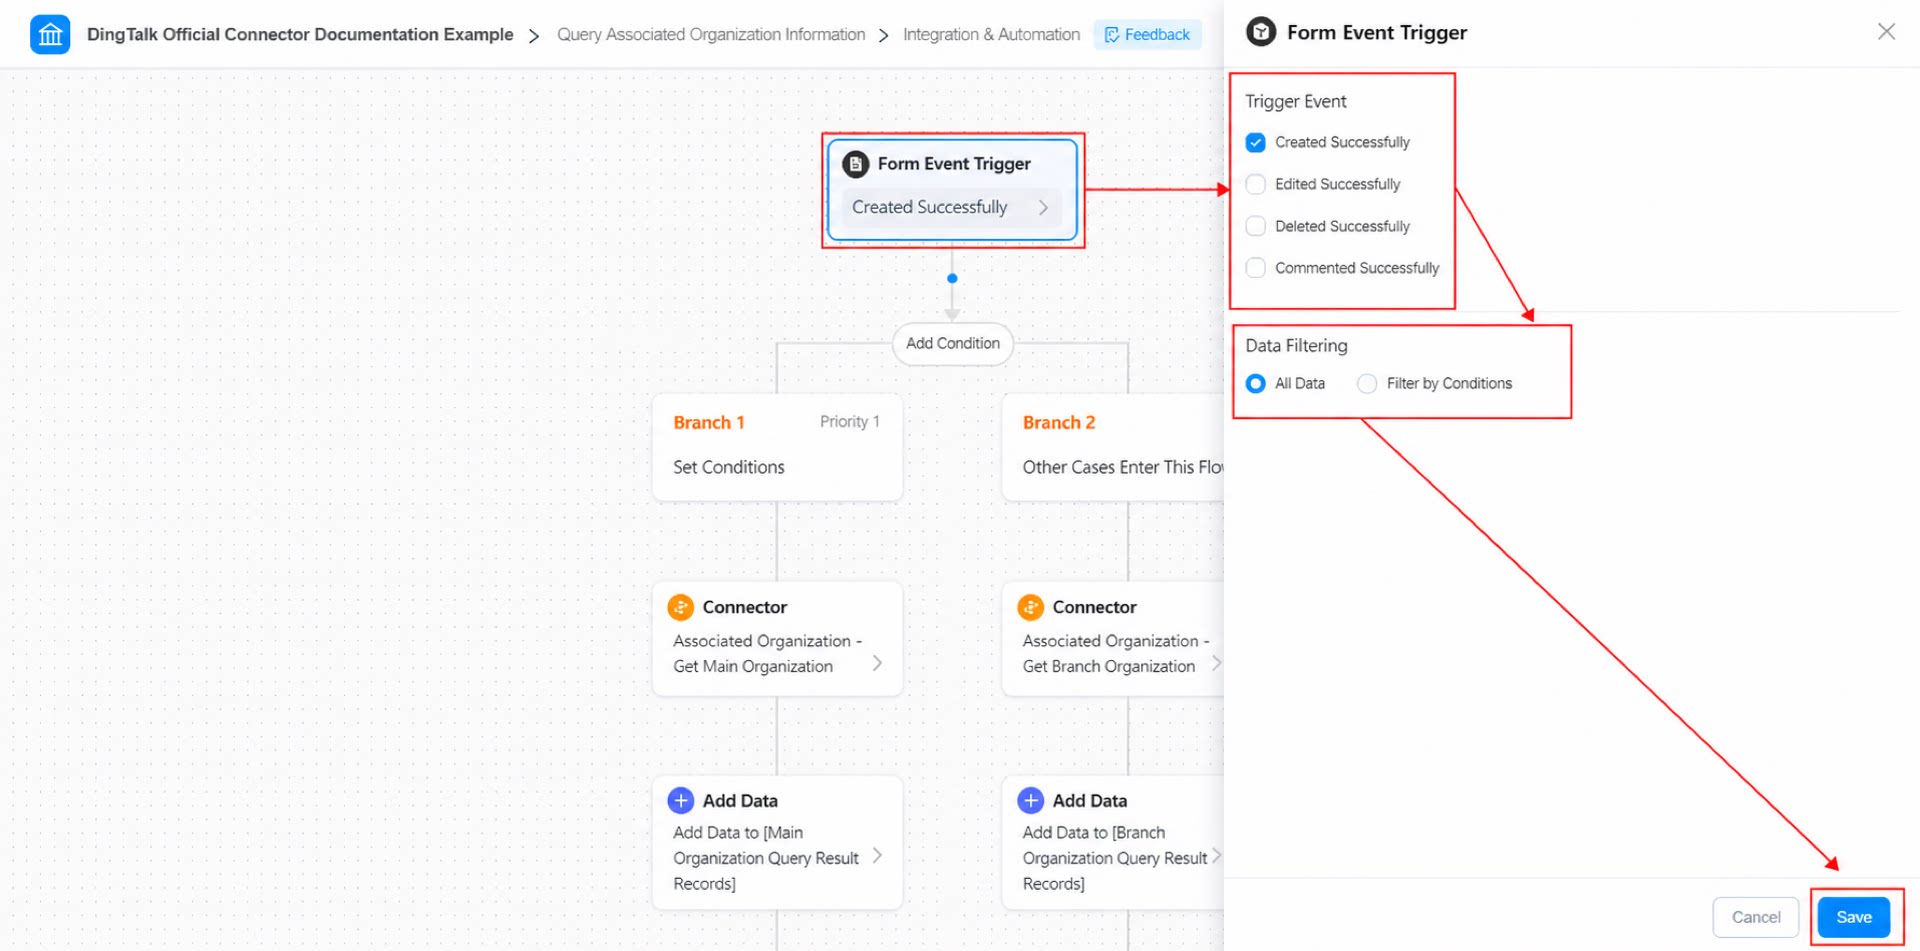
- Name the connector “Query Association Organization Info” > select Create Success under Form event trigger > select All Data under Data filter > click Confirm. (See Figure 2.2-3.)
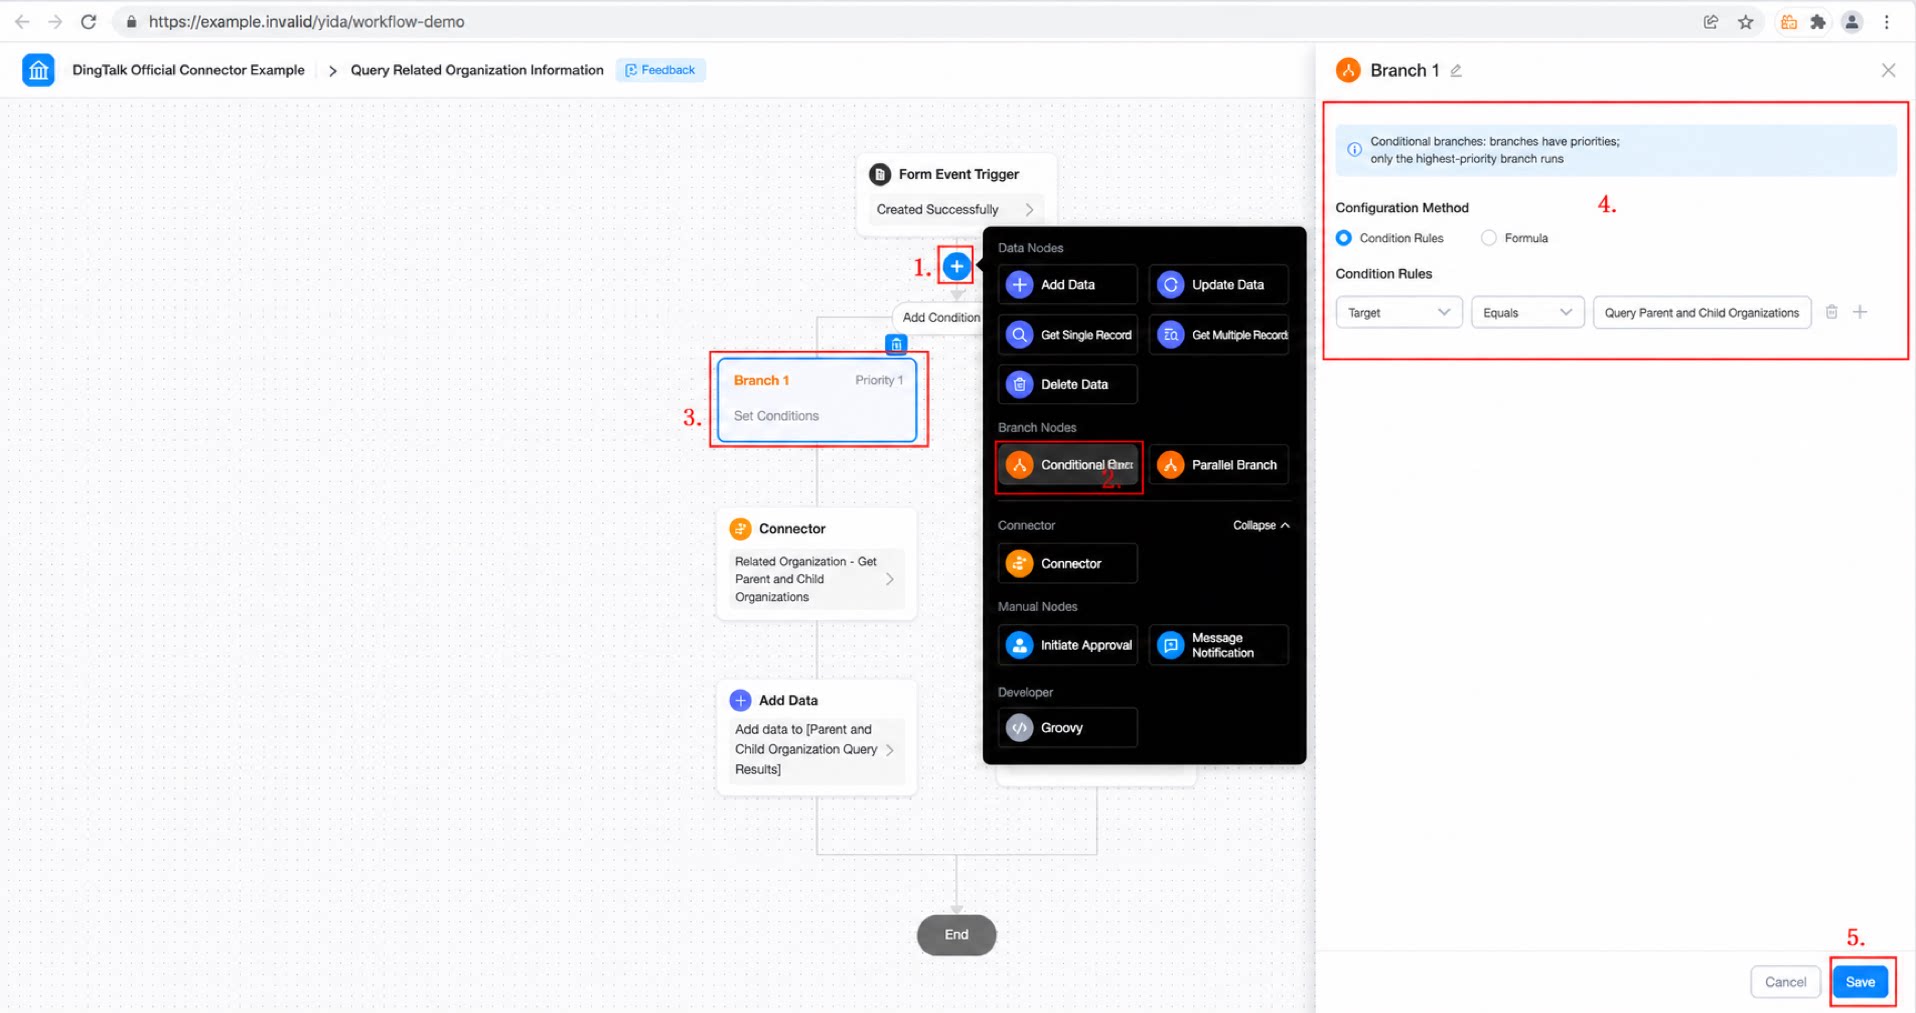
- Add a Conditional Branch node. When the condition rule Target equals “Query Parent Organization”, add the Get Parent Organization connector and a Create Data data node. Otherwise, add the Get Branch Organization connector and a Create Organization data node. (See Figure 2.2-4.)
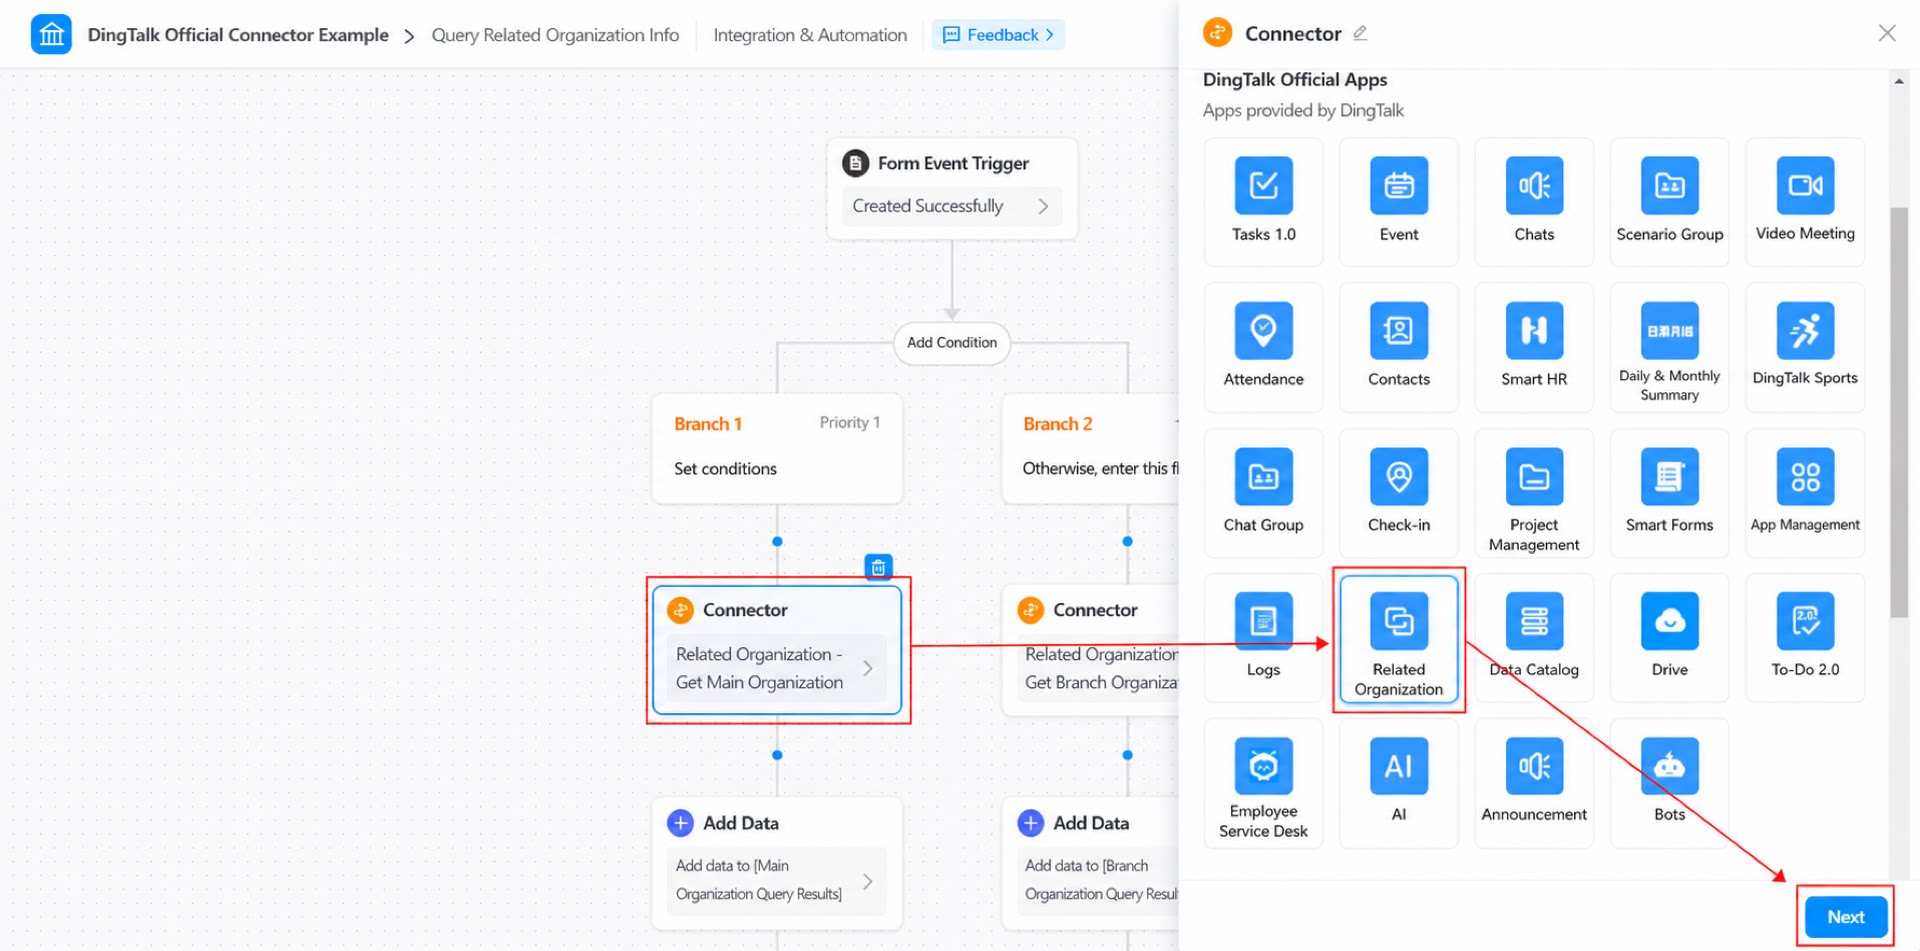
- Configure the connector under Branch 1.
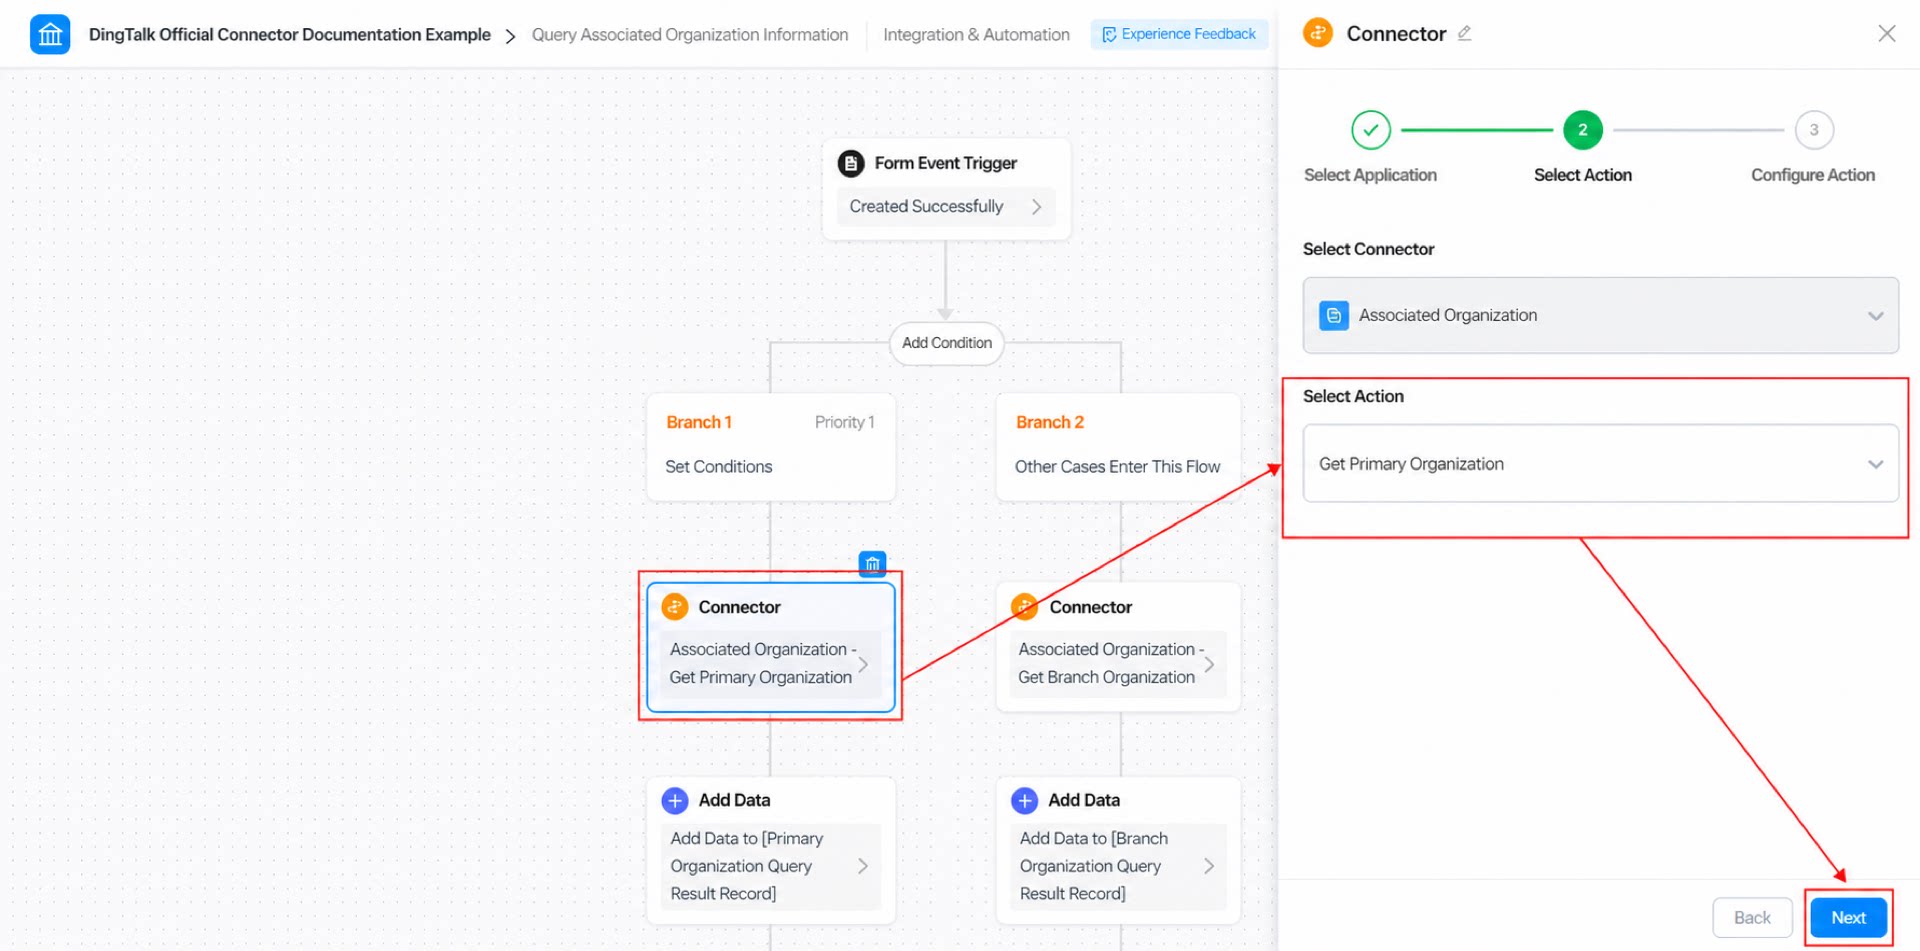
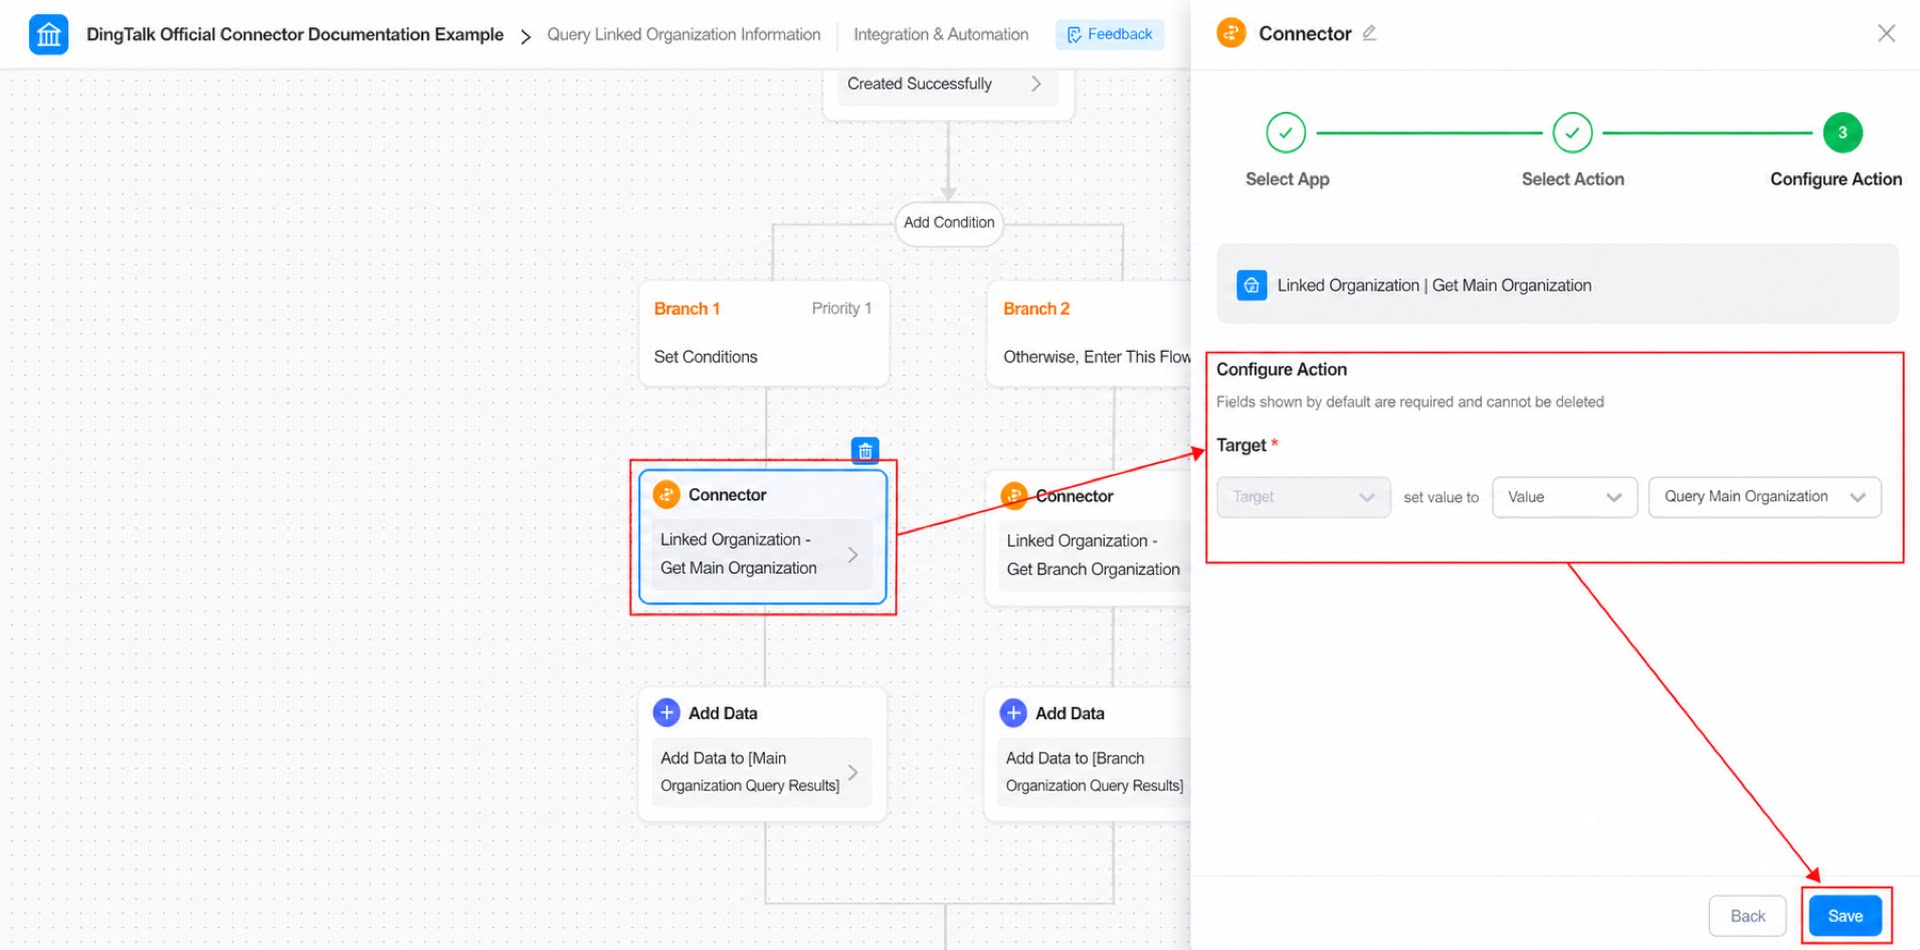
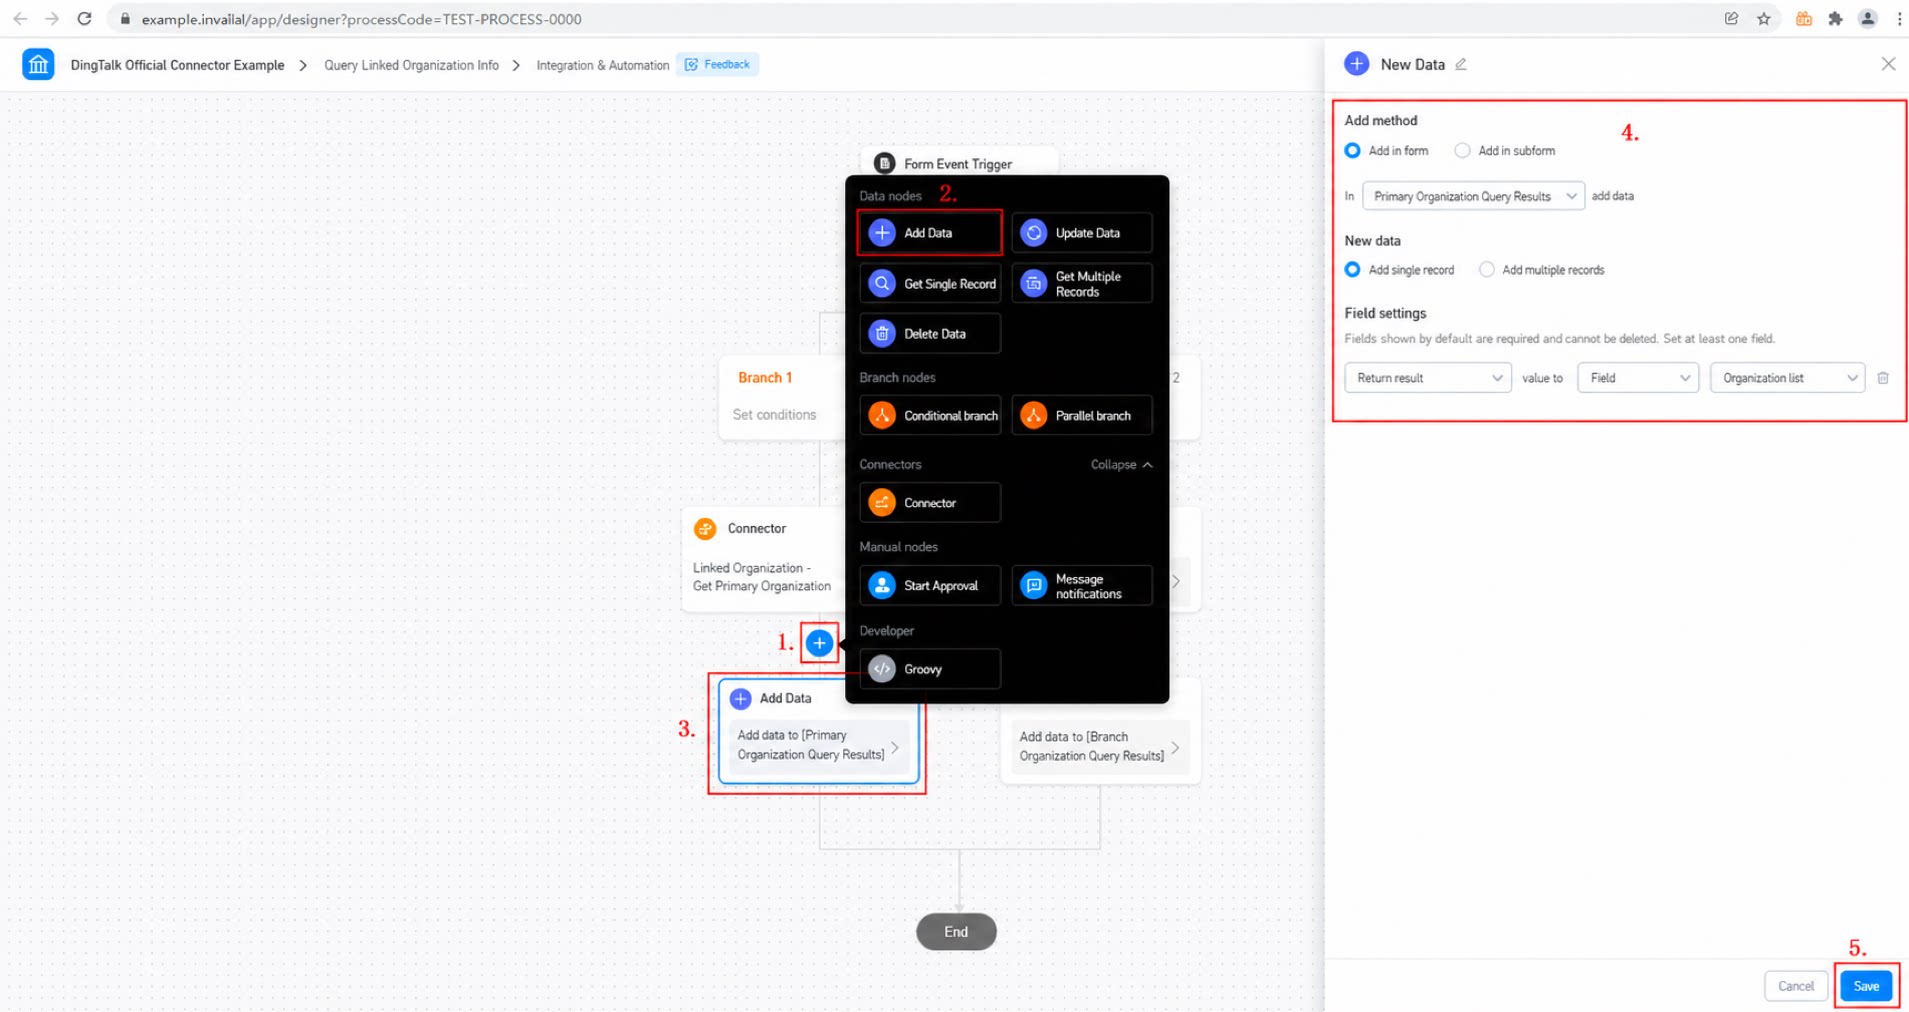
- Configure the Create Data node under Branch 1. (See Figure 2.2-8.)
- Configure the connector under Branch 2.
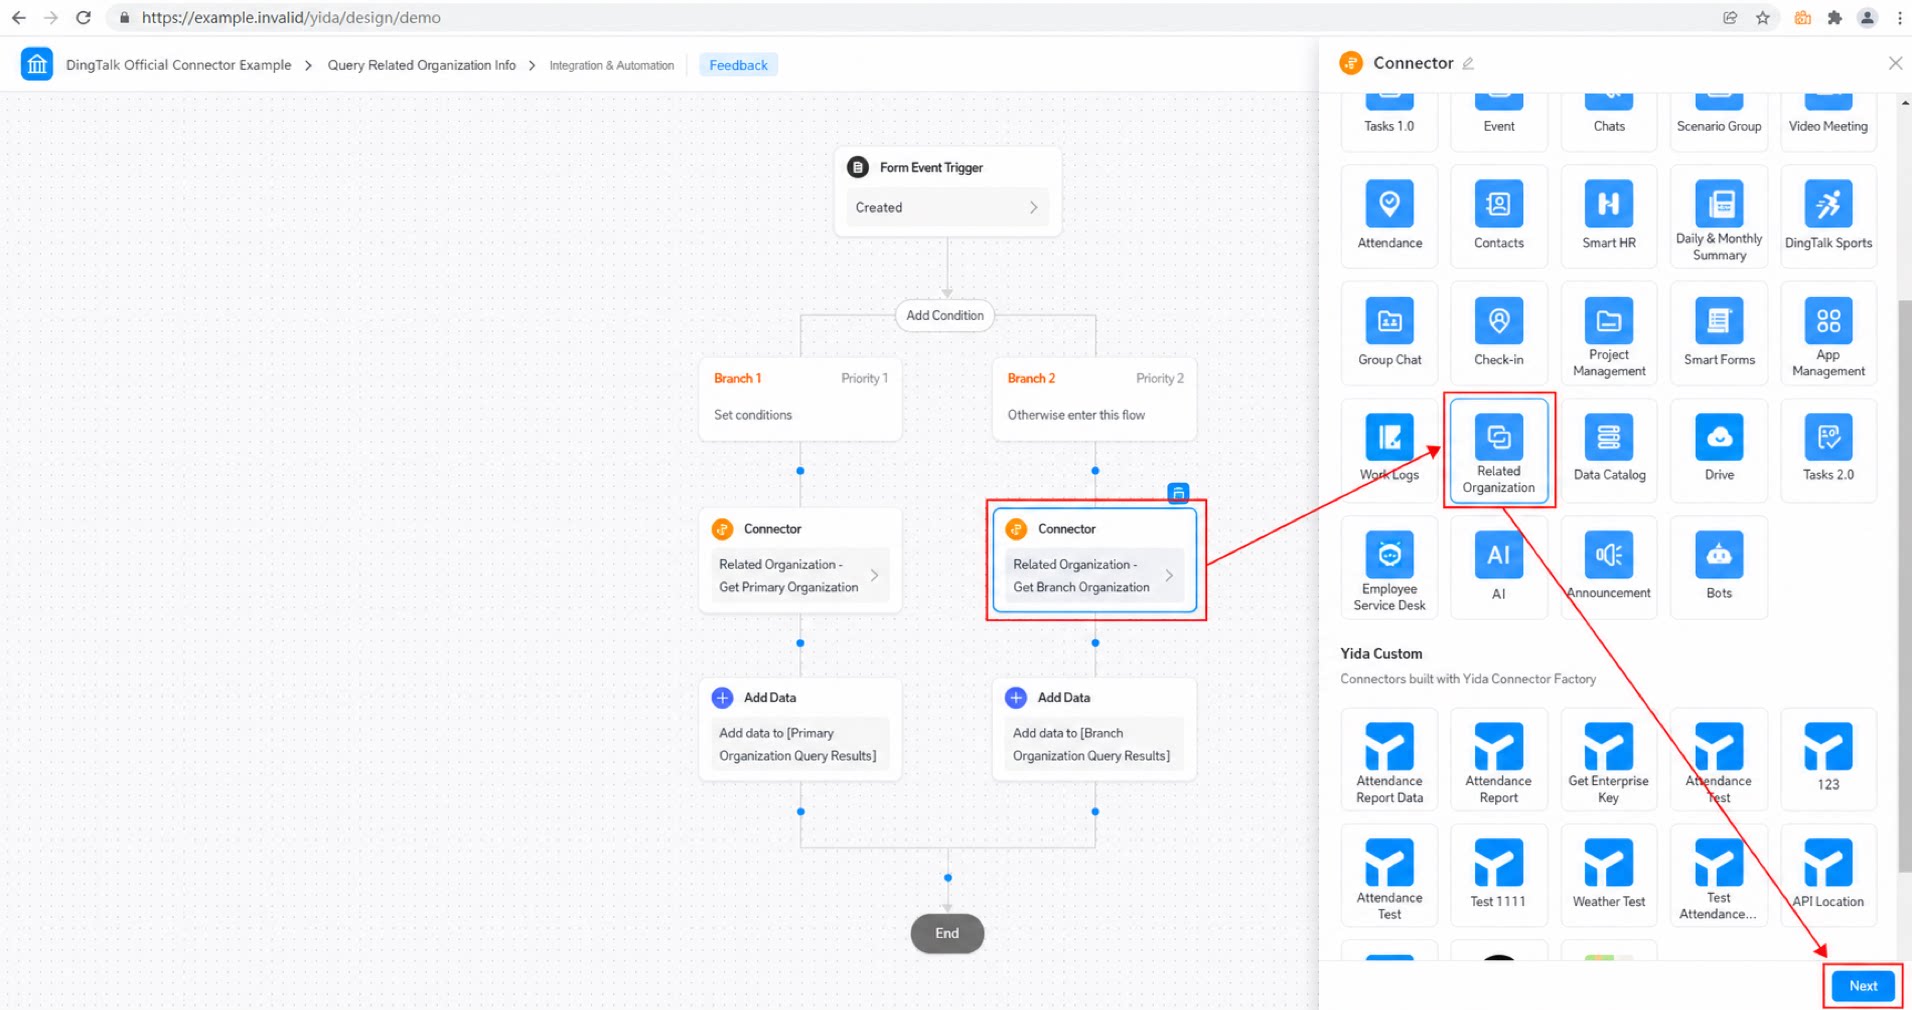
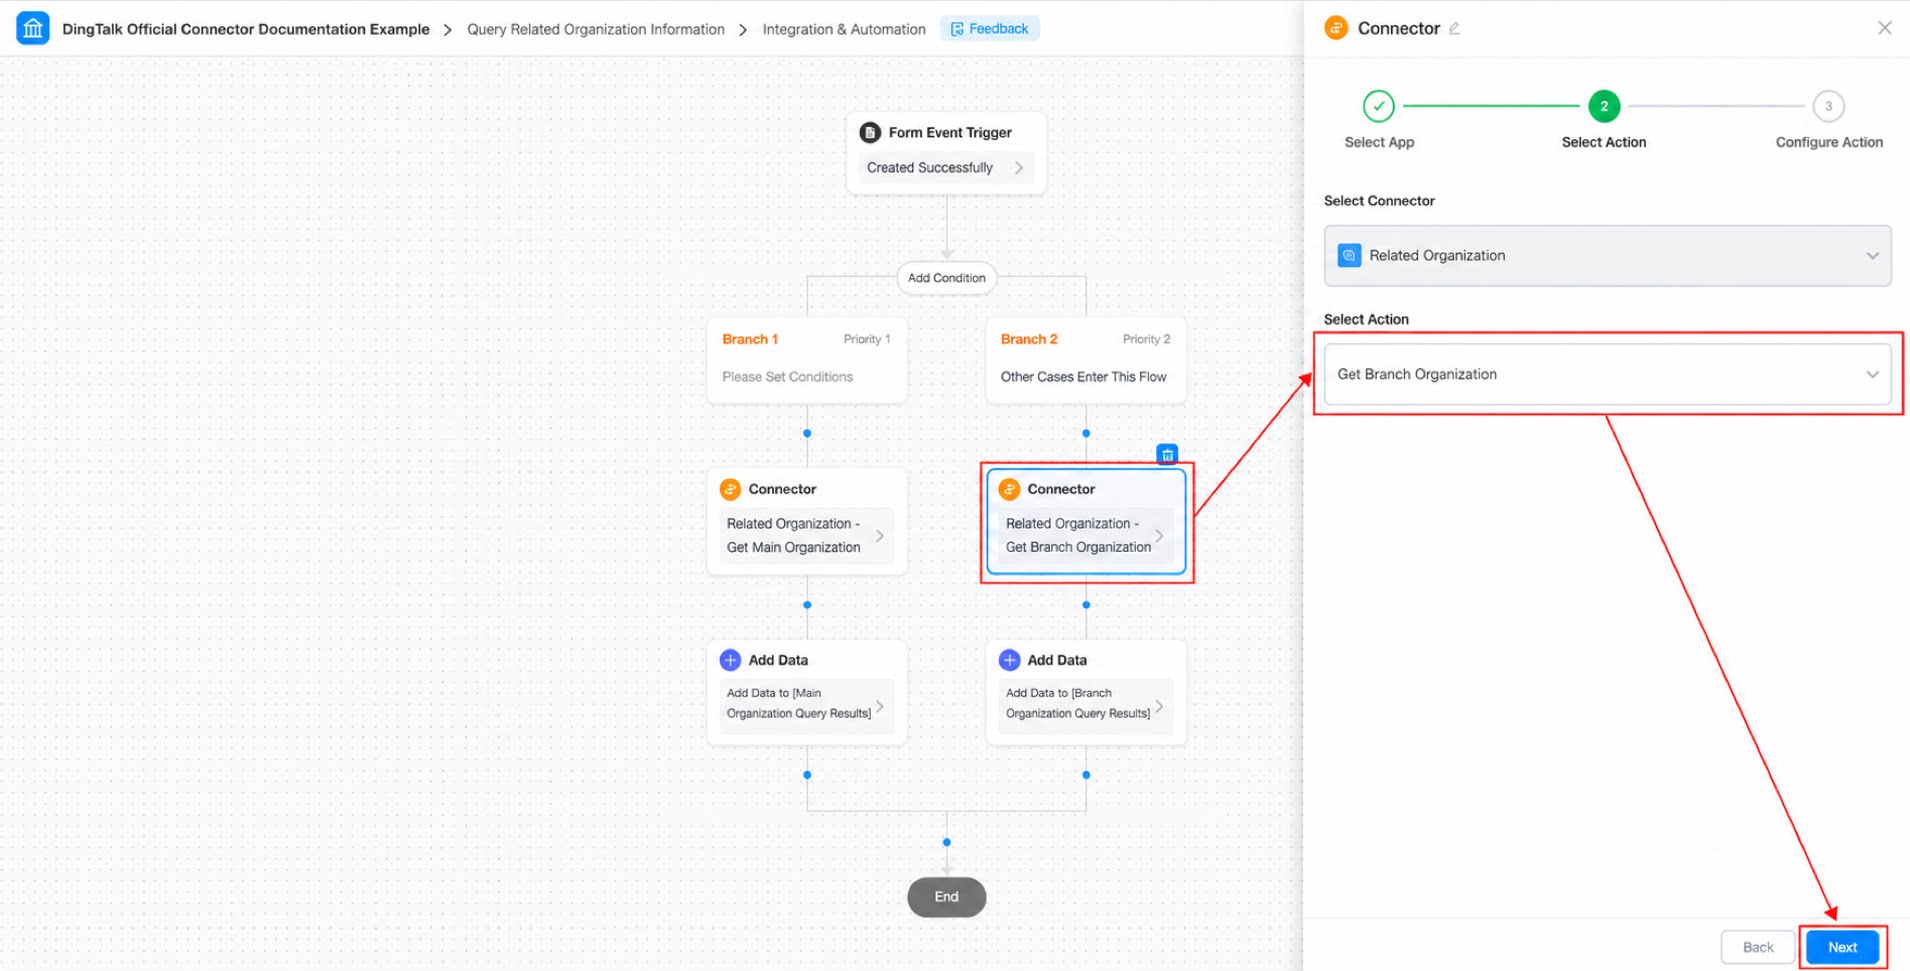
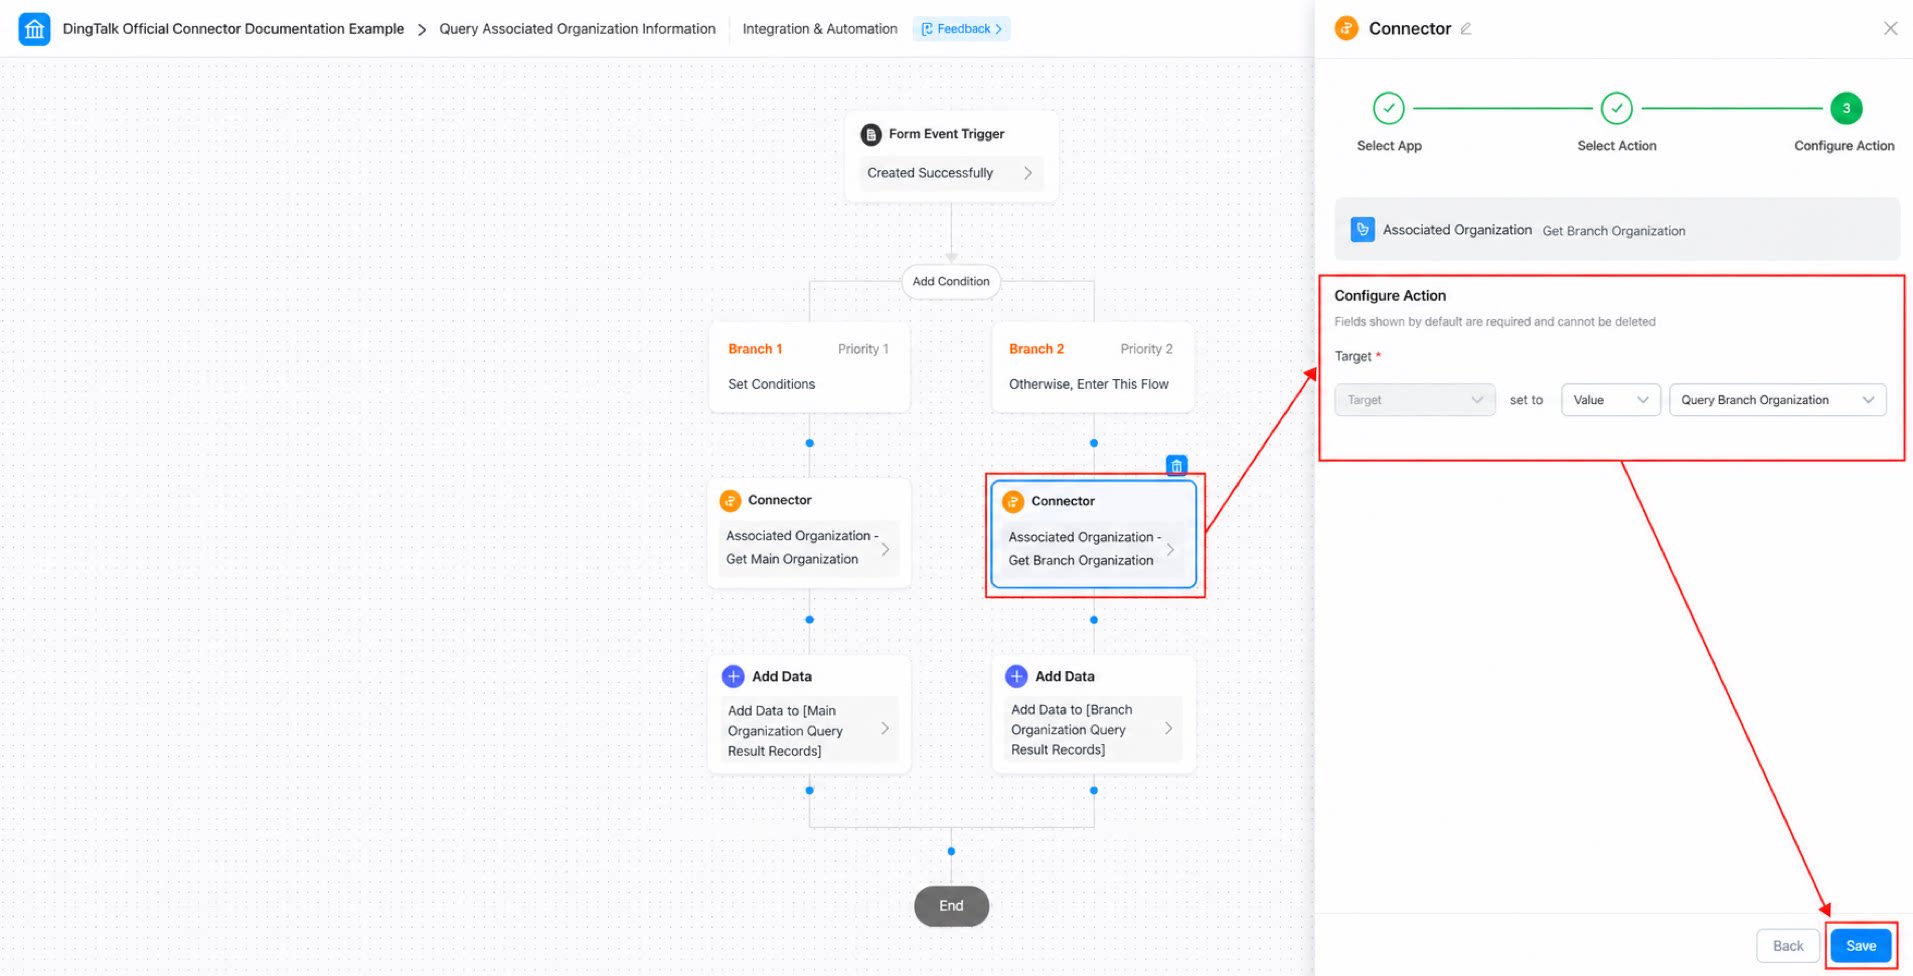
- Configure the Create Data node under Branch 2. (See Figure 2.2-12.)
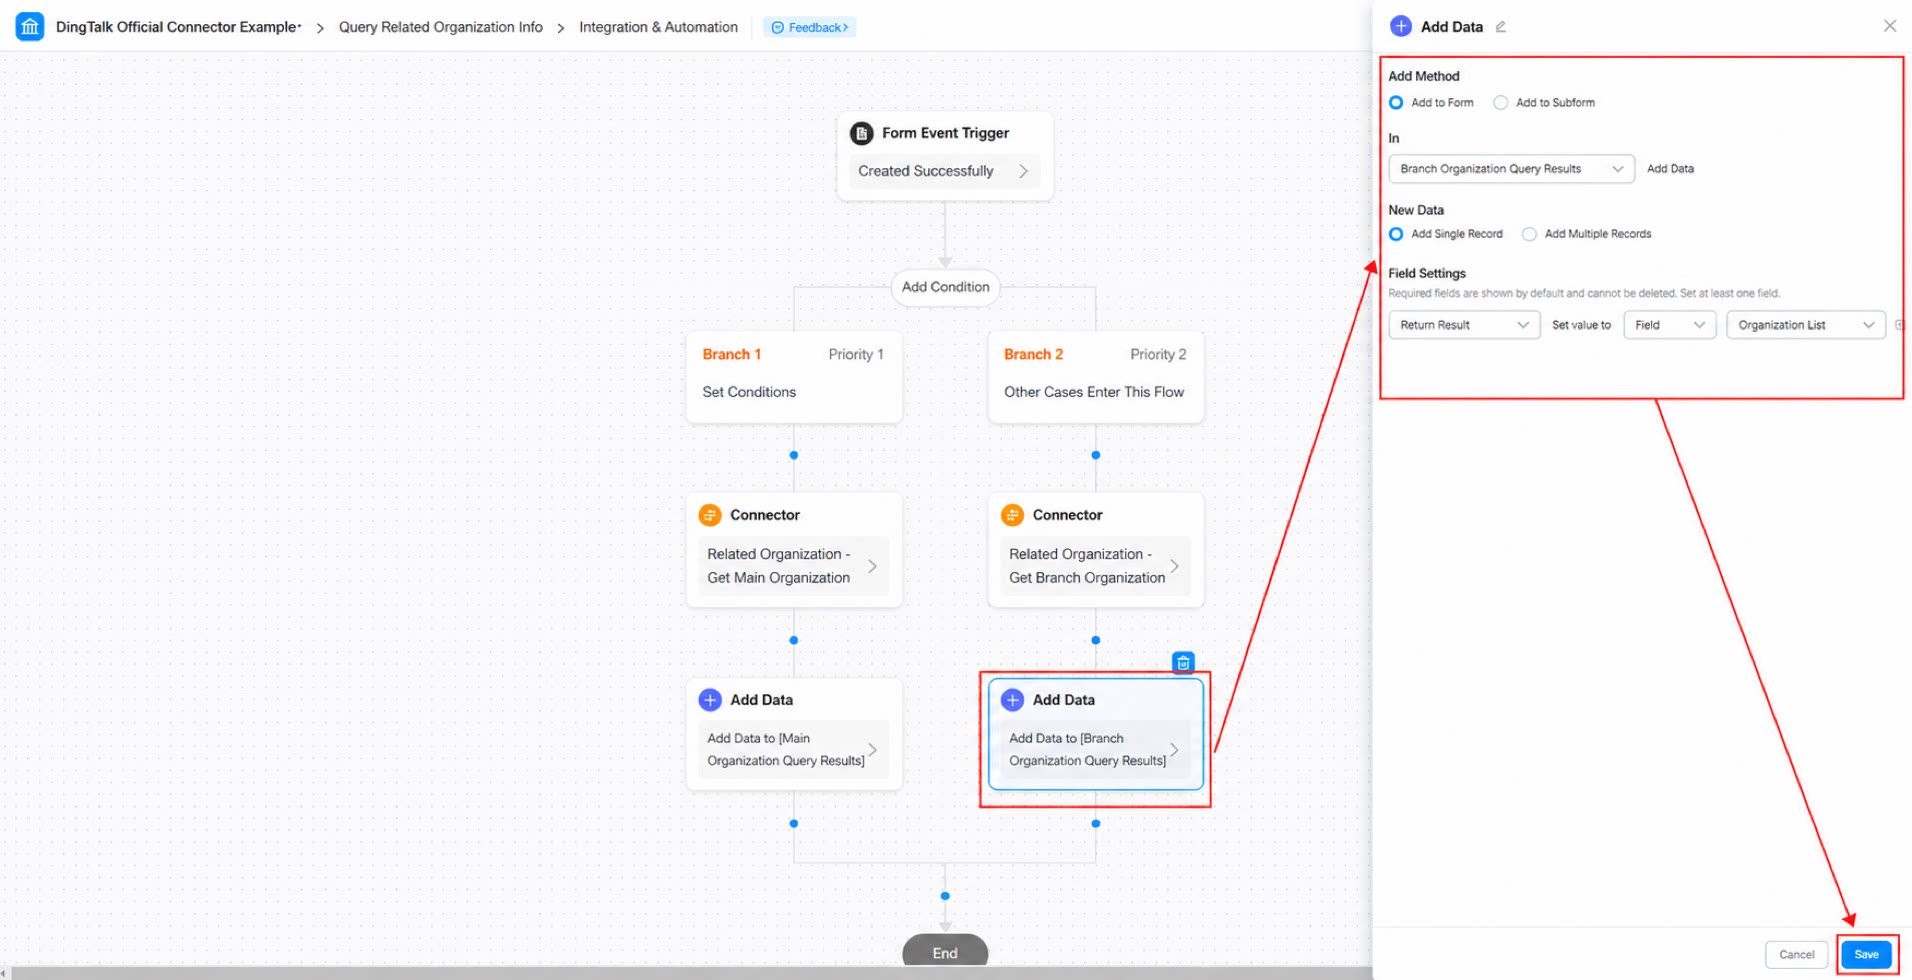
- Click Save in the upper-right corner of the page, then click Publish.
2.3 Step 3: Submit Form Data
Trigger the connector, receive the data it returns, and display the processed result. Steps: Fill in the Form Data and submit. (See Figure 2.3-1.)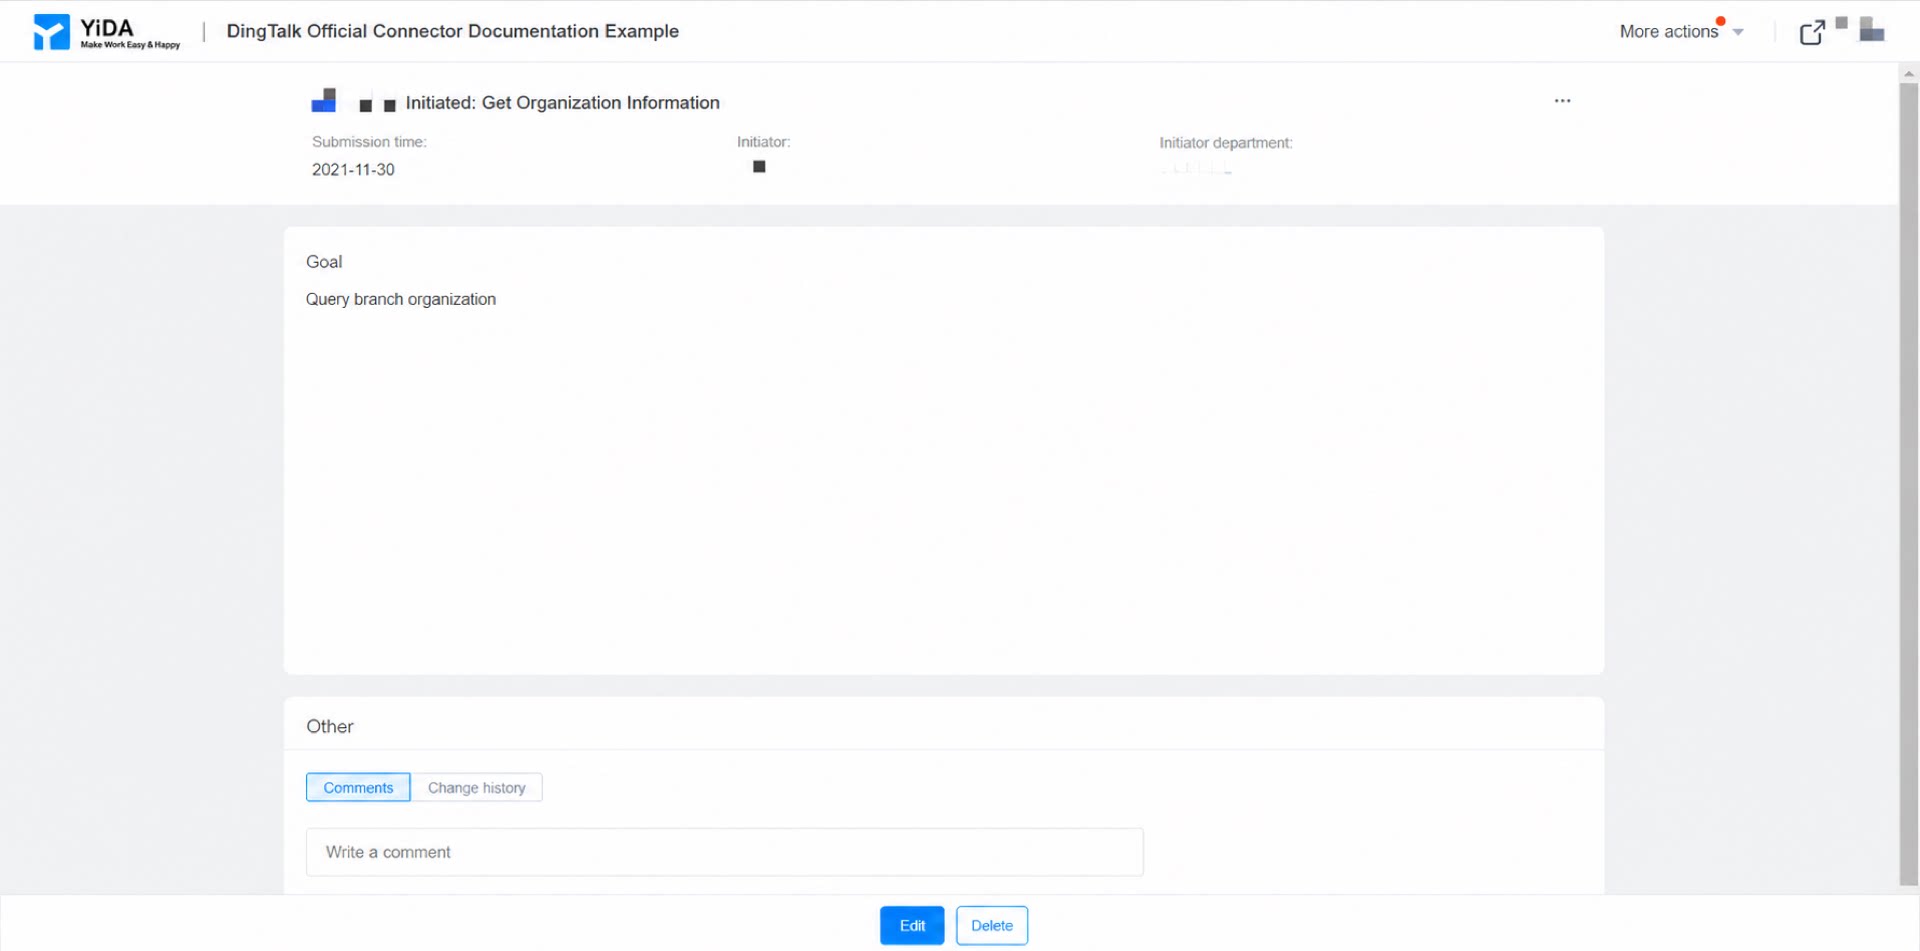
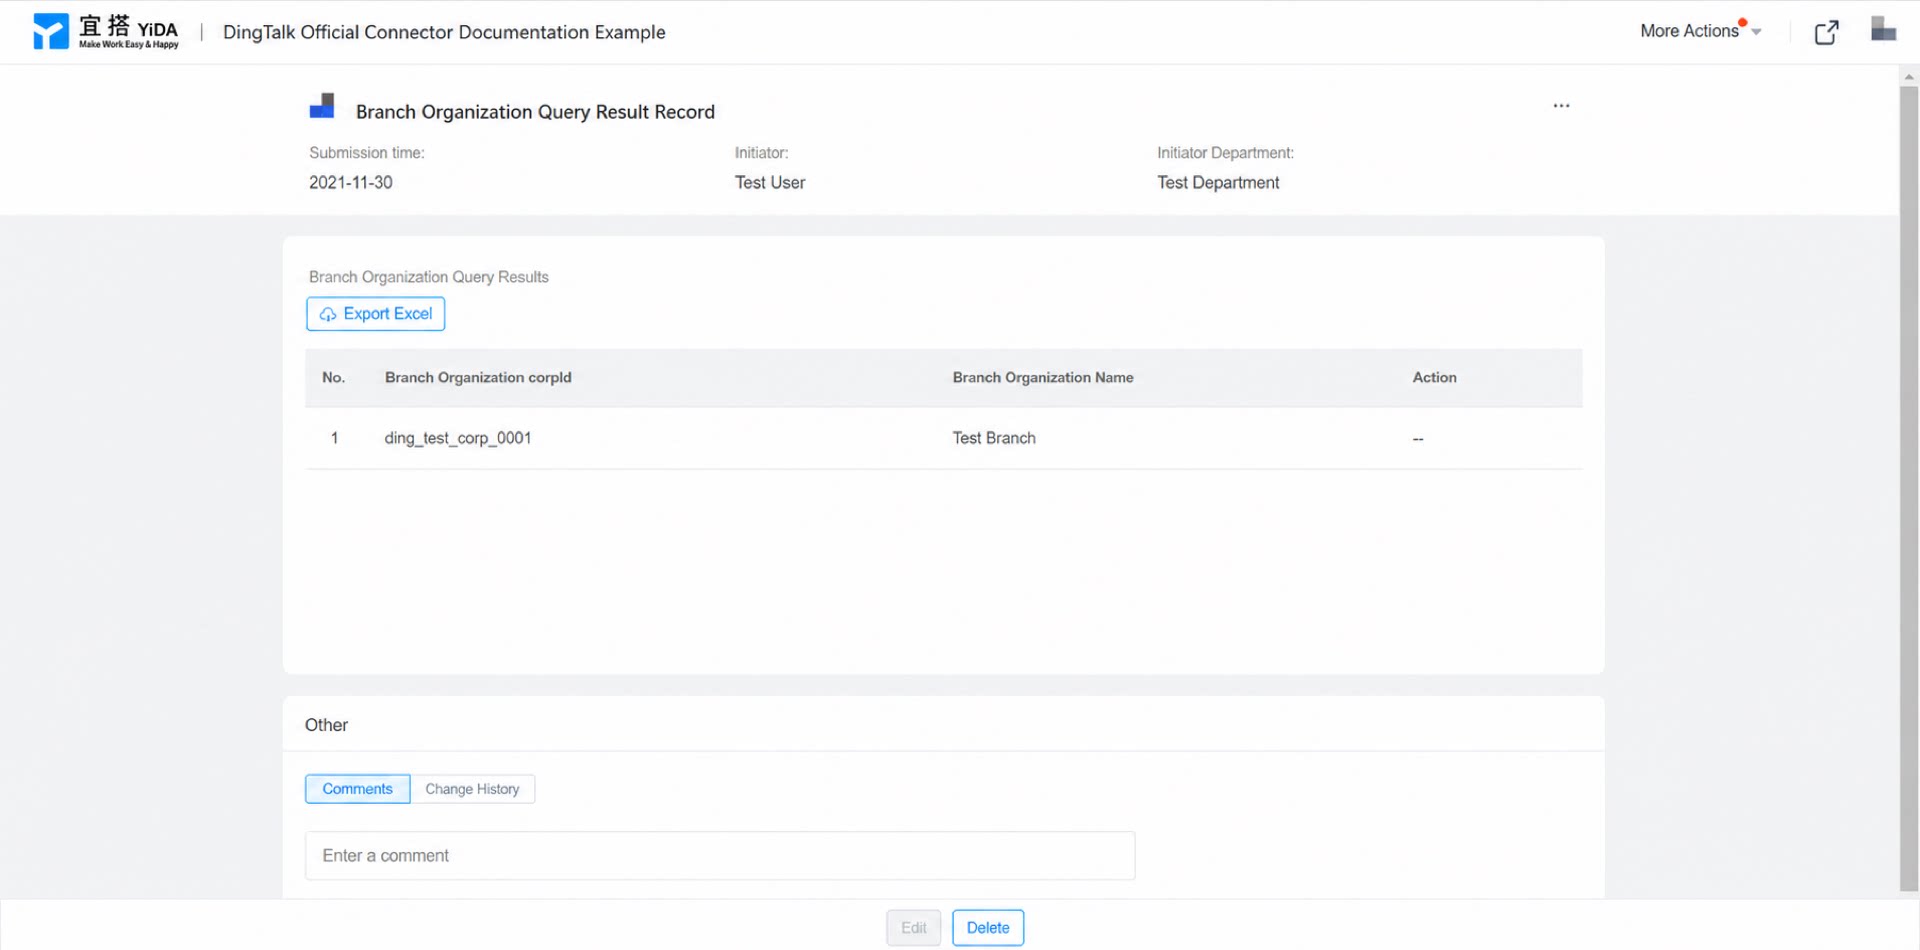
3. Result Preview