Chats
Chats Calendar
 Meetings
 Contacts
 Mail
Mail Docs
Docs Drive
Drive AI Table
 AI Minutes
 Attendance
 Approval
 YiDA
YiDA Admin Console
1. Use Case
This example creates a “Check-in Query Form” and a “Query Result Record” form, then uses a form connector to pull each employee’s check-in status, time, and location into the result form.2. Steps
2.1 Step 1: Create the Forms
Create two regular forms. The “Check-in Query Form” triggers the connector to run the query, and the “Query Result Record” stores the results returned by the connector for easy review.2.1.1 Create the Query Form
Steps:- Create a regular form and name it “Check-in Query Form”.
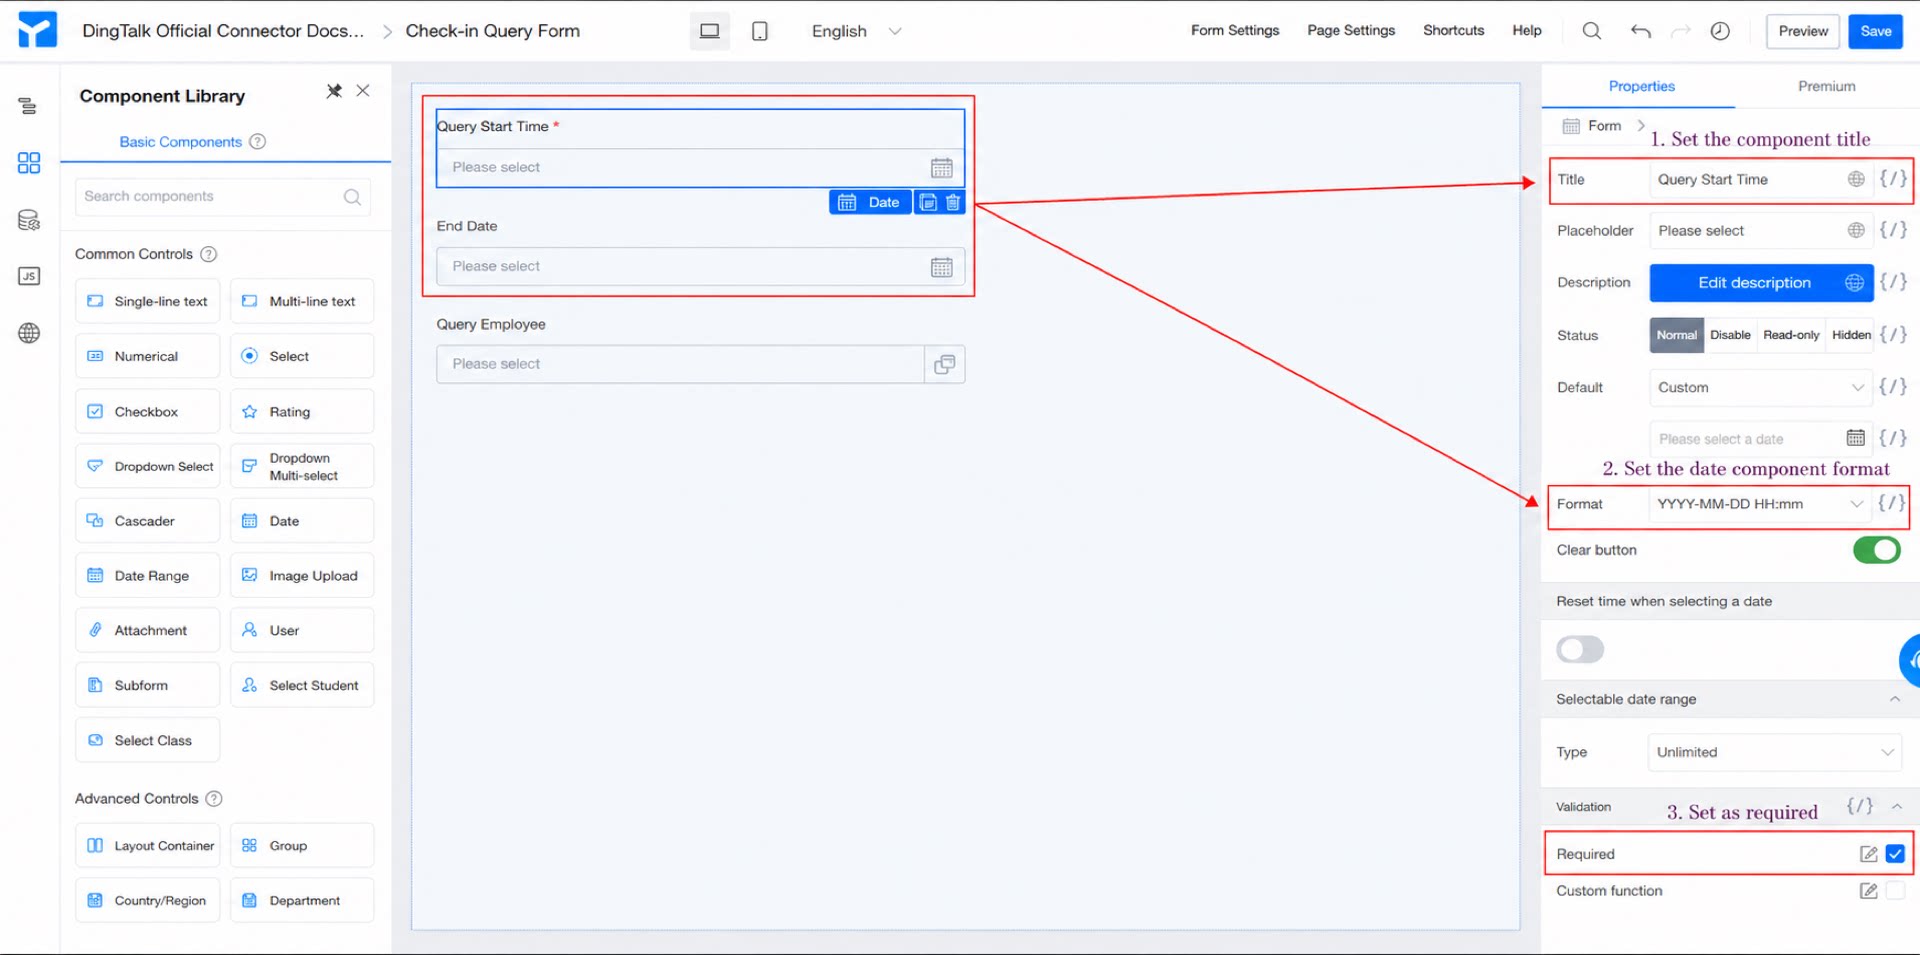
- Add two Date components named “Query Start Date” and “Query End Date”. Set the format to “YYYY-MM-DD HH:mm” and mark both as required. (See Figure 2.1-1.)
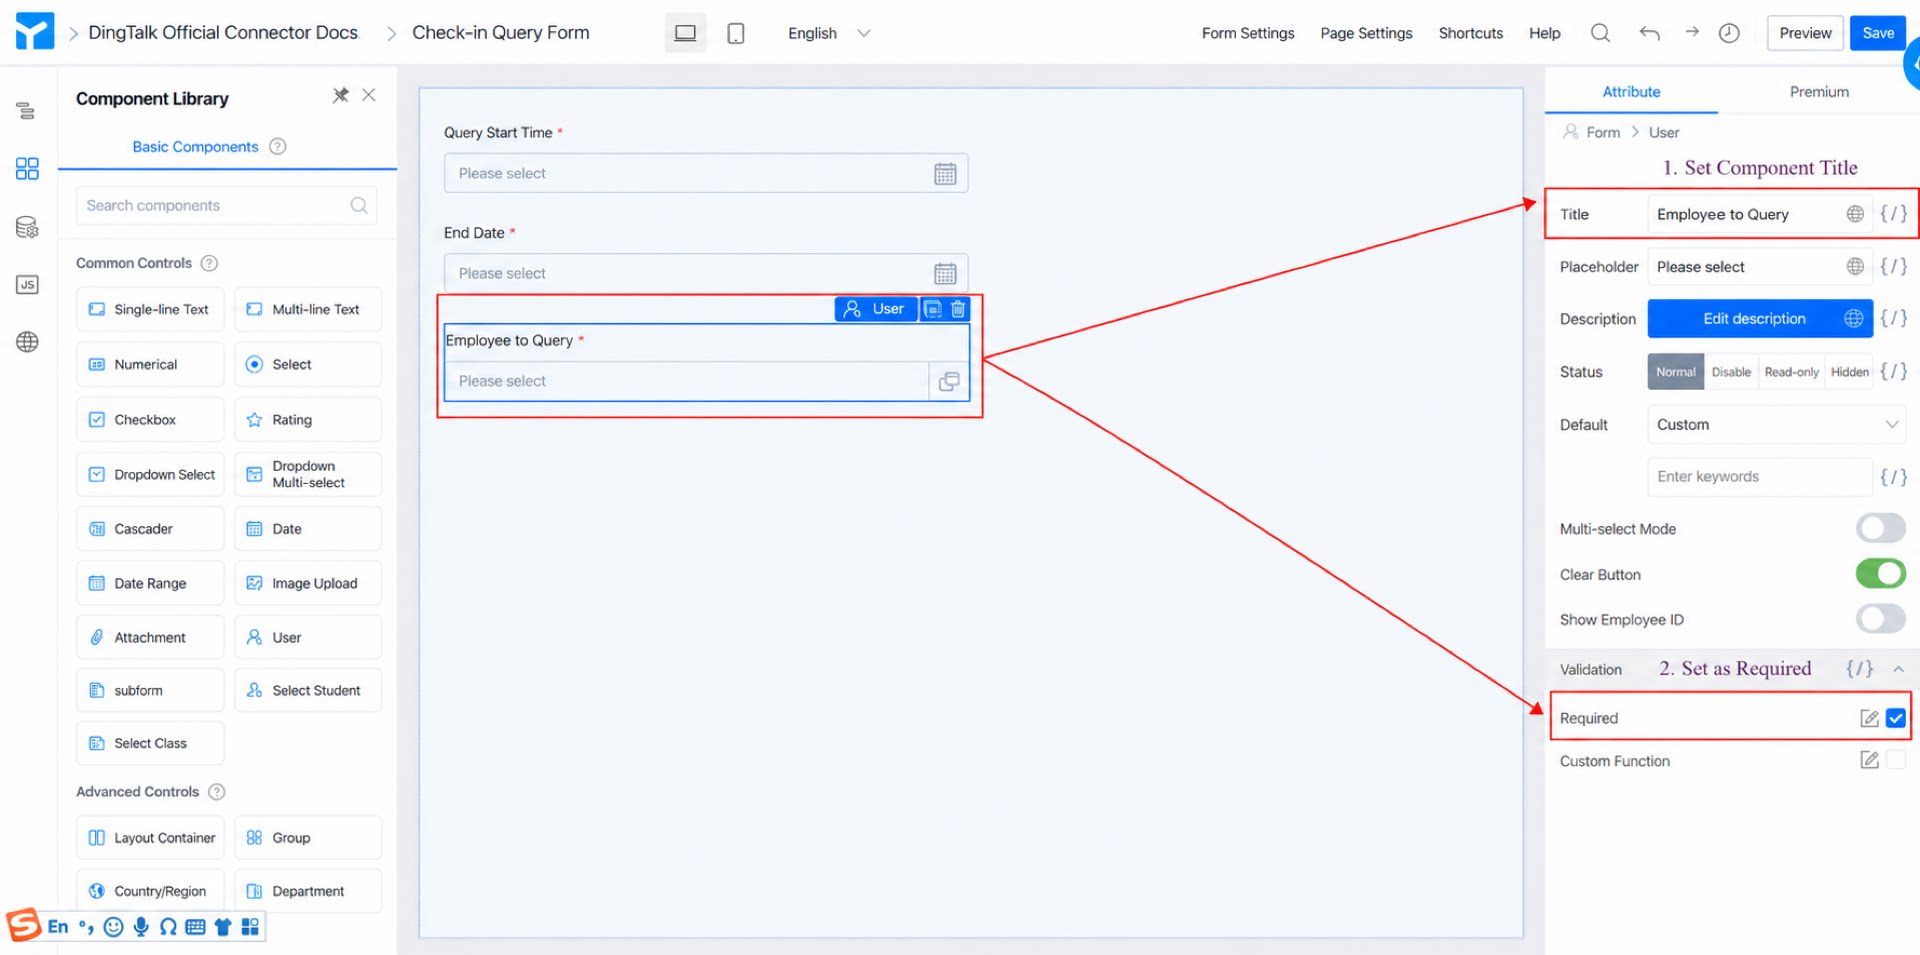
- Add a member component and name it “Employee to Query”. Mark it as required. (See Figure 2.1-2.)
- Click Save in the upper-right corner of the page.
2.1.2 Create the Result Record Form
Steps:- Create a regular form and name it “Query Result Record”.
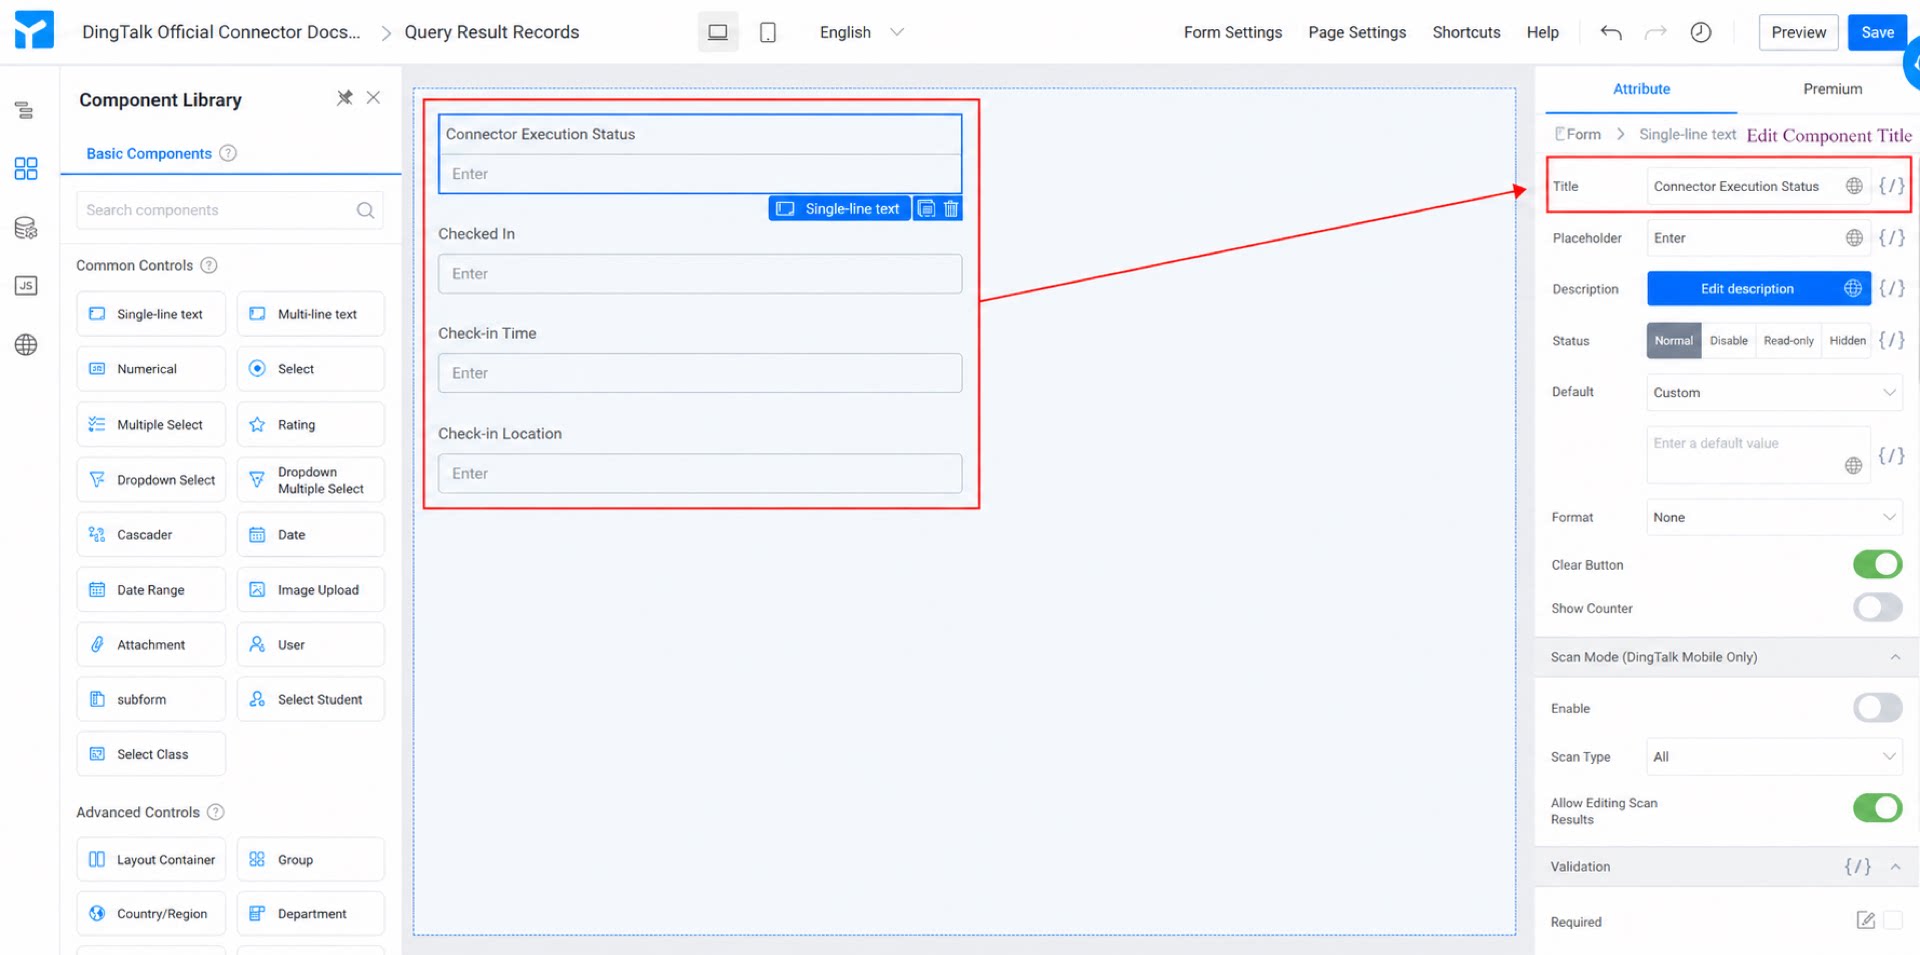
- Add four Single-line text components named “Connector Execution Status”, “Check-in Status”, “Check-in Time”, and “Check-in Location”. (See Figure 2.1-3.)
- Click Save in the upper-right corner.
2.2 Step 2: Configure the Form Connector for the “Check-In Query Form”
For an introduction to connectors, see Integration & Automation - Connector.
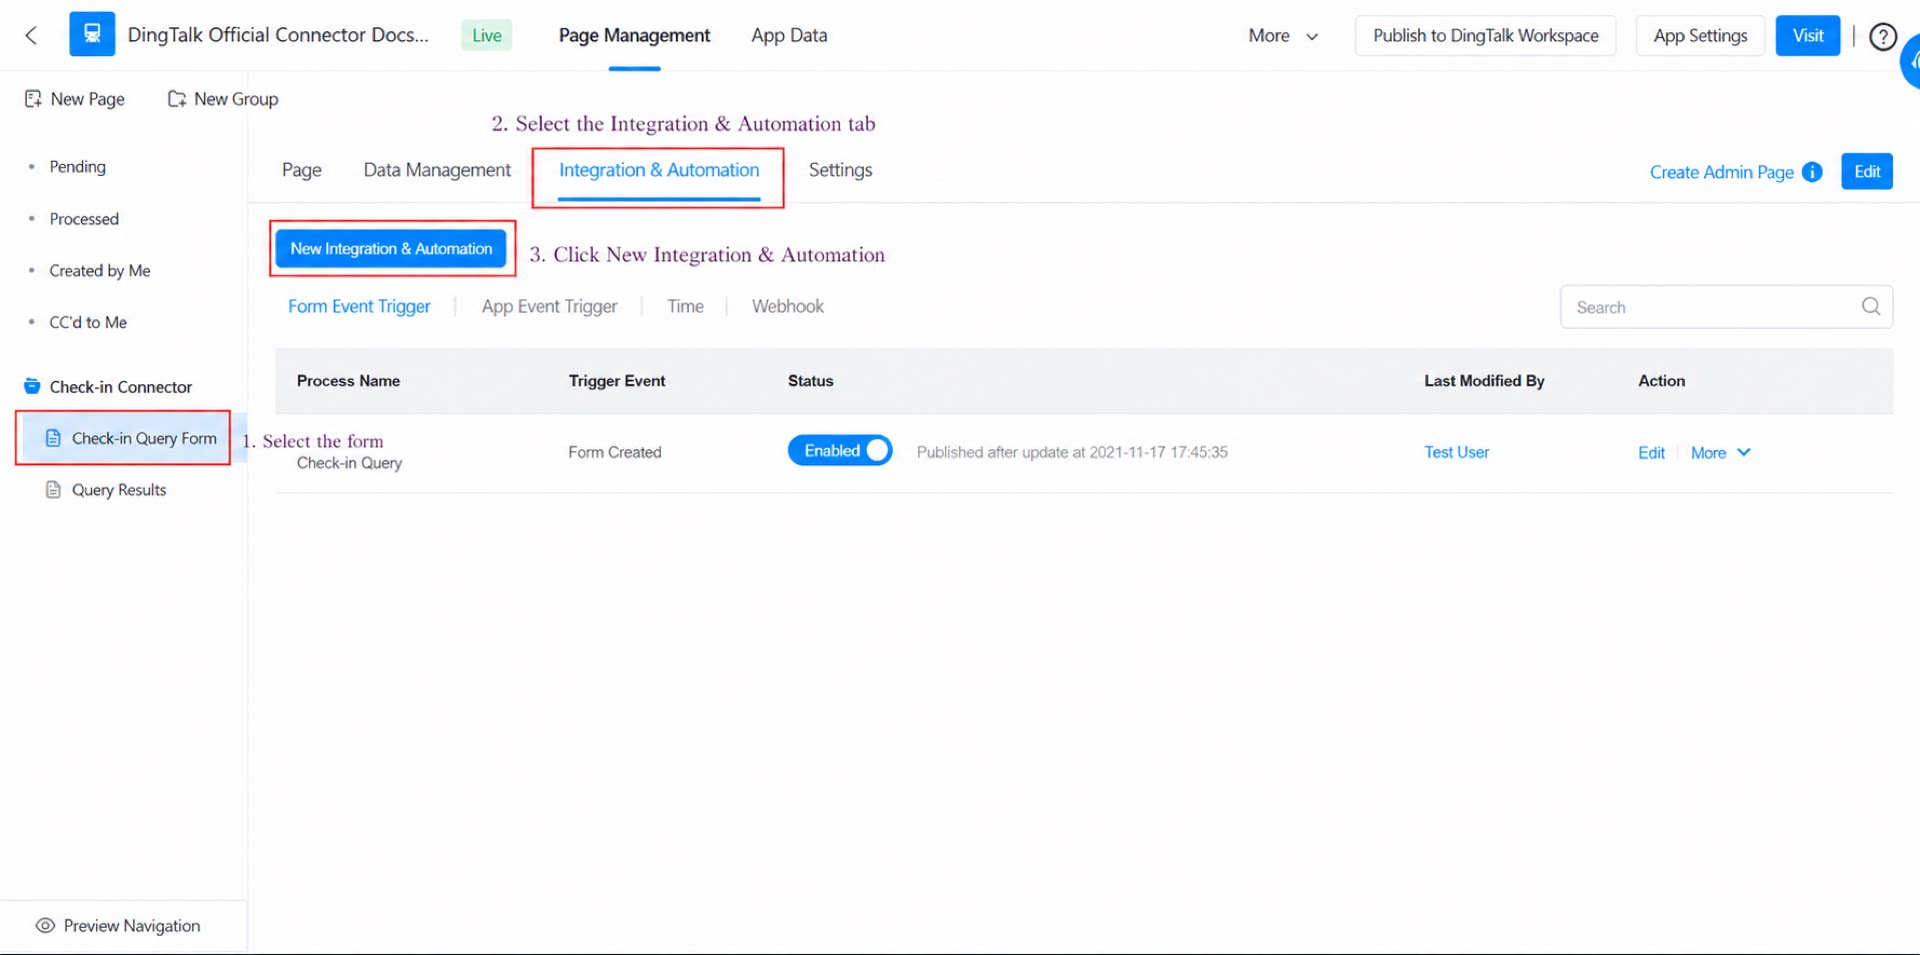
- On the admin page, select the “Check-in Query Form”, switch to the Integration & Automation tab, and click Create Integration & Automation. (See Figure 2.2-1.)
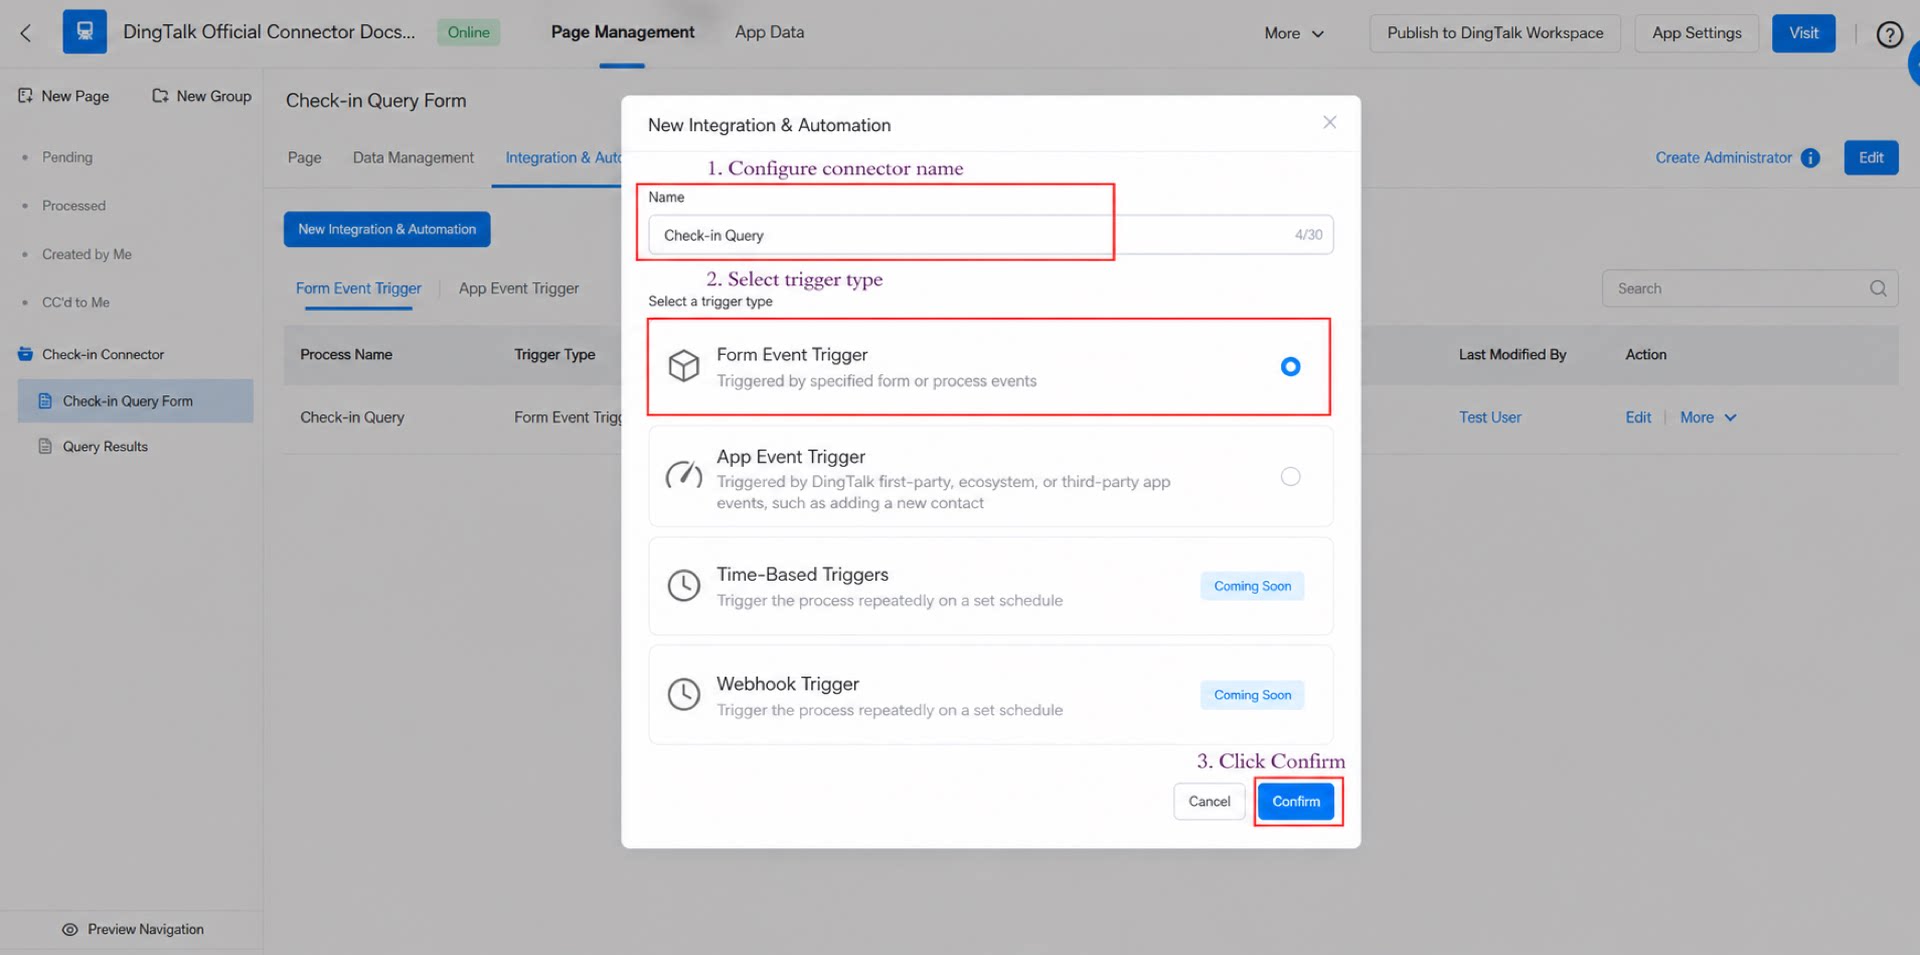
- Name the connector “Check-in Query”, set the trigger type to “Form event trigger”, and click Confirm. (See Figure 2.2-2.)
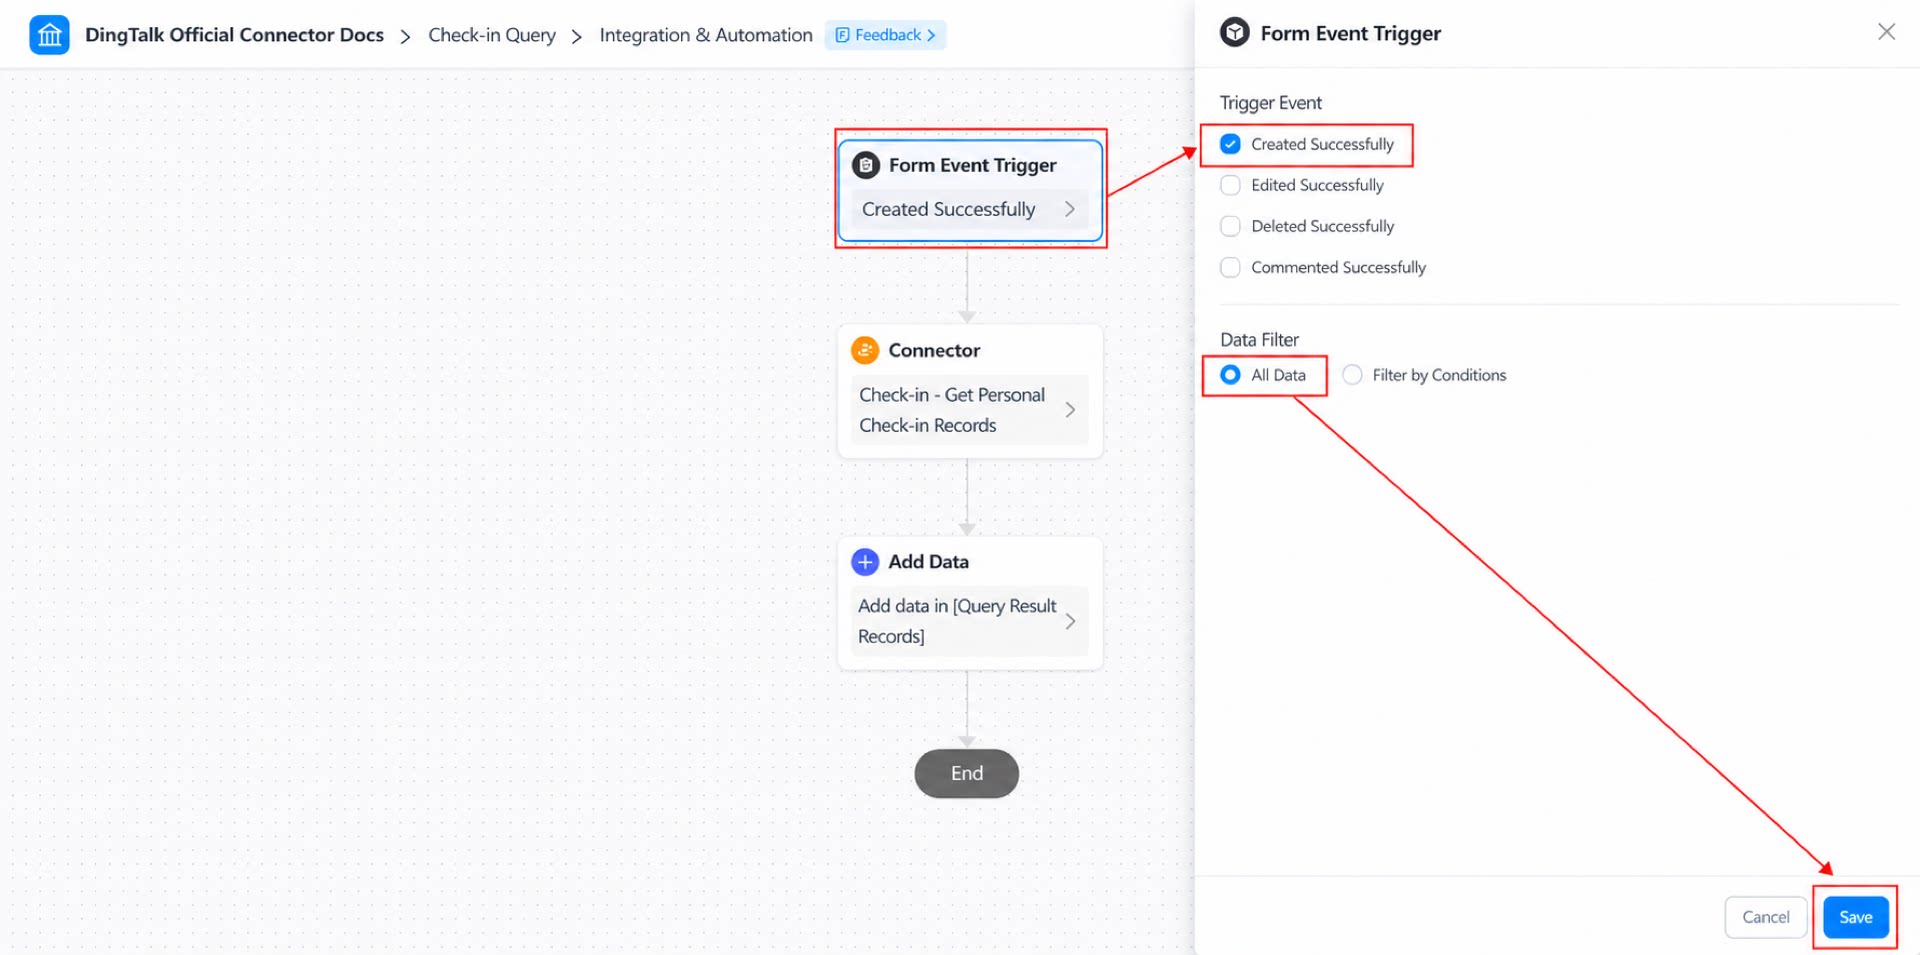
- Click the Form event trigger node. Set the trigger event to “Create success” and the data filter to “All data”. (See Figure 2.2-3.)
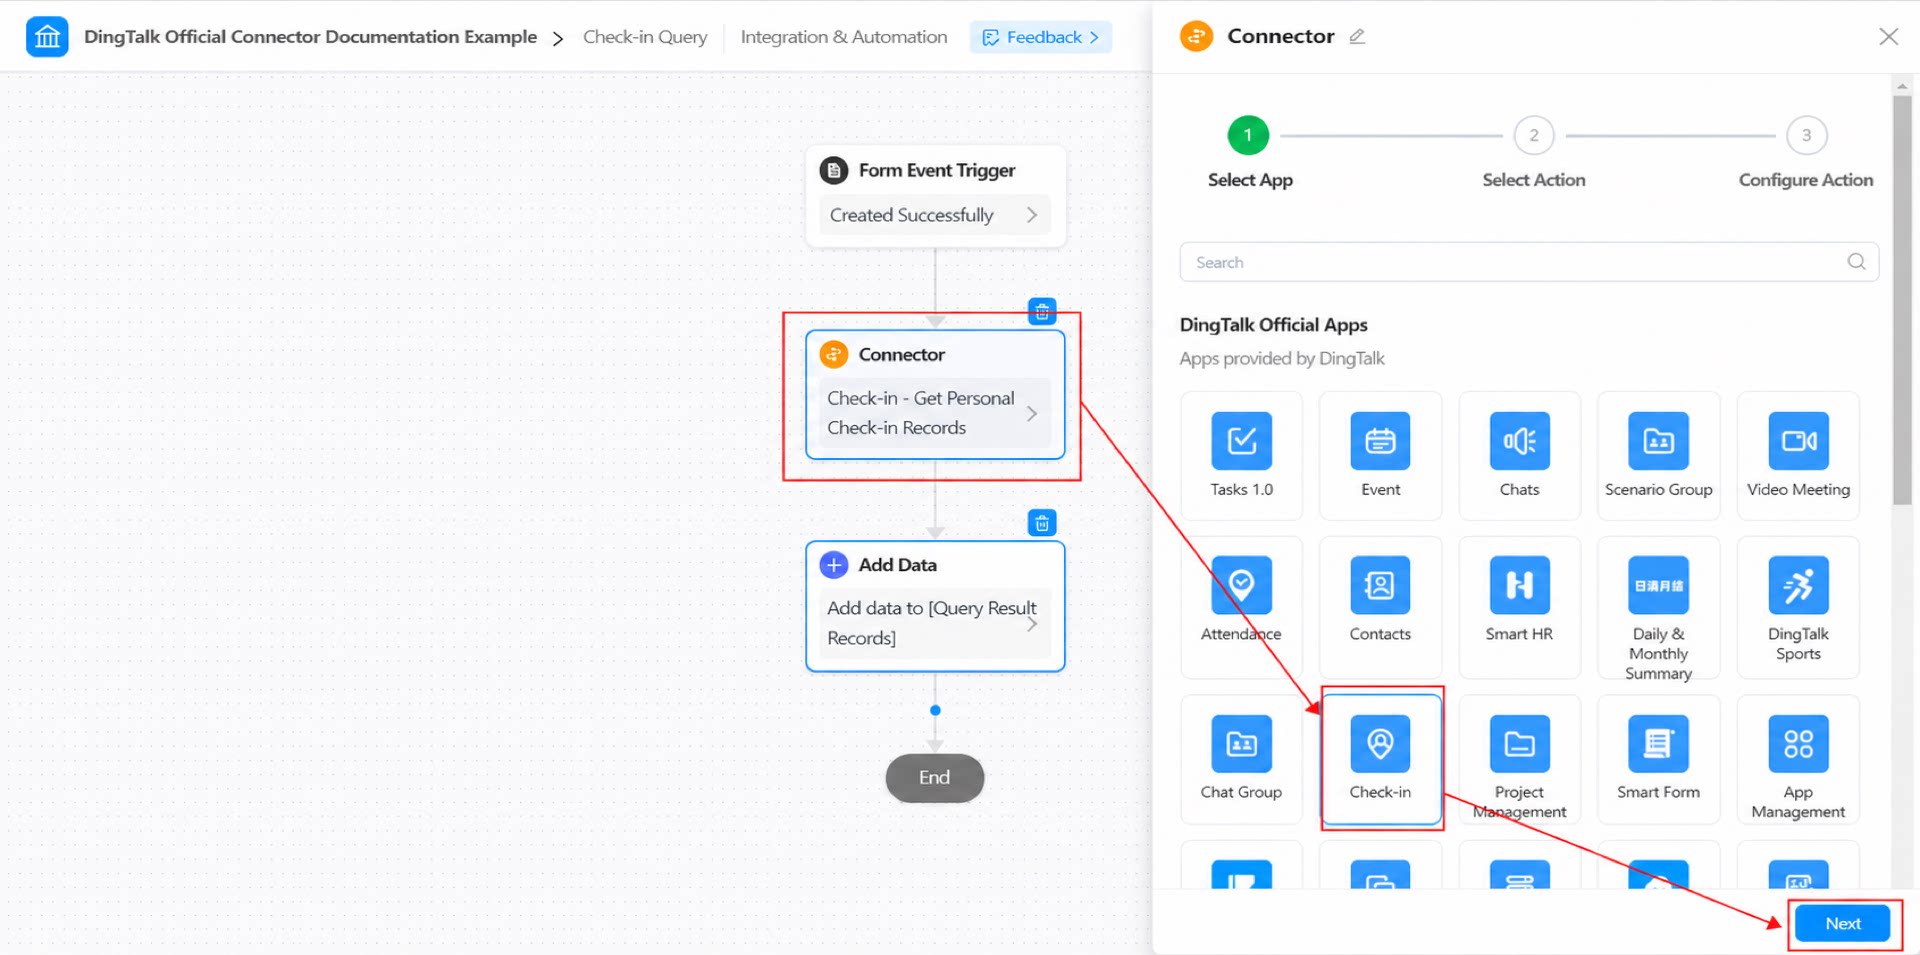
- Click the Connector node, select the “Check-in” app, and click Next. (See Figure 2.2-4.)
- Set the action to “Get personal check-in record” and click Next. (See Figure 2.2-5.)
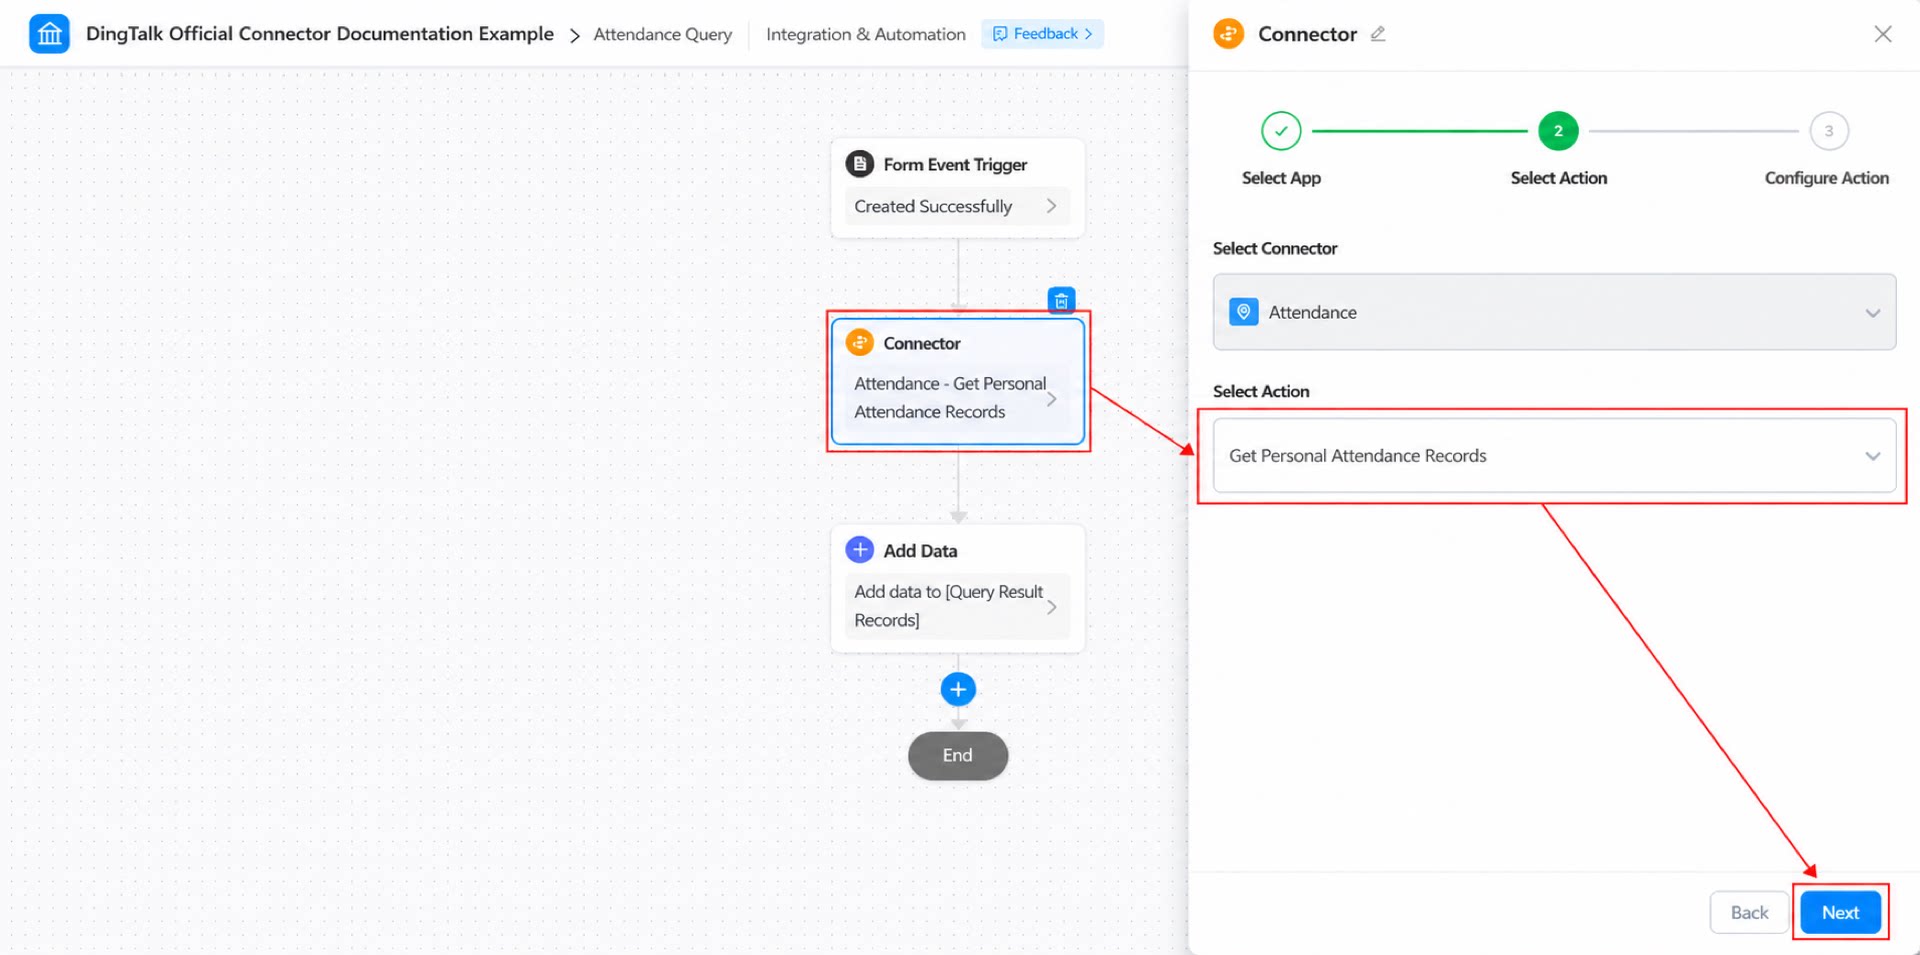
- Configure the action and click Save. (See Figure 2.2-6.)
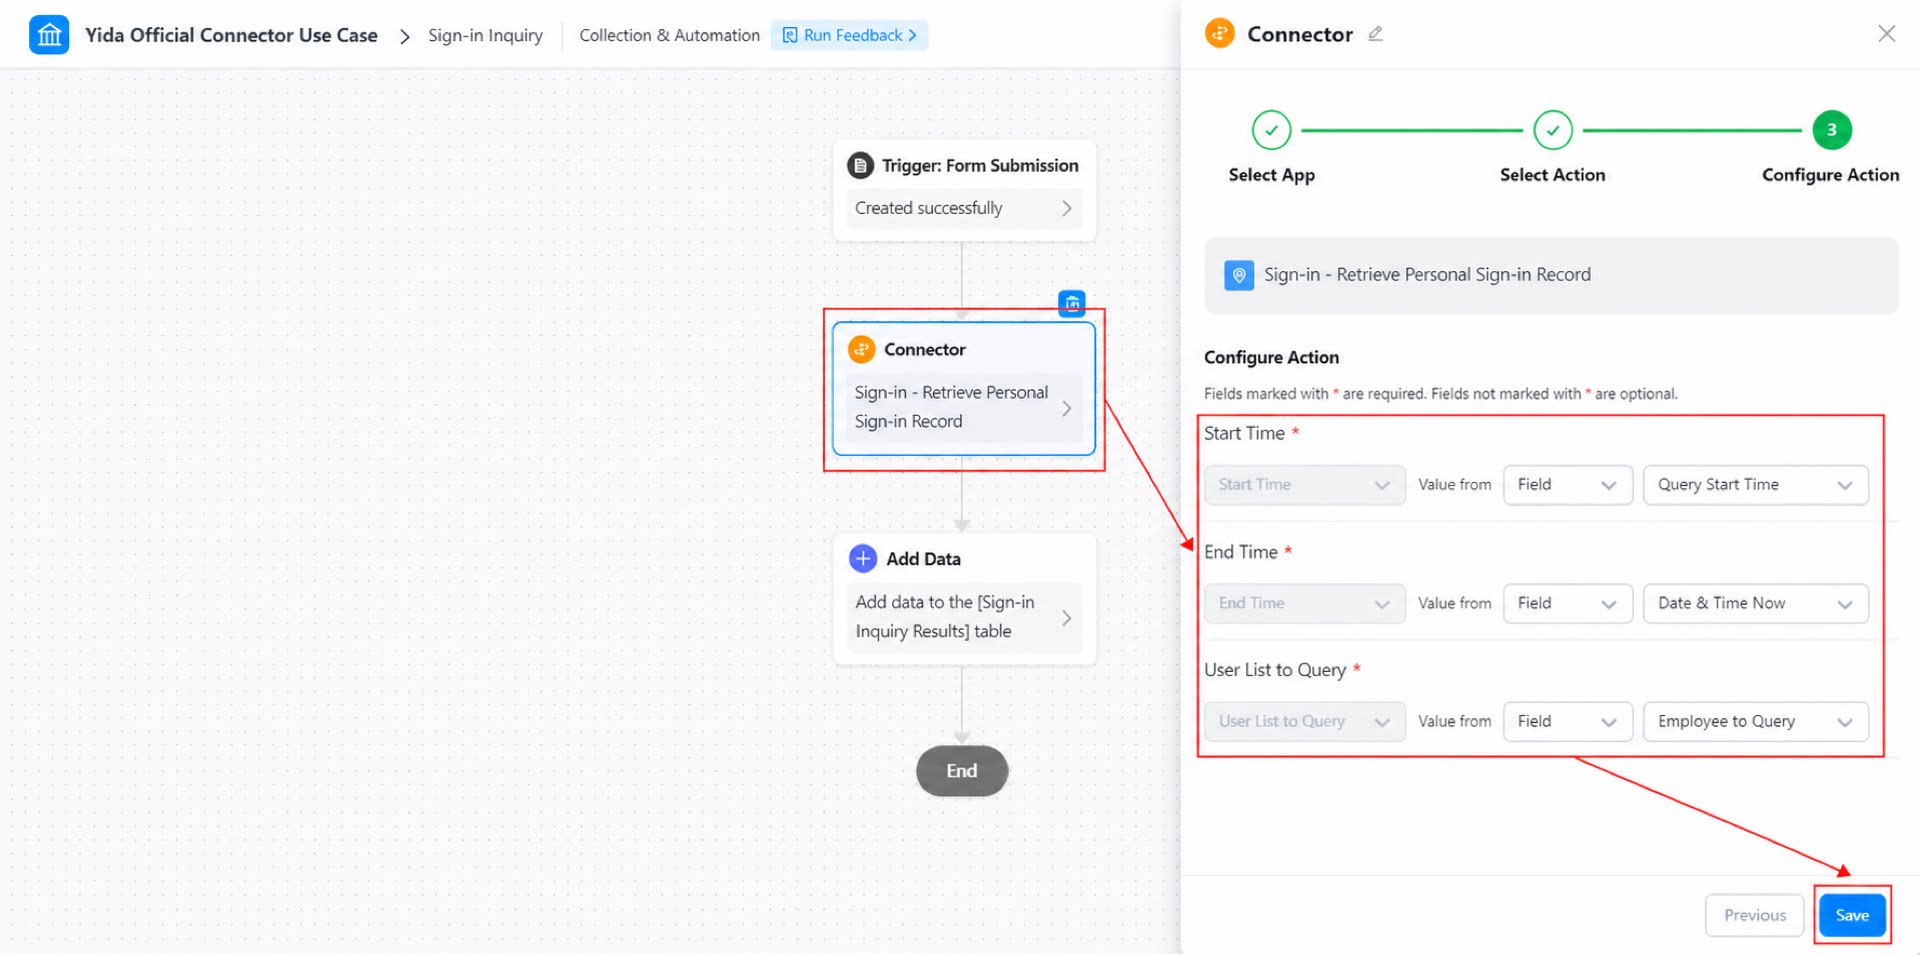
- Hover over the area below the Connector node, click +, and select the Create data node. (See Figure 2.2-7.)
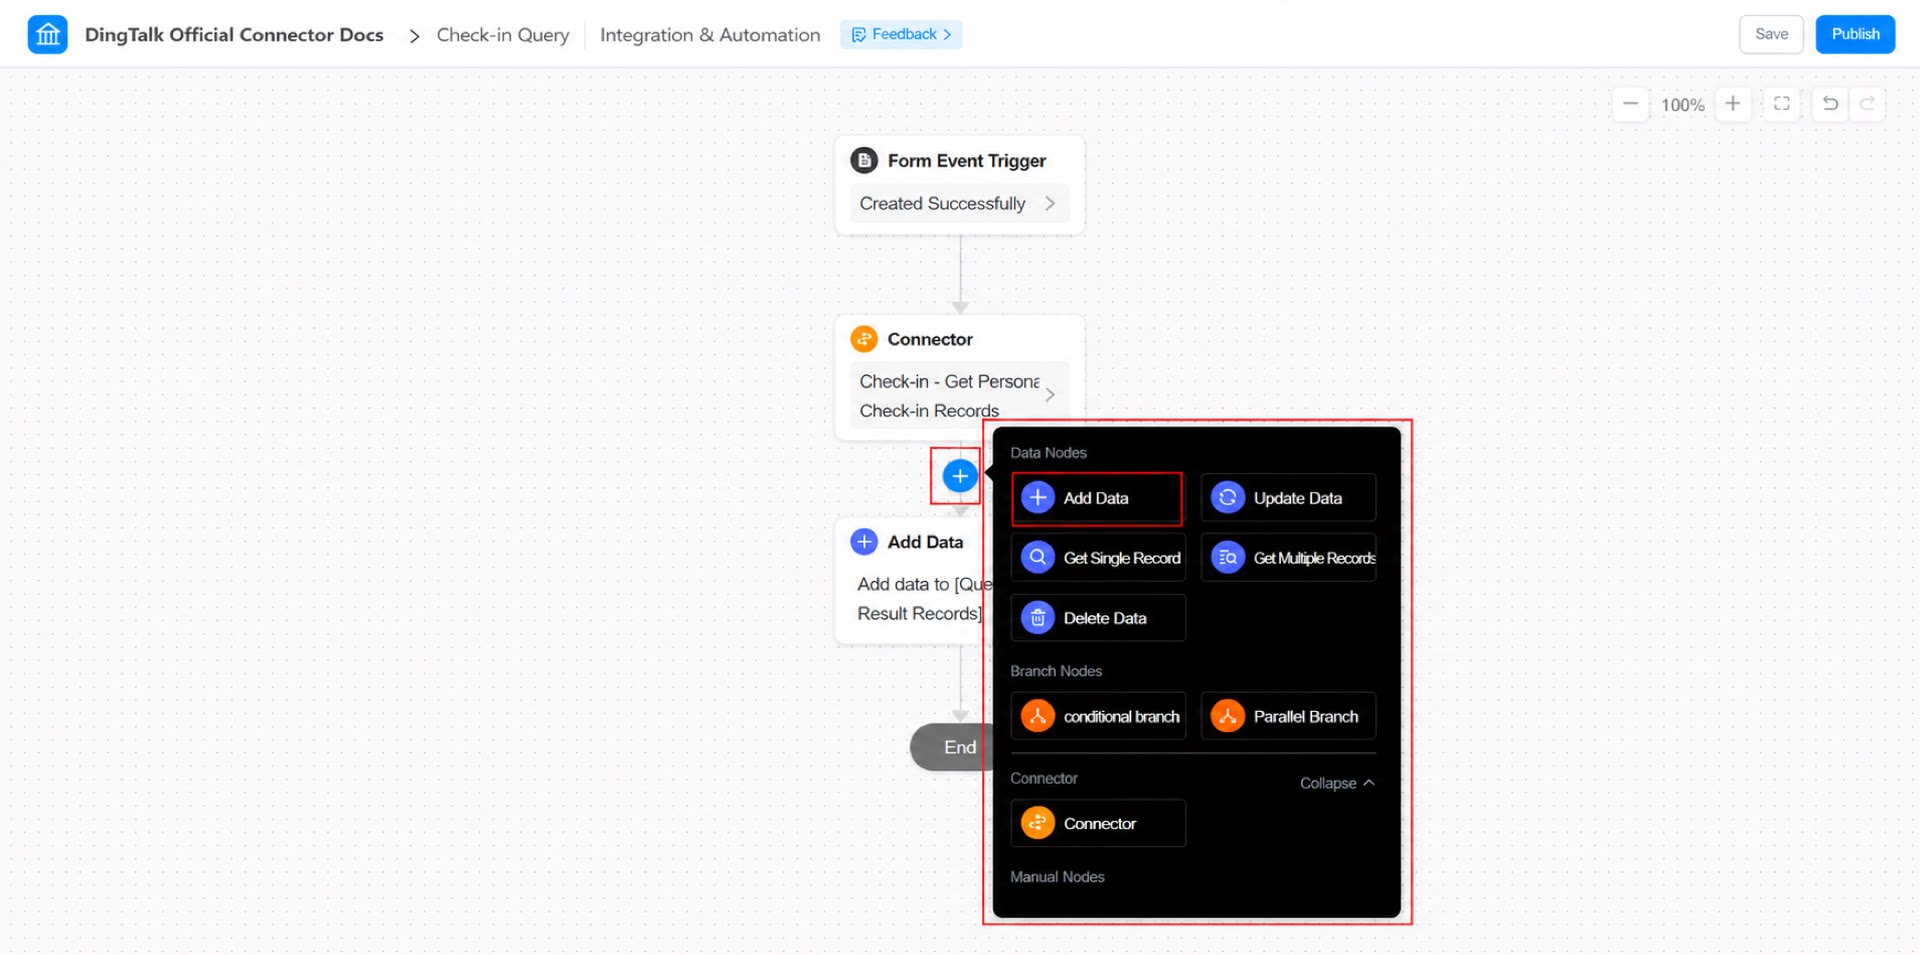
- Configure the Create data node. For Creation method, select “Create in form” and set the form to “Query Result Record”. For Data to create, select “Create a single record”. Configure the field mappings and click Save. (See Figure 2.2-8.)
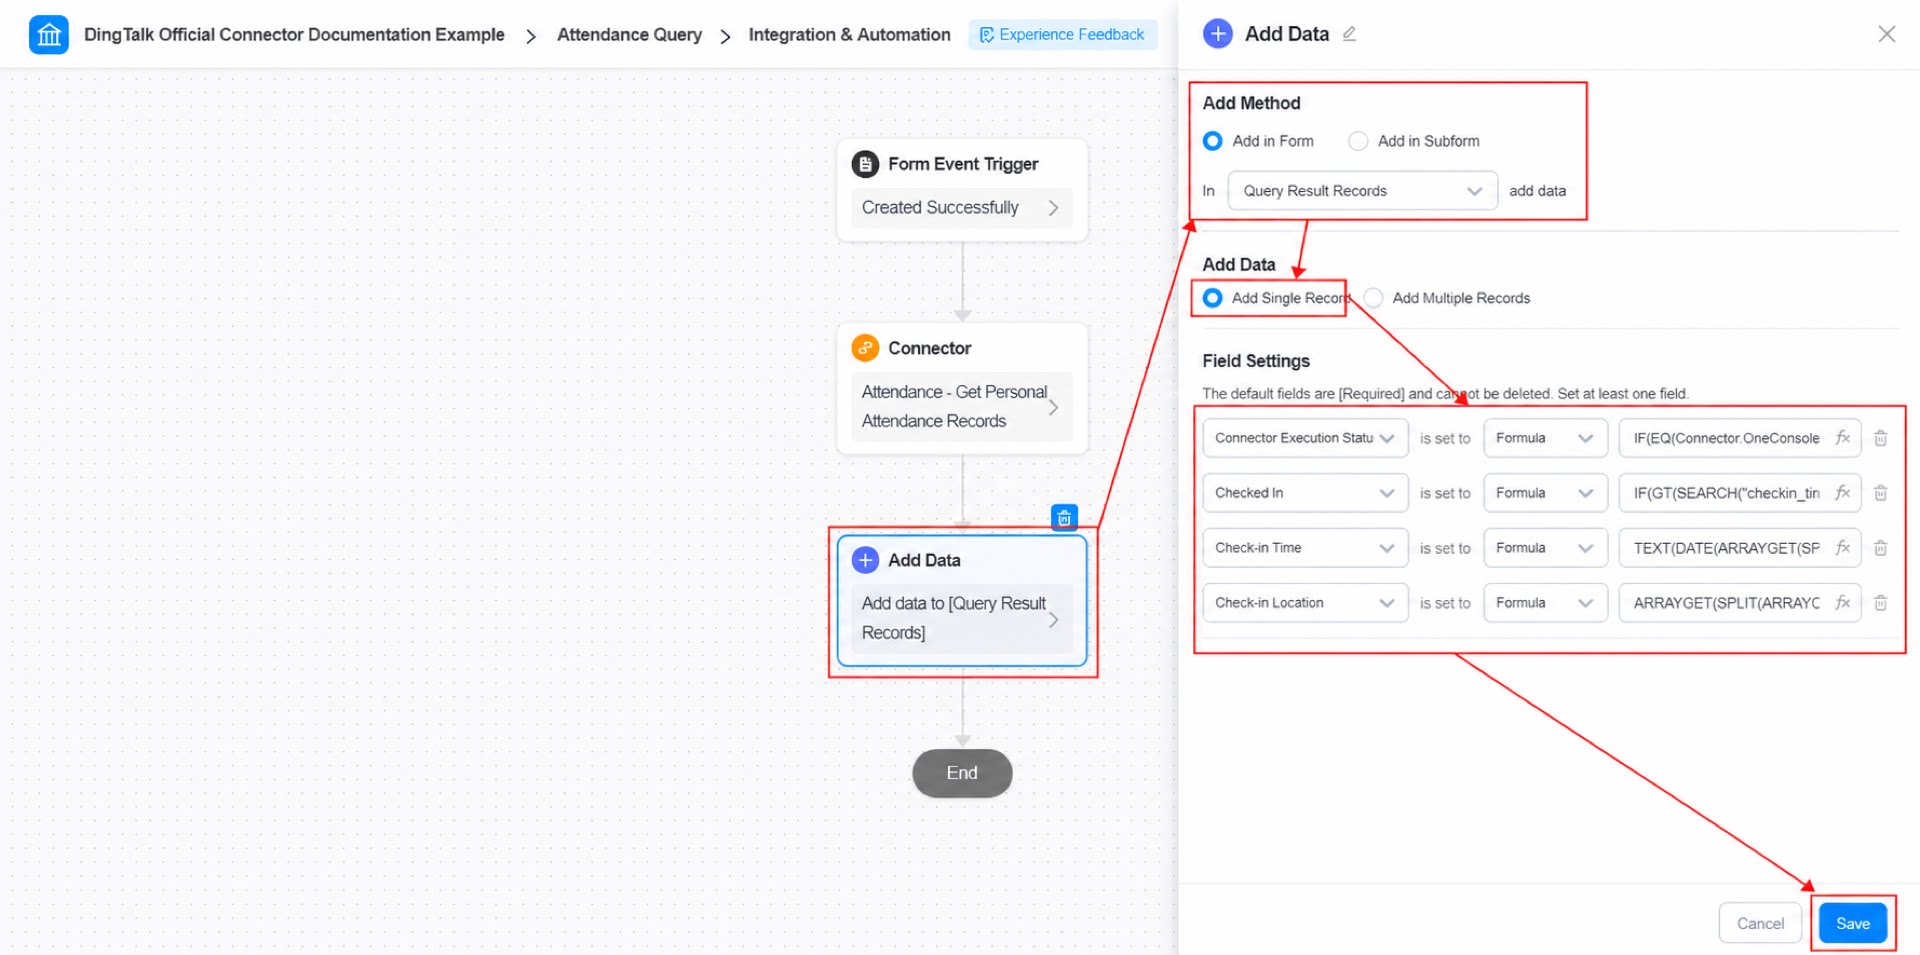
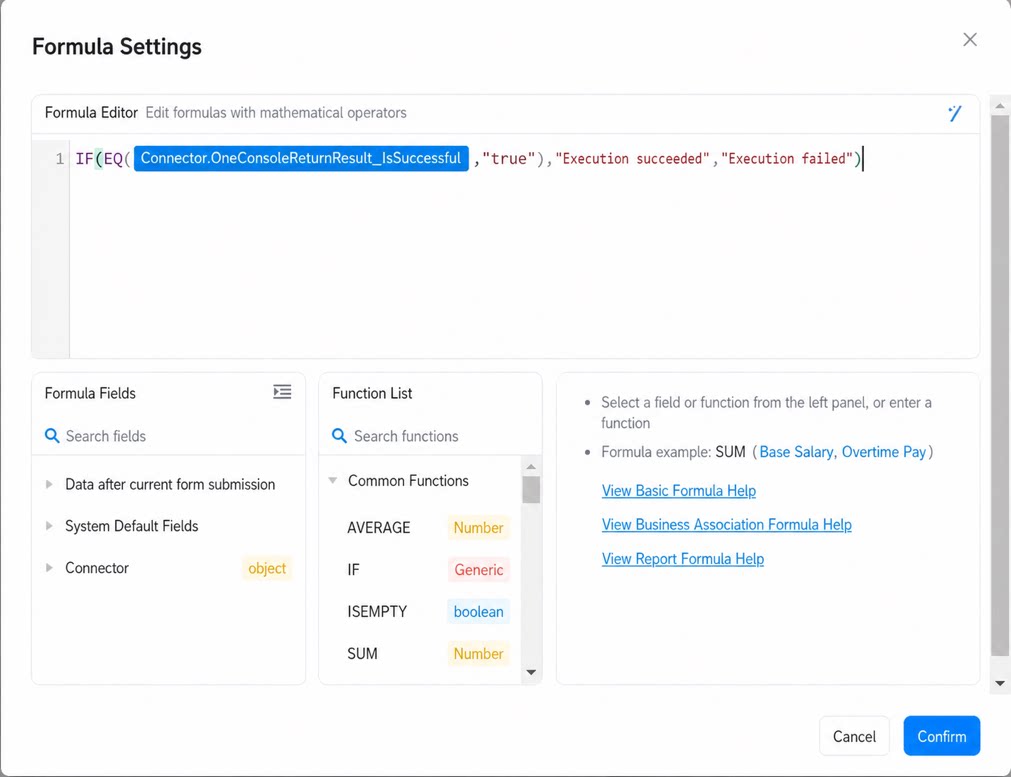
- Configure “Connector Execution Status” in the field settings of the Create data node. (See Figure 2.2-9.)
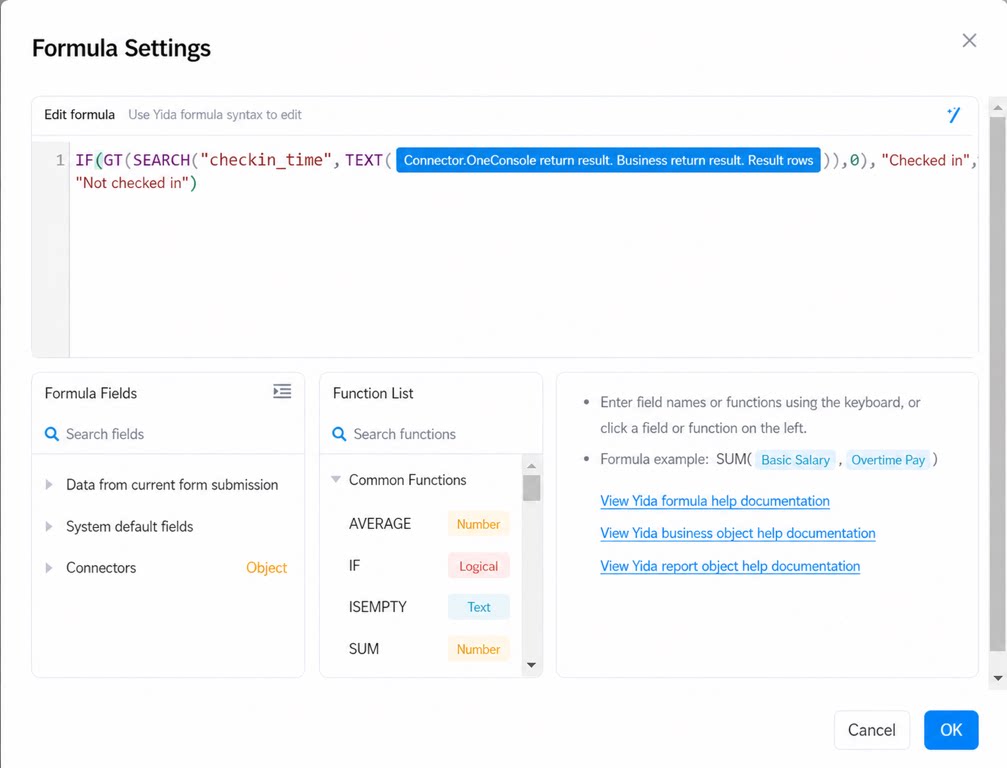
- Configure “Check-in Status” in the field settings of the Create data node. (See Figure 2.2-10.)
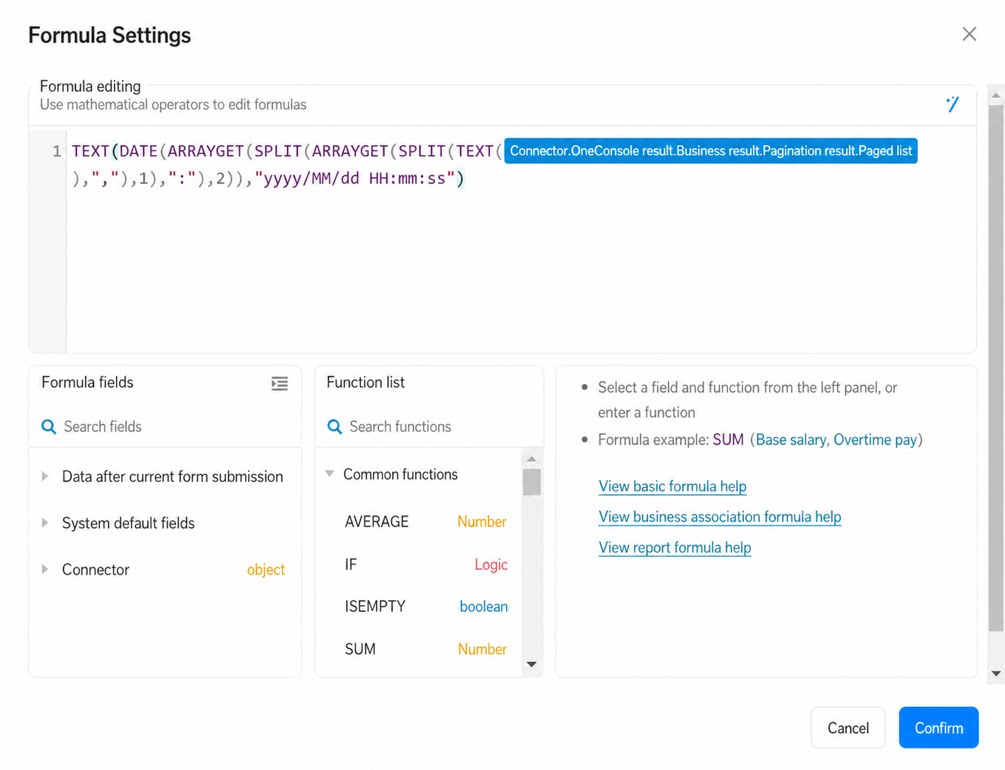
- Configure “Check-in Time” in the field settings of the Create data node. (See Figure 2.2-11.)
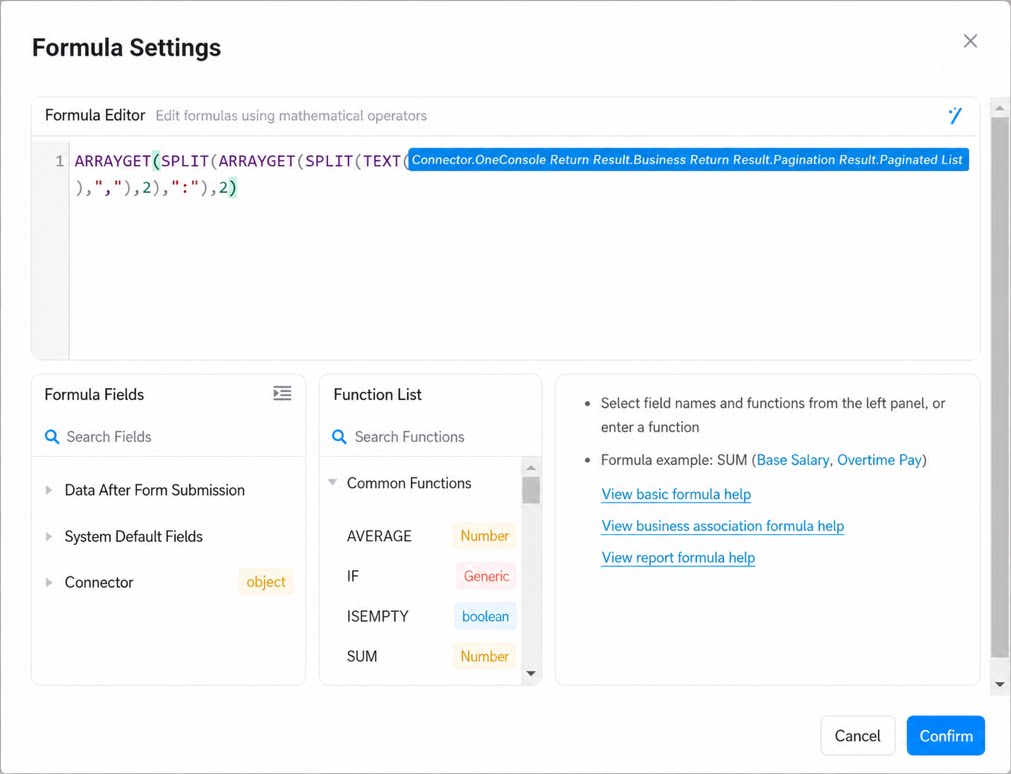
- Configure “Check-in Location” in the field settings of the Create data node. (See Figure 2.2-11.)
- Click Save in the upper-right corner, then click Publish.
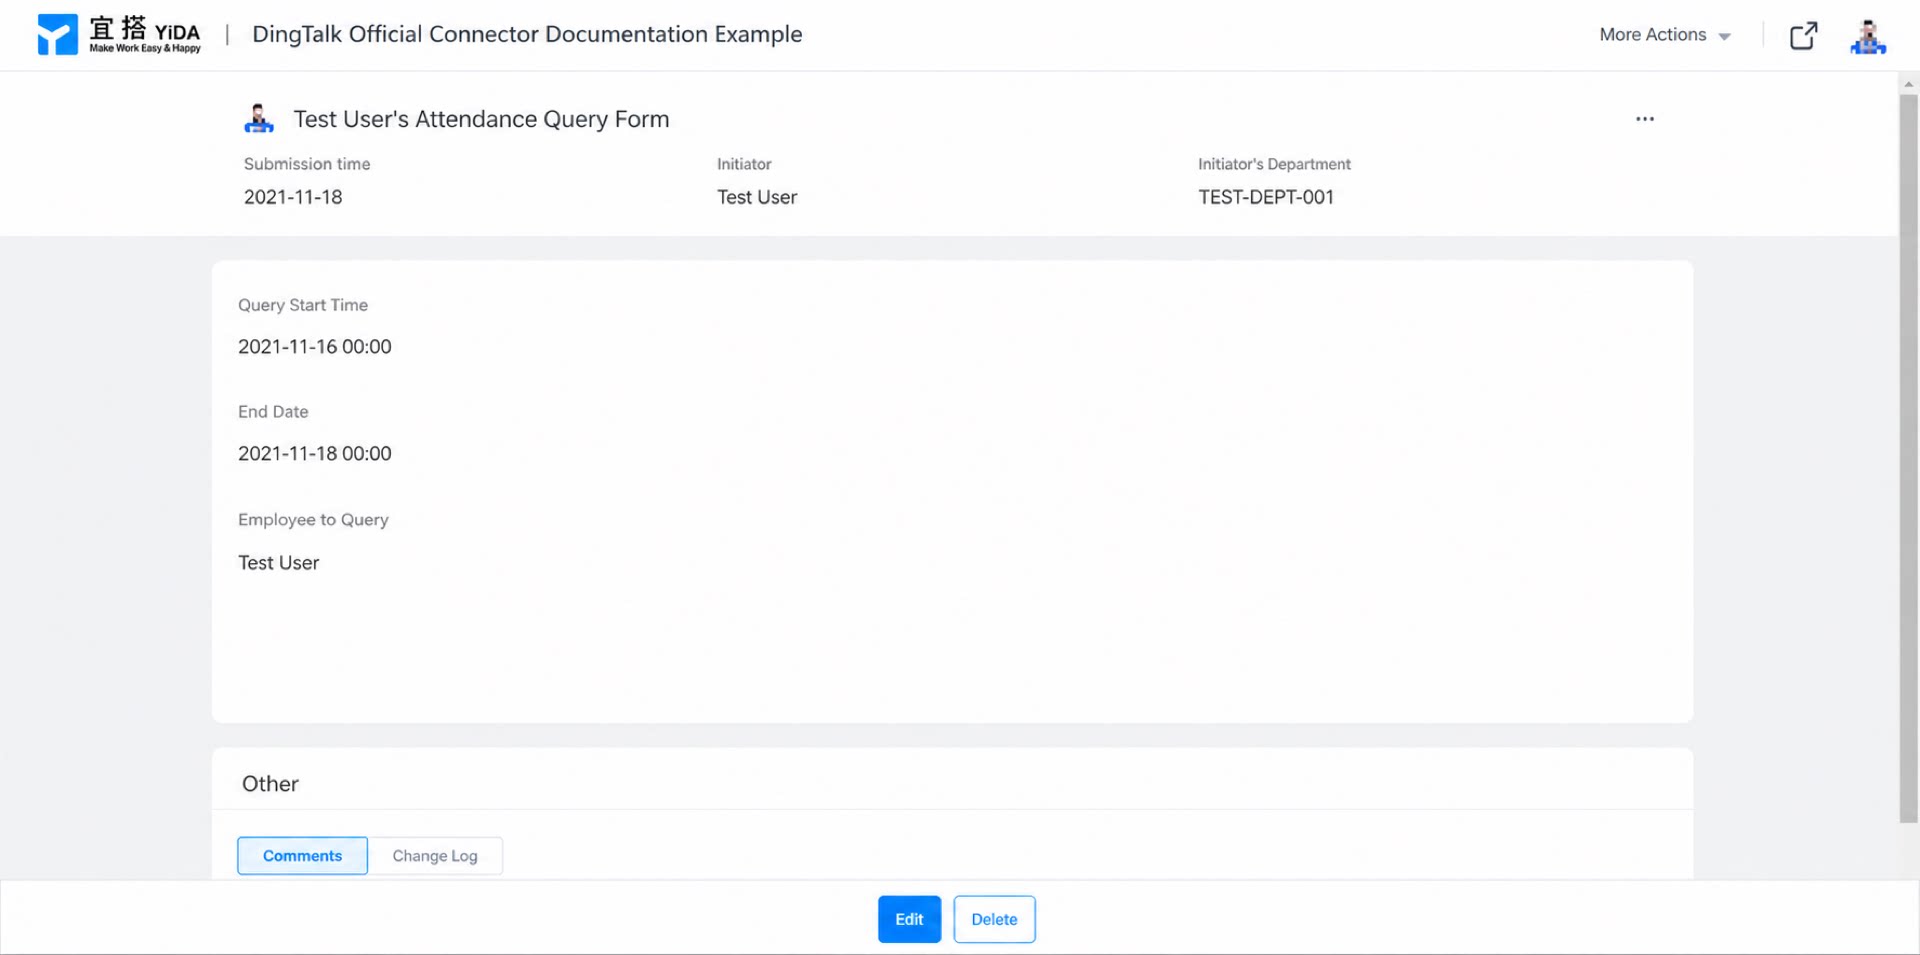
2.3 Step 3: Submit the “Check-In Query Form” to Trigger the Connector
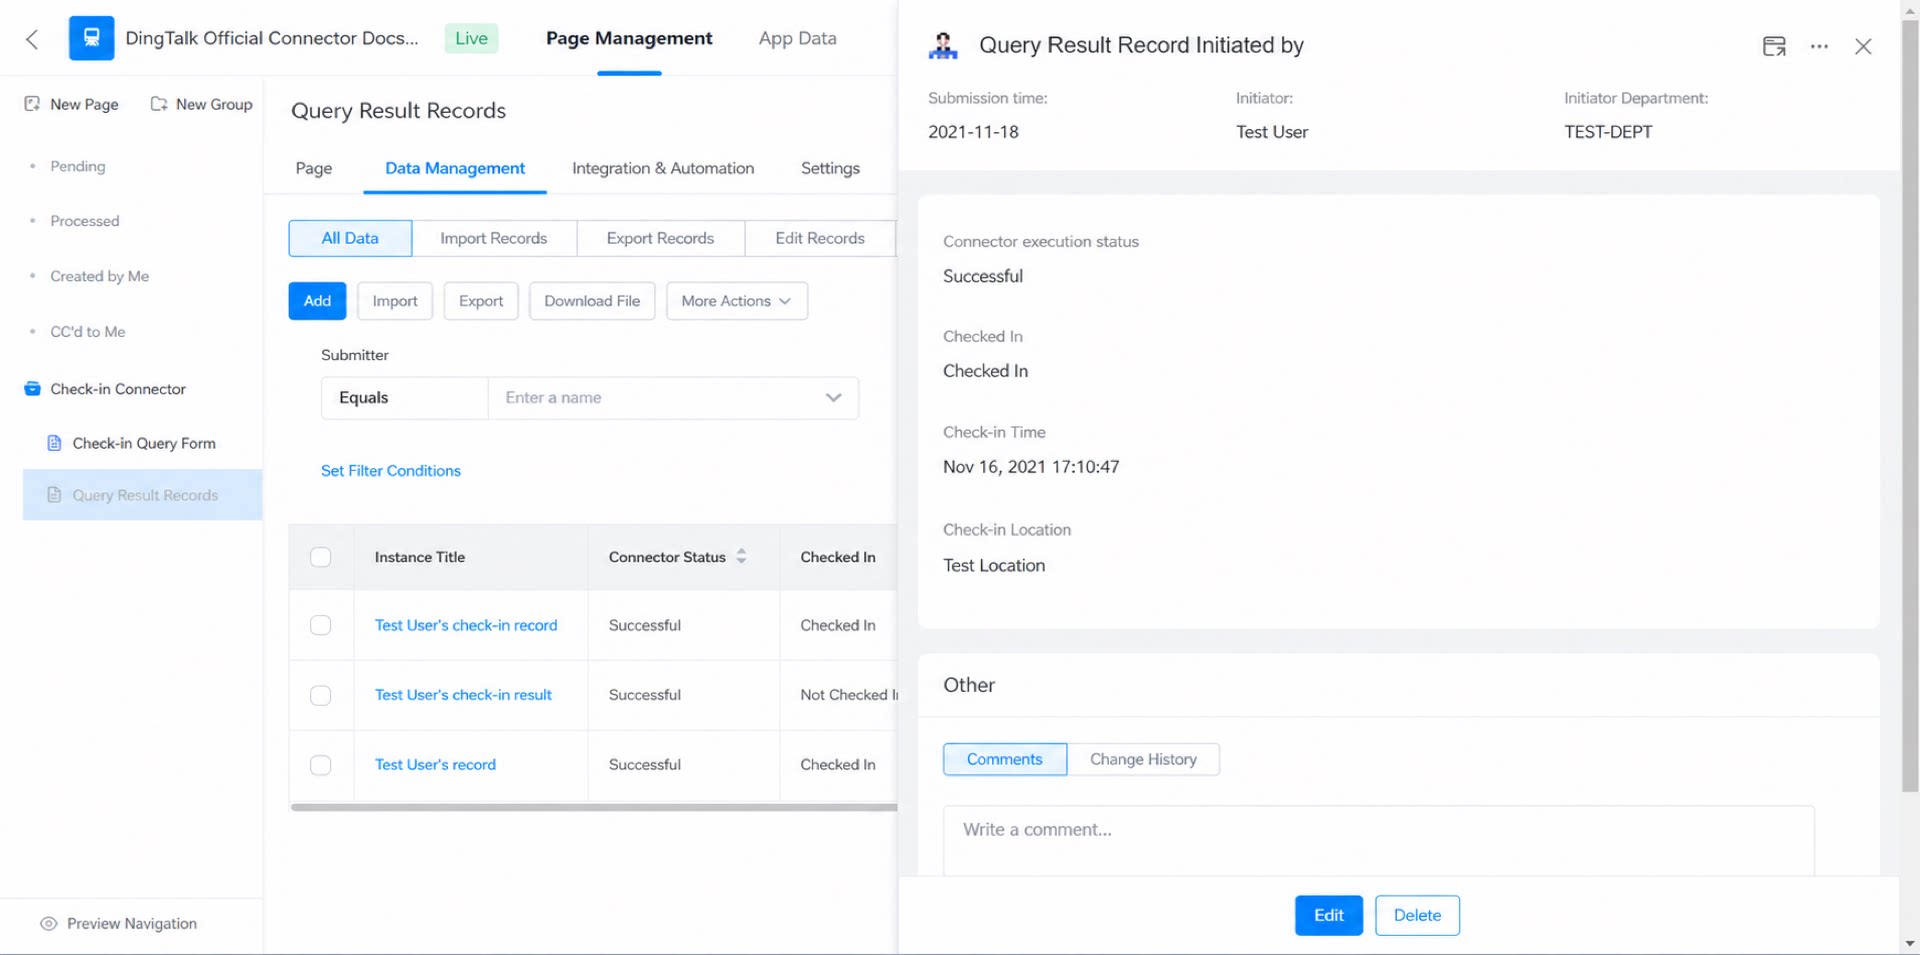
3. Result